Guides
How to Change Clothes in a Photo with AI | ZMS AI
Learn how to change clothes in a photo with AI using ZMS AI, from simple color changes to full outfit swaps, garment references, and better prompt techniques.
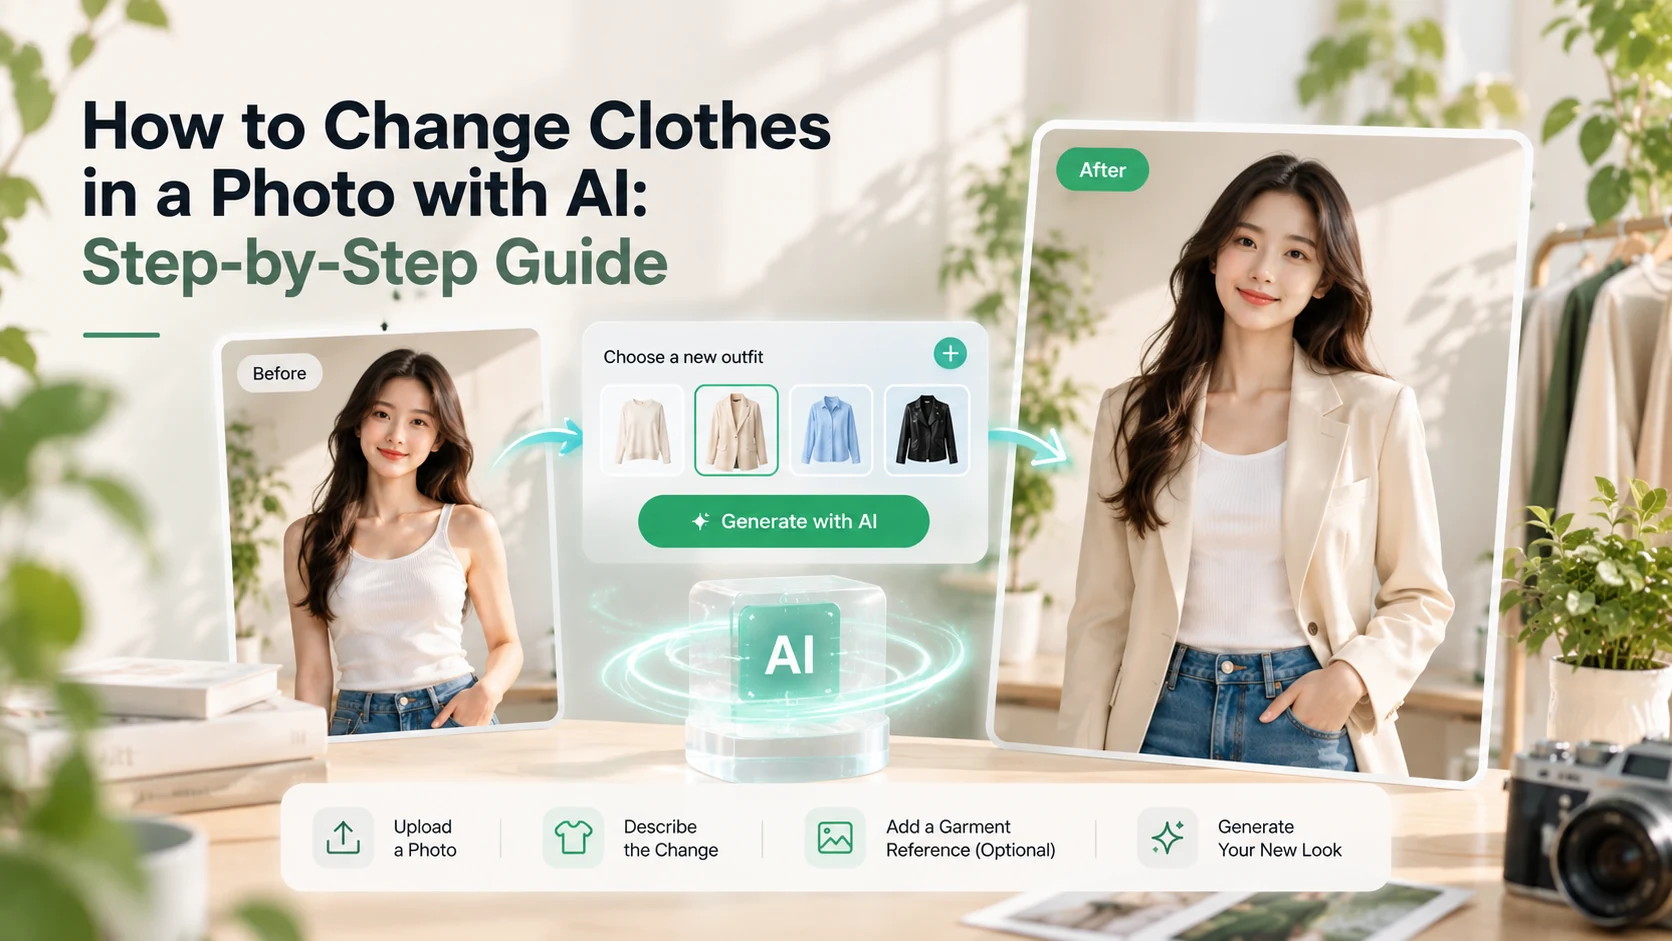
Changing clothes in a photo used to mean manually selecting garments, masking edges, adjusting colors, and fixing fabric details in an image editor.
AI makes the process much simpler.
With AI Clothes Changer on ZMS AI, you can upload a person photo and describe the clothing change you want — from recoloring a shirt to replacing a jacket or creating an entirely different outfit. You can also provide a garment reference when a specific design is easier to show than describe.
In this guide, we’ll show you how to change clothes in a photo with AI, using real ZMS AI tests to explain what works, what can go wrong, and how to write better outfit prompts.
Quick Answer: Upload a clear photo of one person, describe exactly what clothing should change and what should stay the same, optionally add a garment reference, choose your output settings, and generate. Always review the result because generative editing can also redraw nearby details.
How Does AI Change Clothes in a Photo?
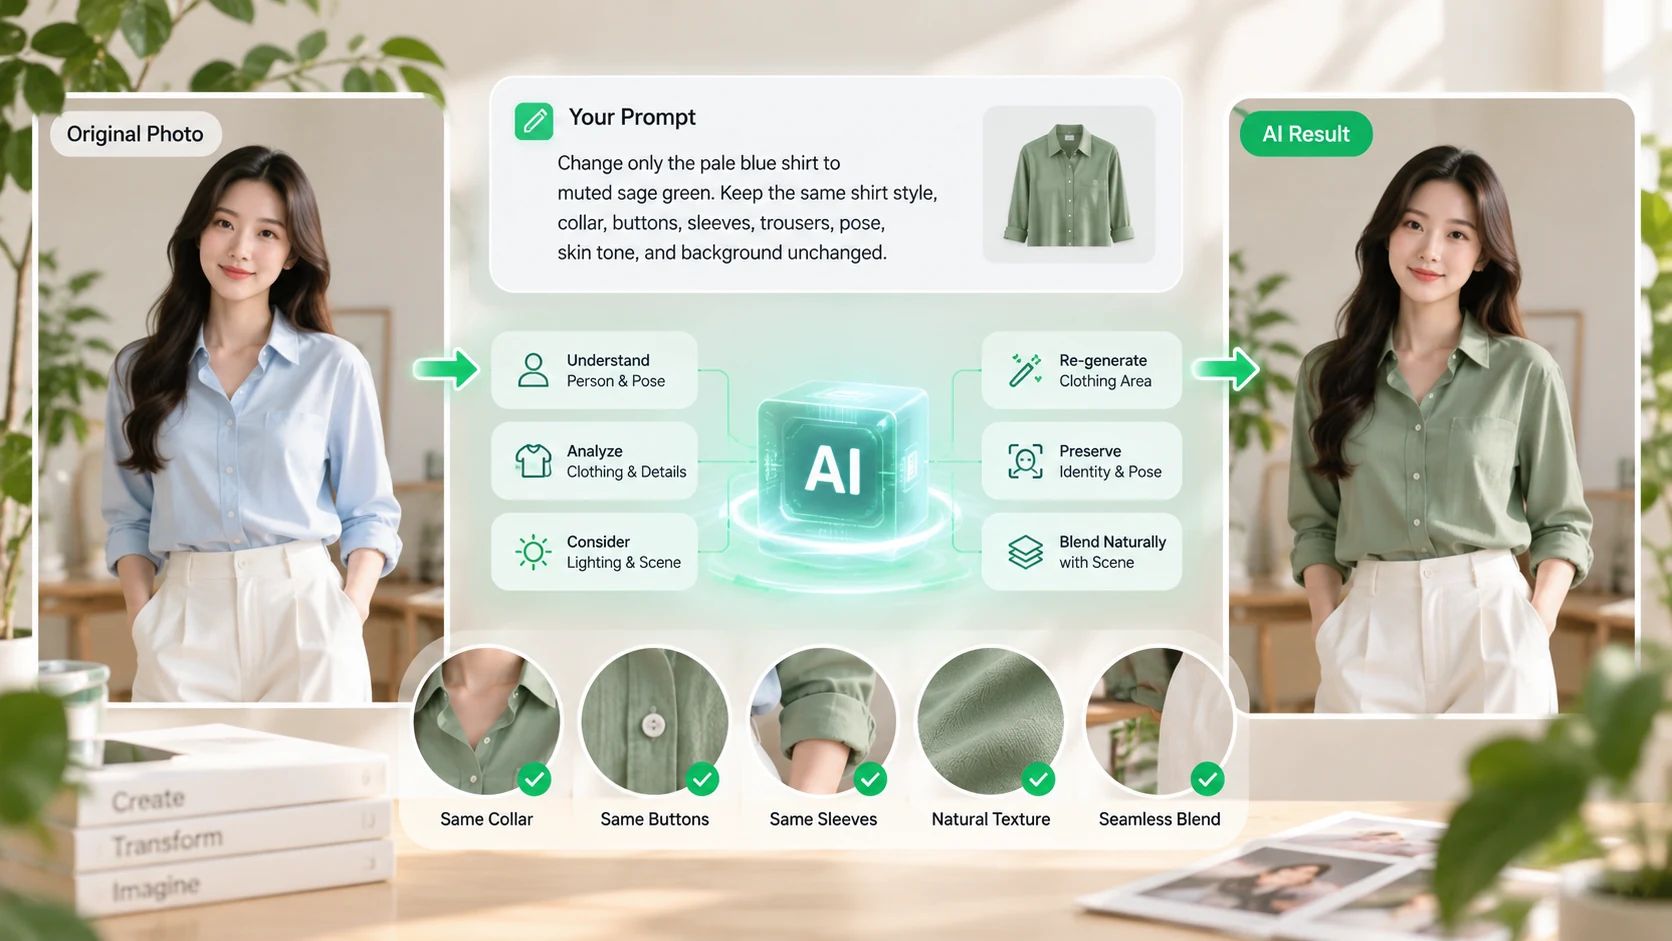
An AI clothes changer doesn’t simply paste a new garment over the original image.
Instead, generative AI interprets the person, clothing, pose, lighting, and surrounding scene, then re-renders the area involved in the requested edit.
For example, instead of manually masking a shirt, you could prompt:
Change only the pale blue shirt to muted sage green. Keep the same shirt style, collar, buttons, sleeves, trousers, pose, skin tone, and background unchanged.
The AI then generates a new version of the image based on those instructions.
This distinction matters.
Even when you request a simple color change, details such as fabric texture, folds, shadows, or nearby edges may be regenerated rather than preserved pixel by pixel.
That’s why good results depend on two things:
telling the AI what to change — and telling it what not to change.
How to Change Clothes in a Photo with AI
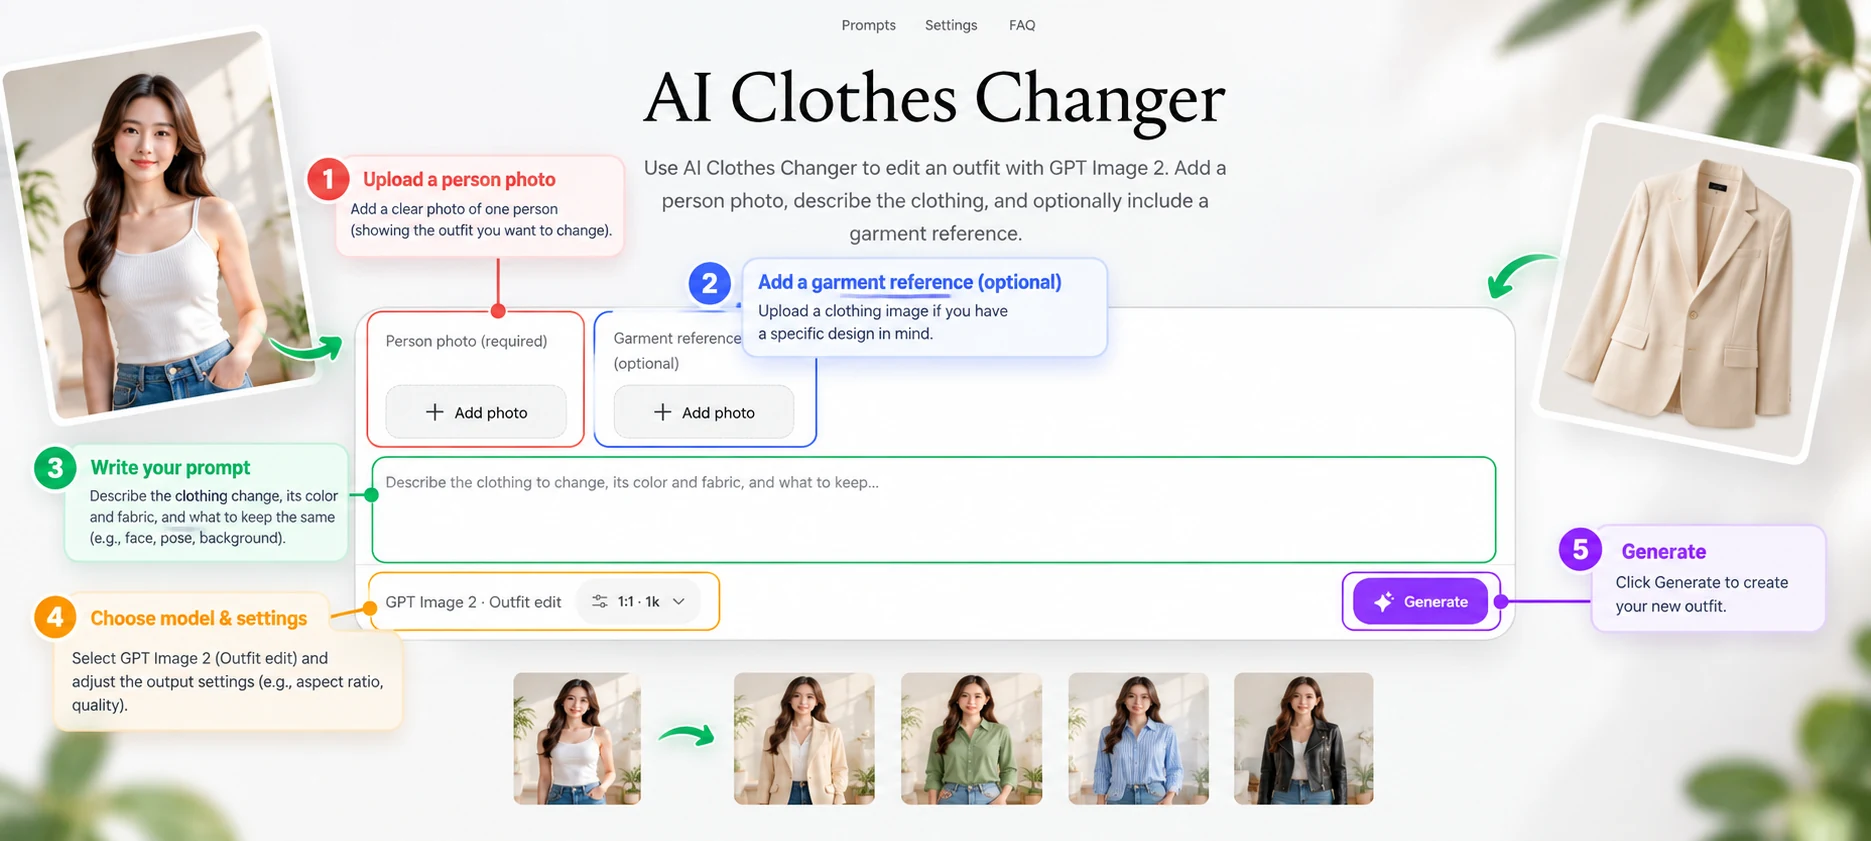
The basic workflow is simple:
Person Photo → Clothing Prompt → Optional Garment Reference → Generate → Review
Here’s how to do it with ZMS AI.

Step 1: Upload a Clear Person Photo
Open AI Clothes Changer and add your image to the Person photo field.
Start with a clear, well-lit image of one person.
The clothing you want to edit should also be easy to see. If you’re changing a top, for example, visible collars, sleeves, cuffs, and waistlines give the AI clearer garment boundaries.
Try to avoid images where the clothing is heavily covered by:
Crossed arms
Hands
Bags
Large accessories
Other objects
This workflow is designed around a single person photo, so an individual portrait is preferable to a crowded group image.
Tip: A cleaner source image usually gives the AI fewer ambiguous areas to reconstruct.

Step 2: Describe Exactly What You Want to Change
Next, write your clothing instruction.
Avoid vague prompts such as:
Change my outfit.
Instead, specify the garment, color, material, style, and anything that should remain untouched.
For example:
Replace the gray knitted top with a charcoal wool blazer over a simple cream top. Use softly structured shoulders, narrow notch lapels, and two dark buttons. Keep the lower outfit and accessories unchanged.
A useful structure is:
Garment + Color + Material + Style Details + What to Preserve
For example:
Replace the current sweater with an oatmeal cable-knit sweater with a crew neckline, ribbed cuffs, and moderate knit texture. Keep the trousers, accessories, pose, face, and background unchanged.
Tip: Start with one clearly defined clothing change before attempting a complete wardrobe transformation.
Step 3: Add a Garment Reference When Needed
A text prompt is enough for many clothing edits.
But some designs are difficult to describe accurately.
If you want to follow a particular jacket, dress, pattern, neckline, or silhouette, add a garment image to the optional Garment reference field.
Then explain which visual details matter.
For example:
Replace only the current top with the garment shown in the clothing reference. Follow its neckline, sleeve length, main color, and pattern placement. Keep the lower outfit and accessories unchanged.
Don’t rely on the reference image alone.
Tell the AI whether you care most about the:
Neckline
Sleeve length
Main color
Pattern
Buttons
Fabric appearance
Overall silhouette
This gives the model a clearer editing target.
Tip: Use a garment reference when visual design accuracy matters more than general outfit style.
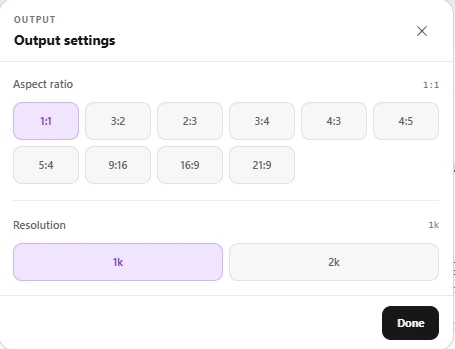
Step 4: Choose Your Output Settings
Before generating, choose the aspect ratio and resolution.
ZMS AI Clothes Changer currently offers:
Resolution | Cost | Best For |
|---|---|---|
1K | 12 credits | Testing outfit shape, color, and prompts |
2K | 20 credits | Inspecting smaller fabric and edge details |
The output aspect ratio is selected separately rather than automatically inheriting the exact dimensions of the uploaded photo, so check the framing before generating.
A practical workflow is to start at 1K while testing your prompt.
Once the outfit, color, and overall edit look right, you can use 2K when you need a larger output for closer inspection.
Remember that higher resolution doesn’t guarantee a more accurate clothing edit.
Tip: Test the clothing concept first; increase resolution after you’re satisfied with the edit direction.

Step 5: Generate and Compare the Result
Submit the task and wait for the AI to generate the edited image.
Once it finishes, don’t judge the result only by whether the new outfit looks attractive.
Compare it with the original image.
Check:
The requested clothing change
Face and hairstyle
Pose and body position
Hands near the garment
Collar, cuffs, waist, and hem
Accessories
Background
Fabric texture and folds
Generative editing may redraw details close to the changed garment.
If something important has shifted, make the next prompt more constrained instead of simply making it longer.
3 Real AI Clothes Changer Tests — and What We Learned
The best way to understand AI outfit editing is to look at what happens in actual generations.
Here are three different types of clothing edits tested with ZMS AI.
Test 1: Replace a Top
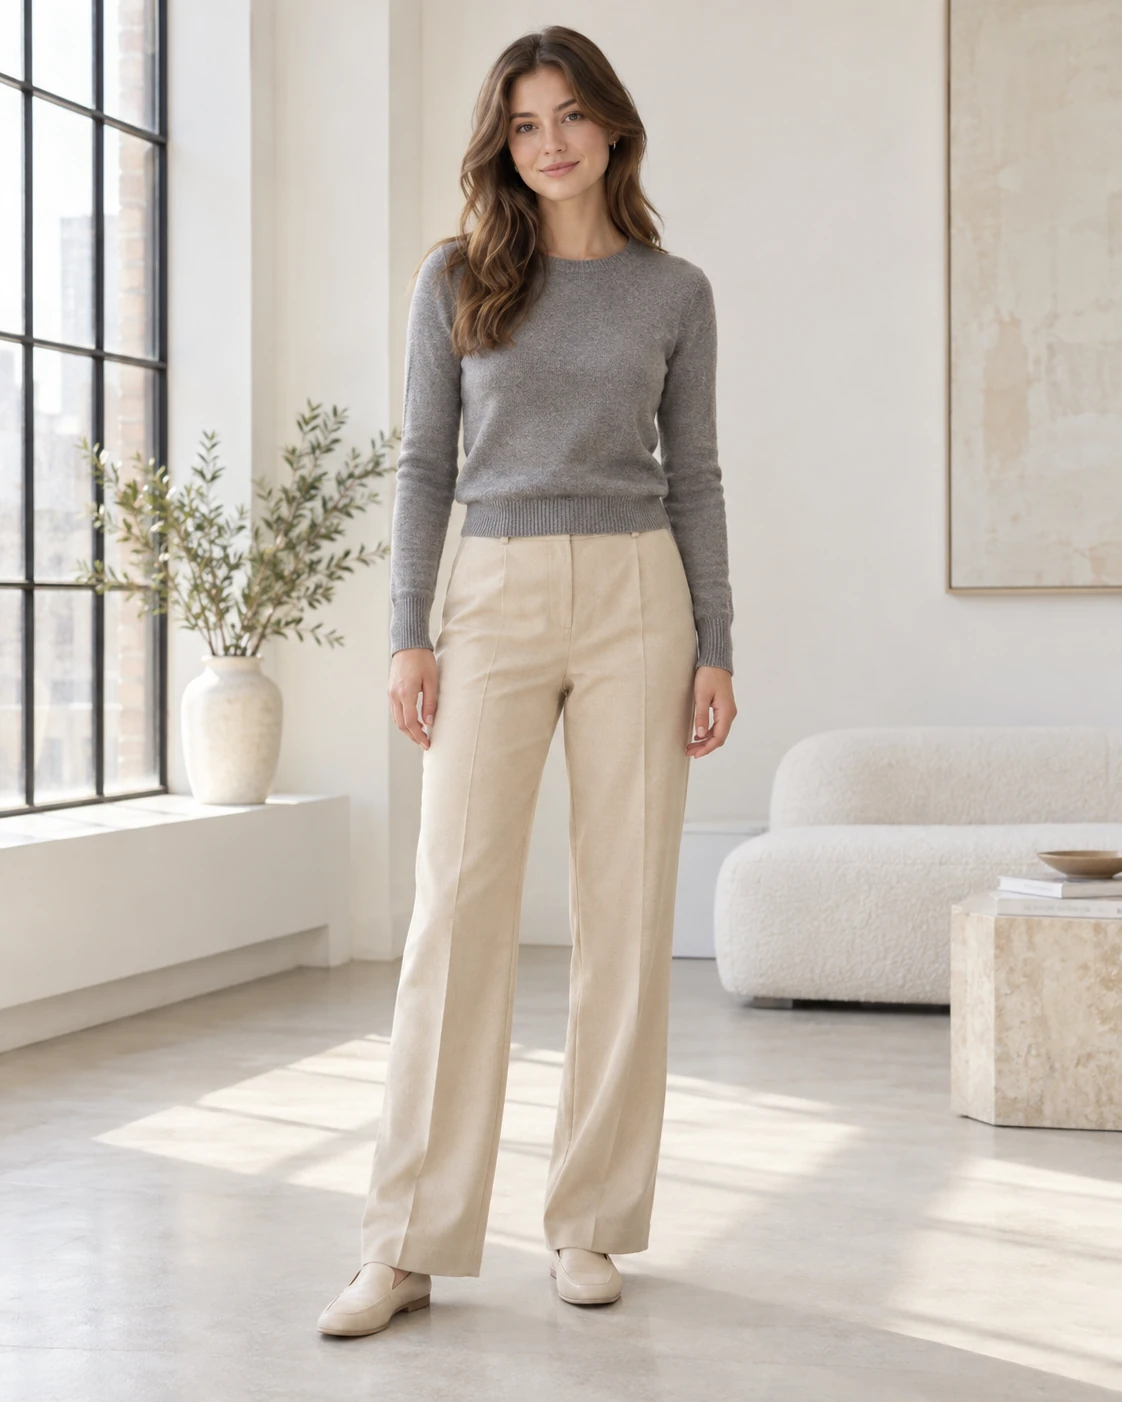
Prompt:
Replace the current gray knitted top with a charcoal wool blazer over a simple cream top. Use softly structured shoulders, narrow notch lapels, and two dark buttons. Keep the lower outfit and accessories unchanged, with subtle woven fabric rather than a glossy finish.
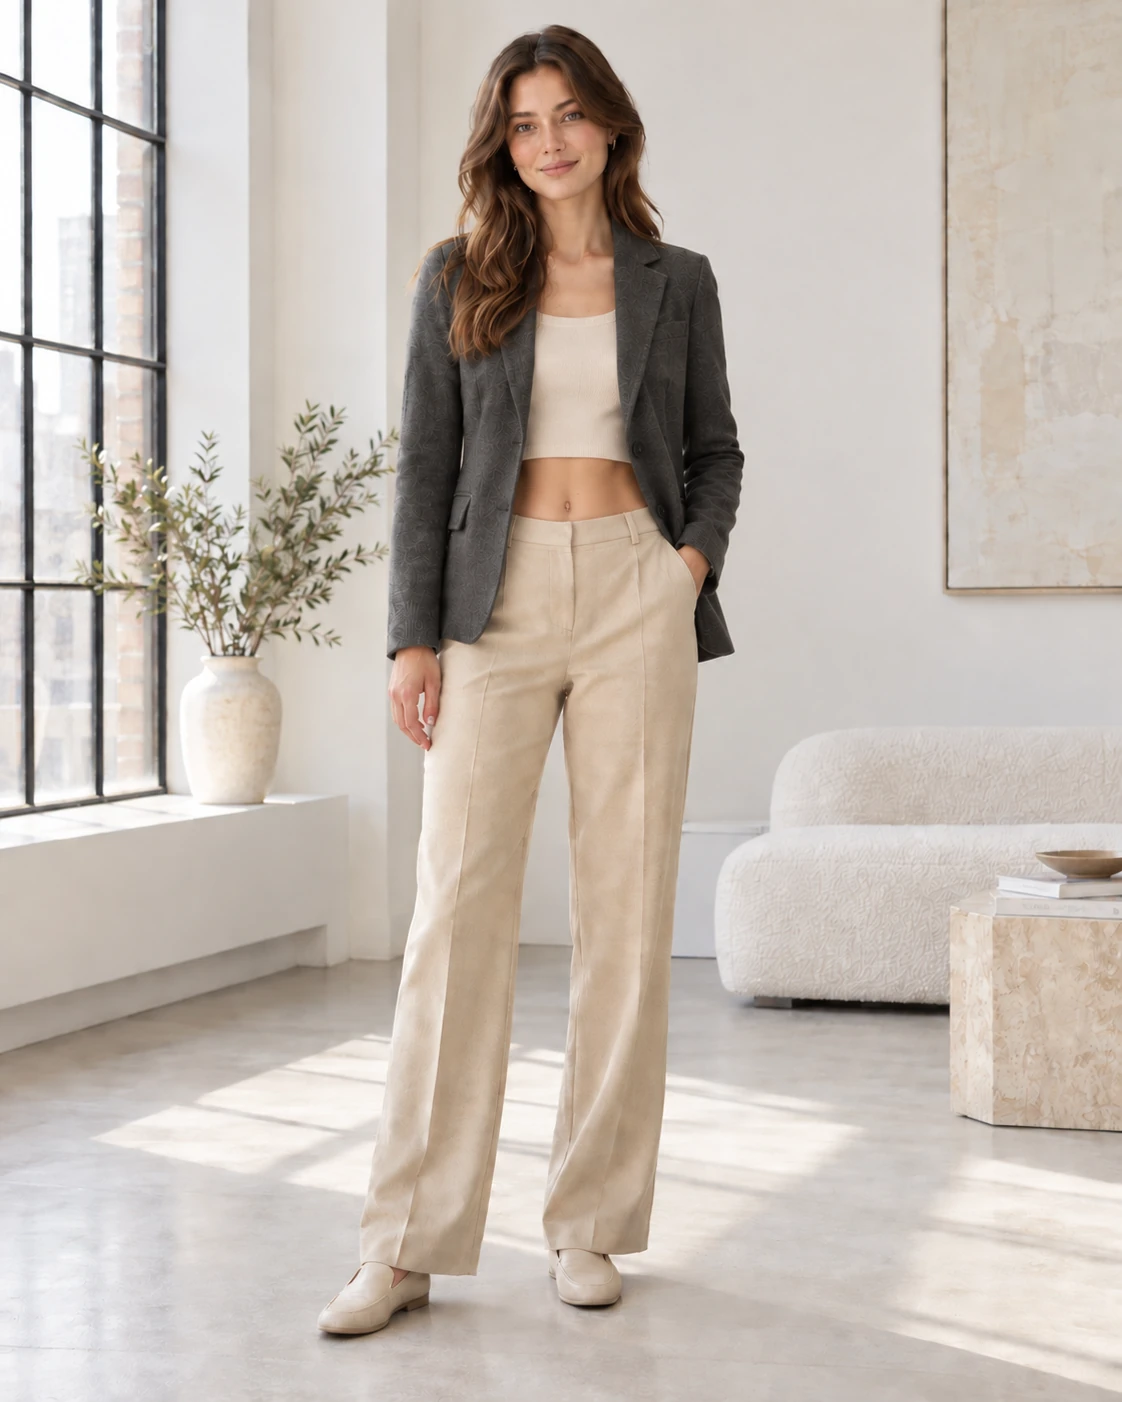
Result:
The knitted top became a charcoal two-button blazer with a cream layer underneath.
However, the edit also exposed more of the waist than the original image, and some nearby trouser folds changed.
What we learned:
A garment replacement can affect nearby areas even when the prompt only asks to change one piece of clothing.
When preservation matters, explicitly mention adjacent elements such as trousers, accessories, waistline, and pose.
Test 2: Change Only the Clothing Color
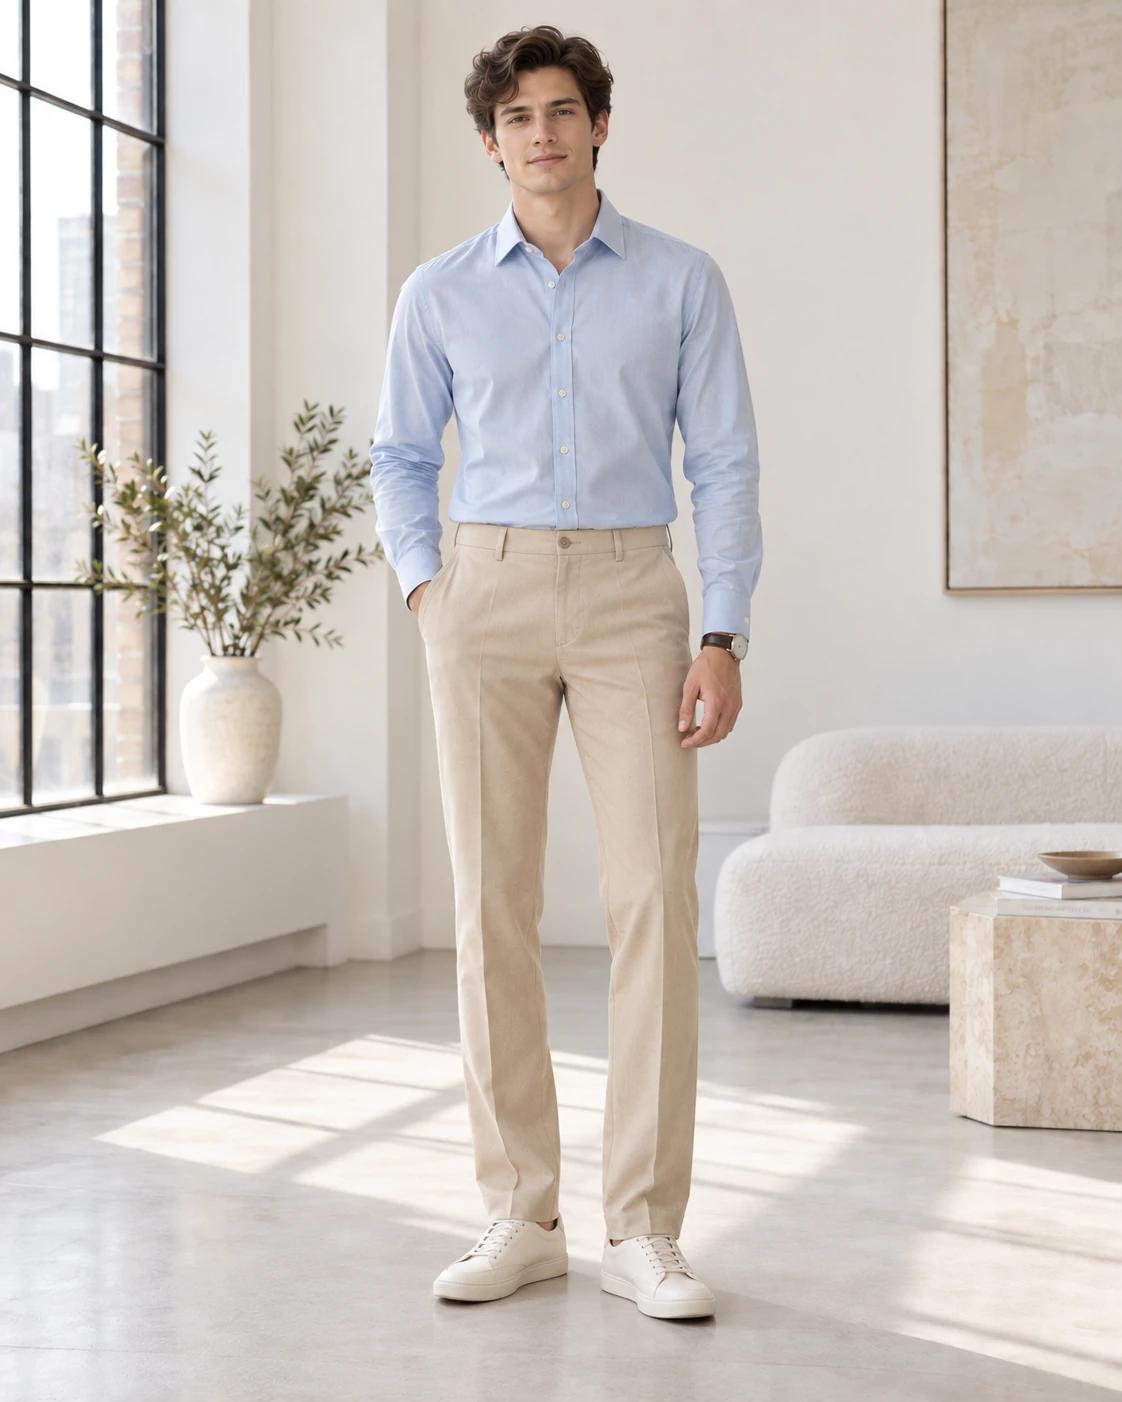
Prompt:
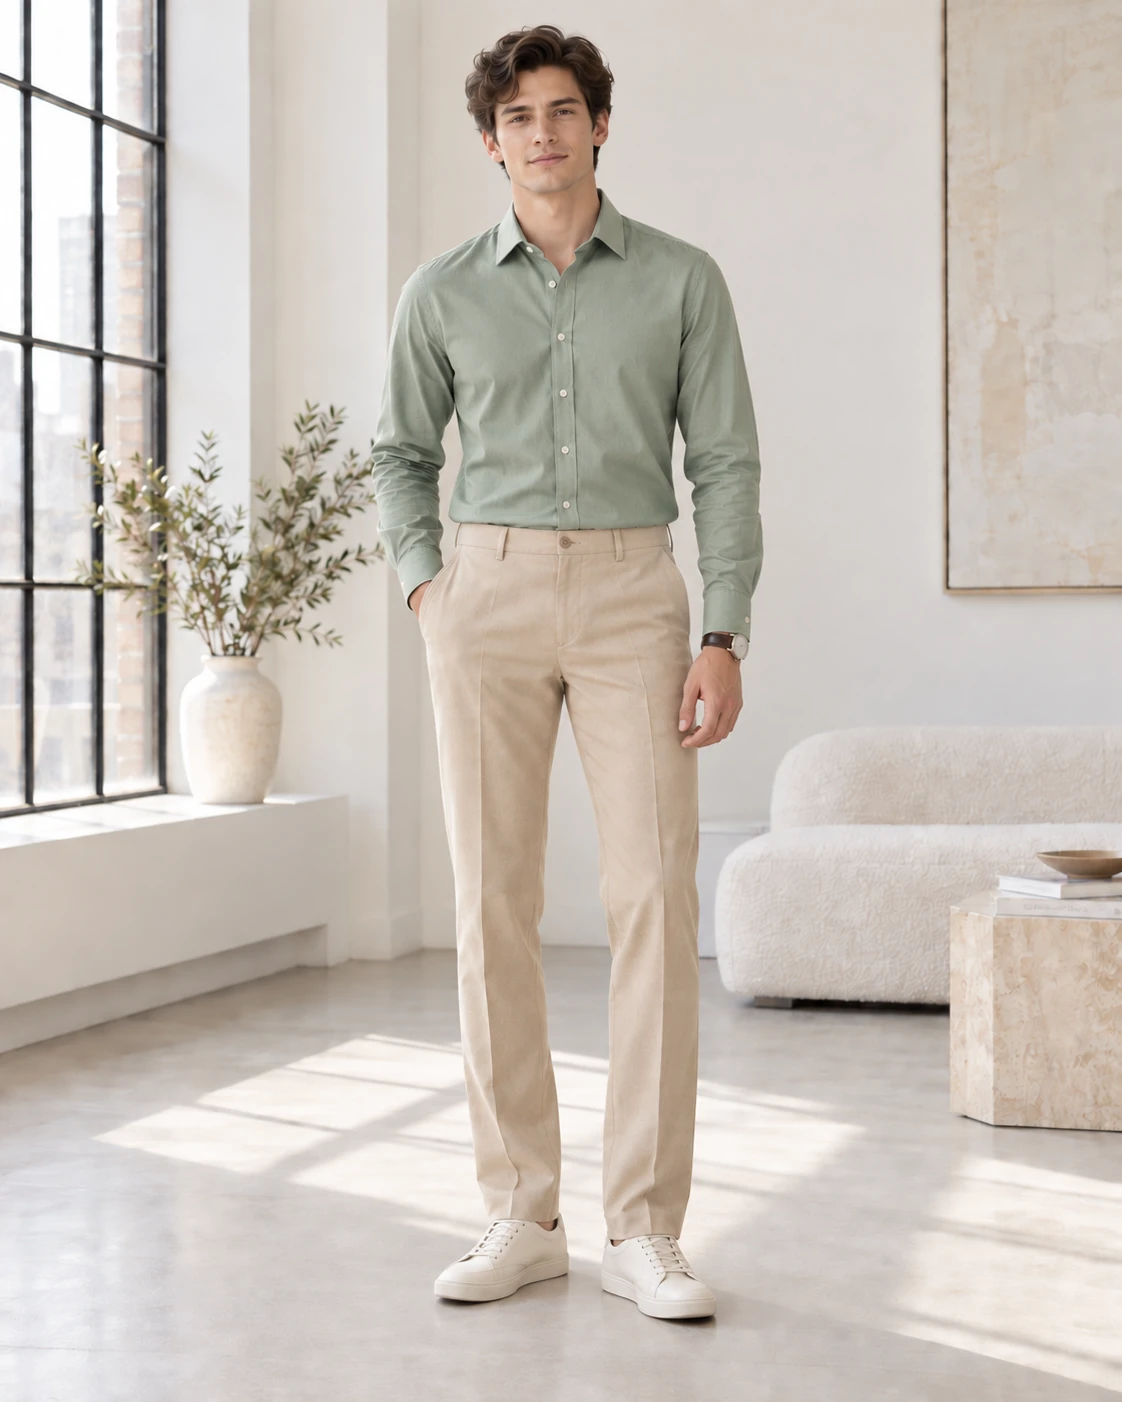
Change only the pale blue shirt color to muted sage green. Keep the same shirt style, fabric texture, collar, buttons, sleeves, and folds. Leave the sand colored trousers, shoes, accessories, skin tone, and background unchanged. Do not replace the shirt or add layers, patterns, or logos.
Result:
The shirt changed to sage green while keeping a similar collar and button layout.
However, the fabric texture and folds were also regenerated.
What we learned:
“Change only the color” does not necessarily behave like a traditional recolor filter.
Generative AI can recreate the garment while changing its color, meaning texture and folds may shift slightly.
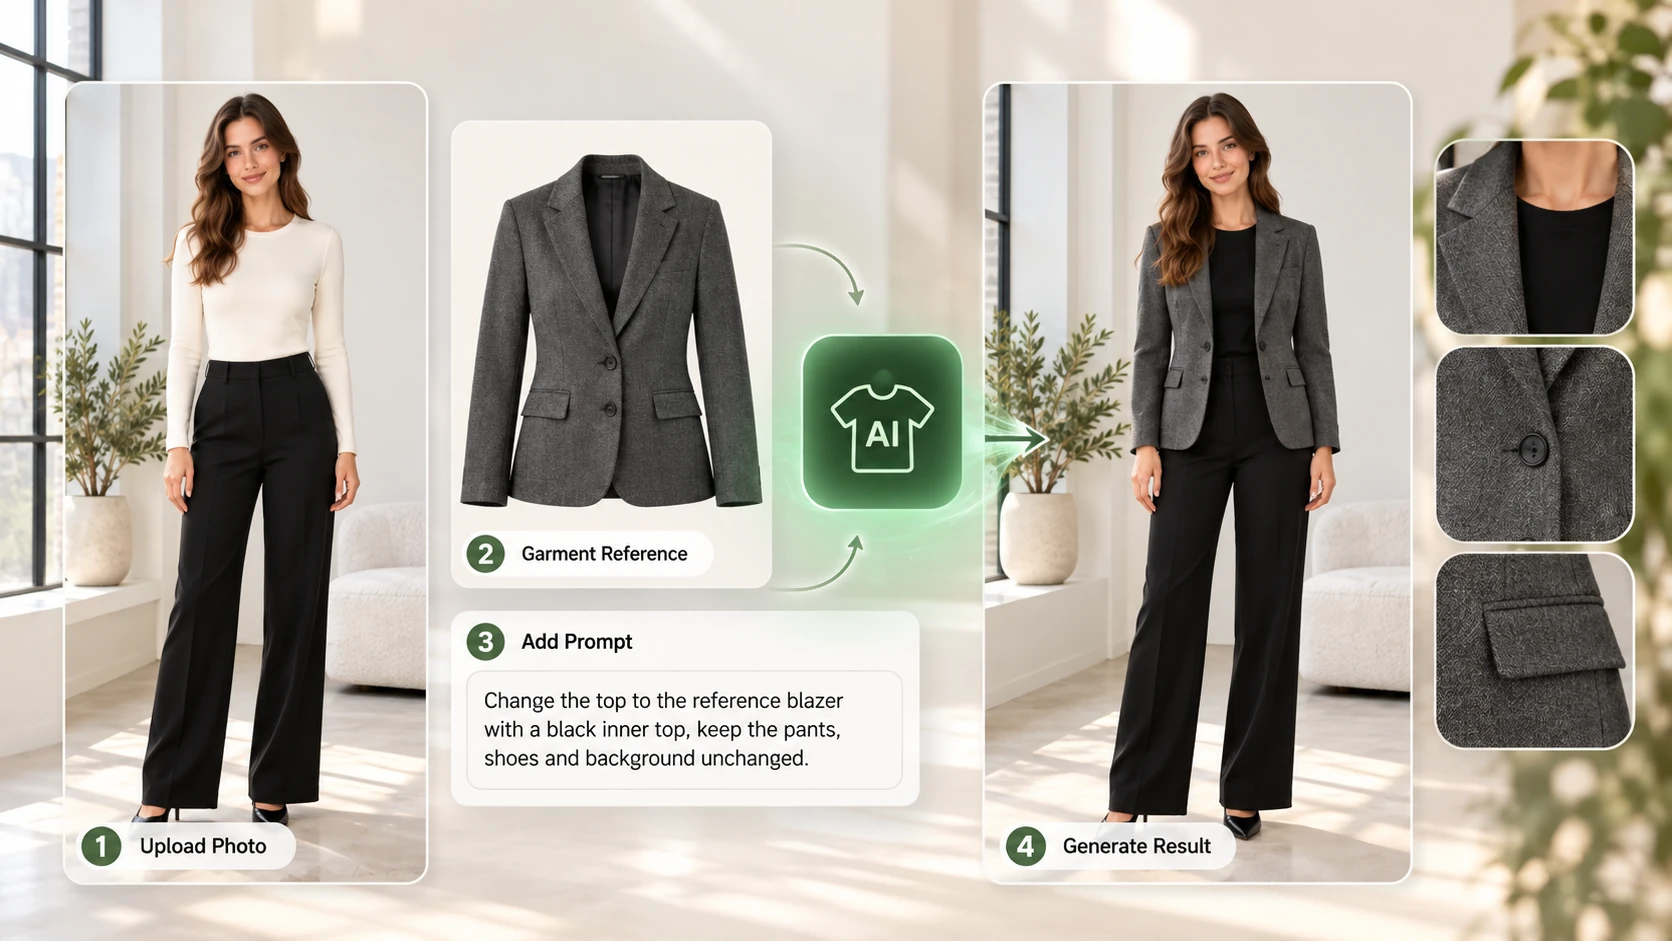
Test 3: Use a Garment Reference
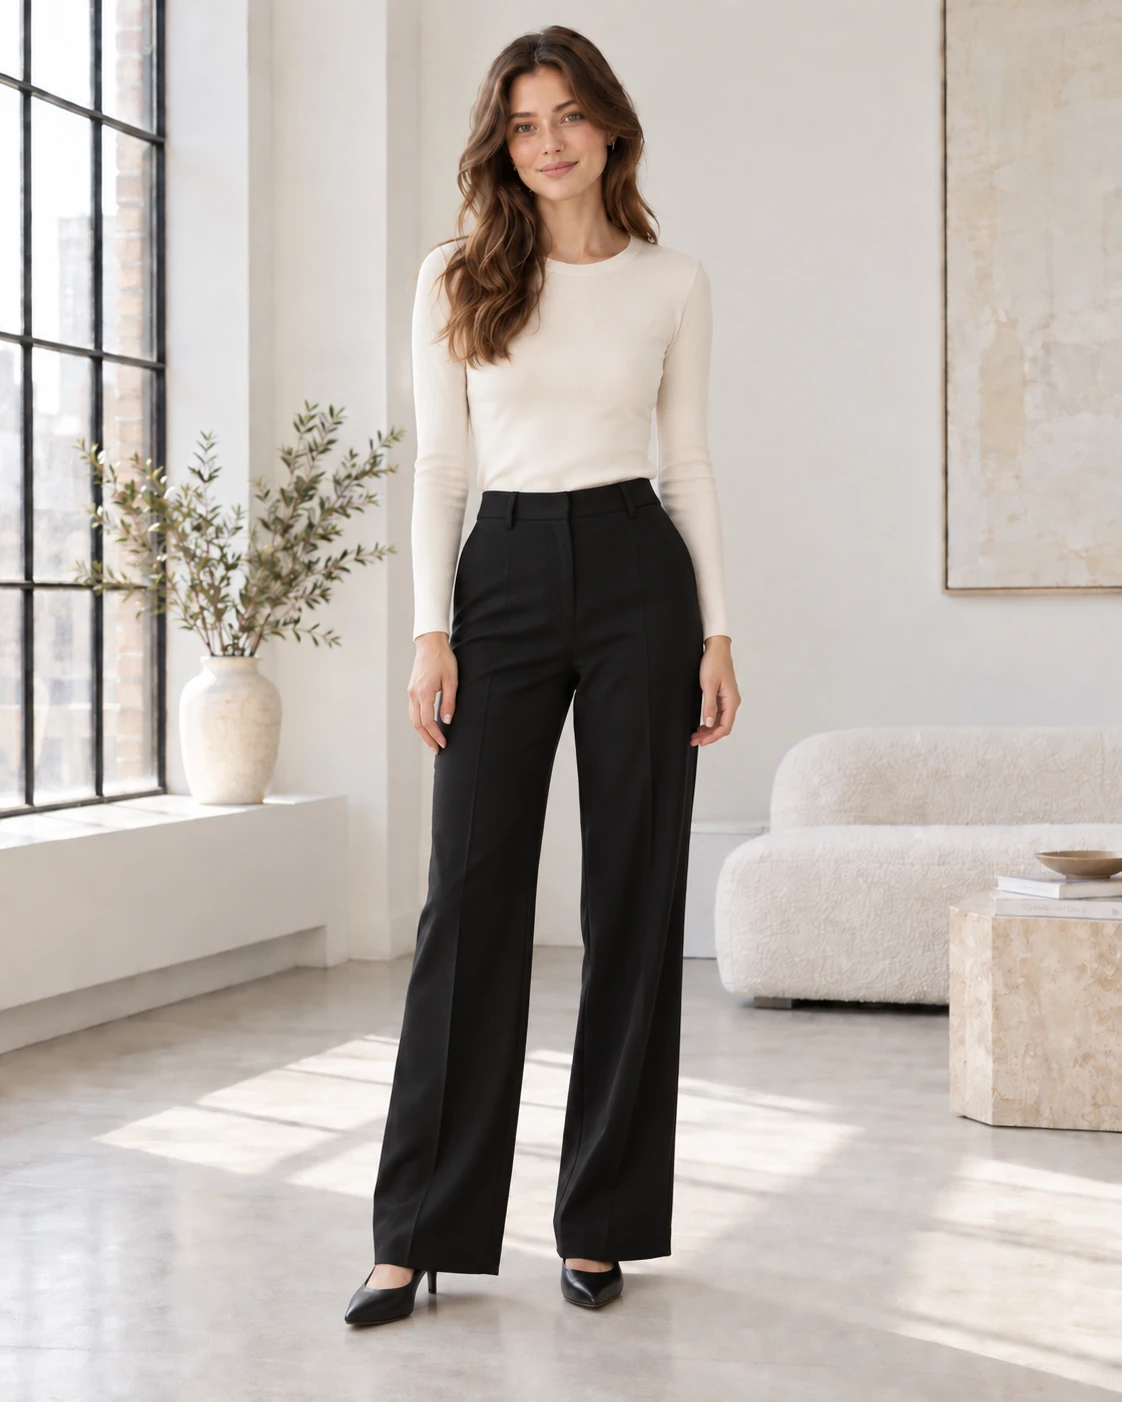
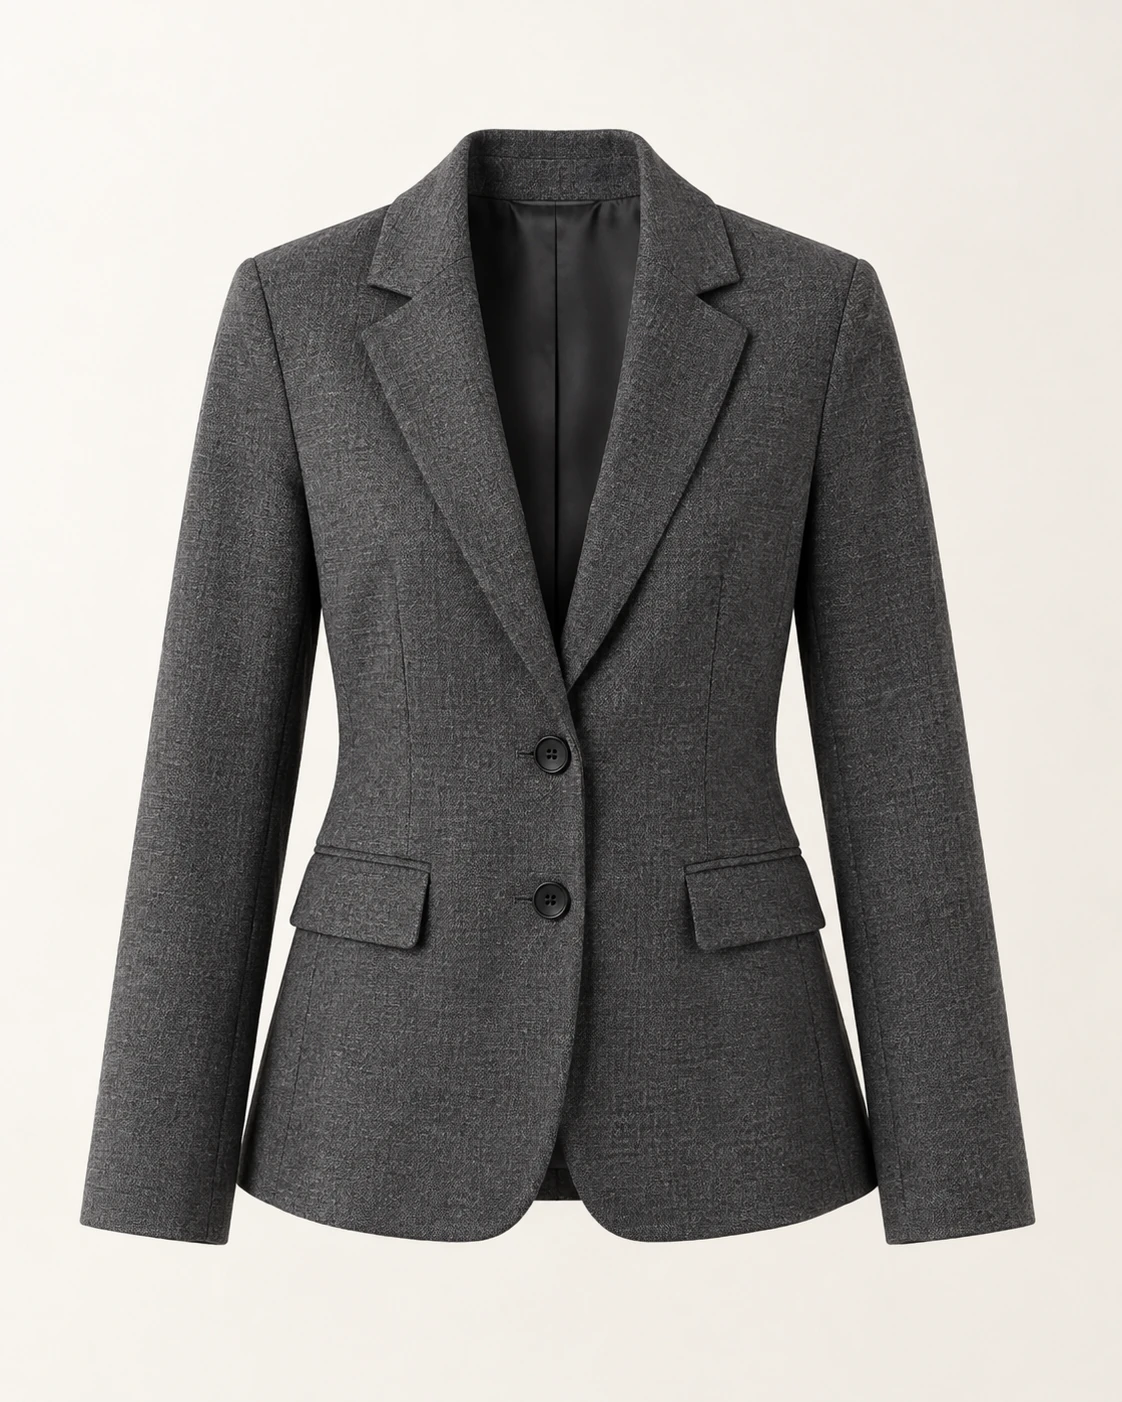
Prompt:
Replace only the current top with the garment shown in the clothing reference. Follow its neckline, sleeve length, main color, and pattern placement. Keep the lower outfit and accessories unchanged. Adapt the drape to the visible pose without adding new decorations.
Result:
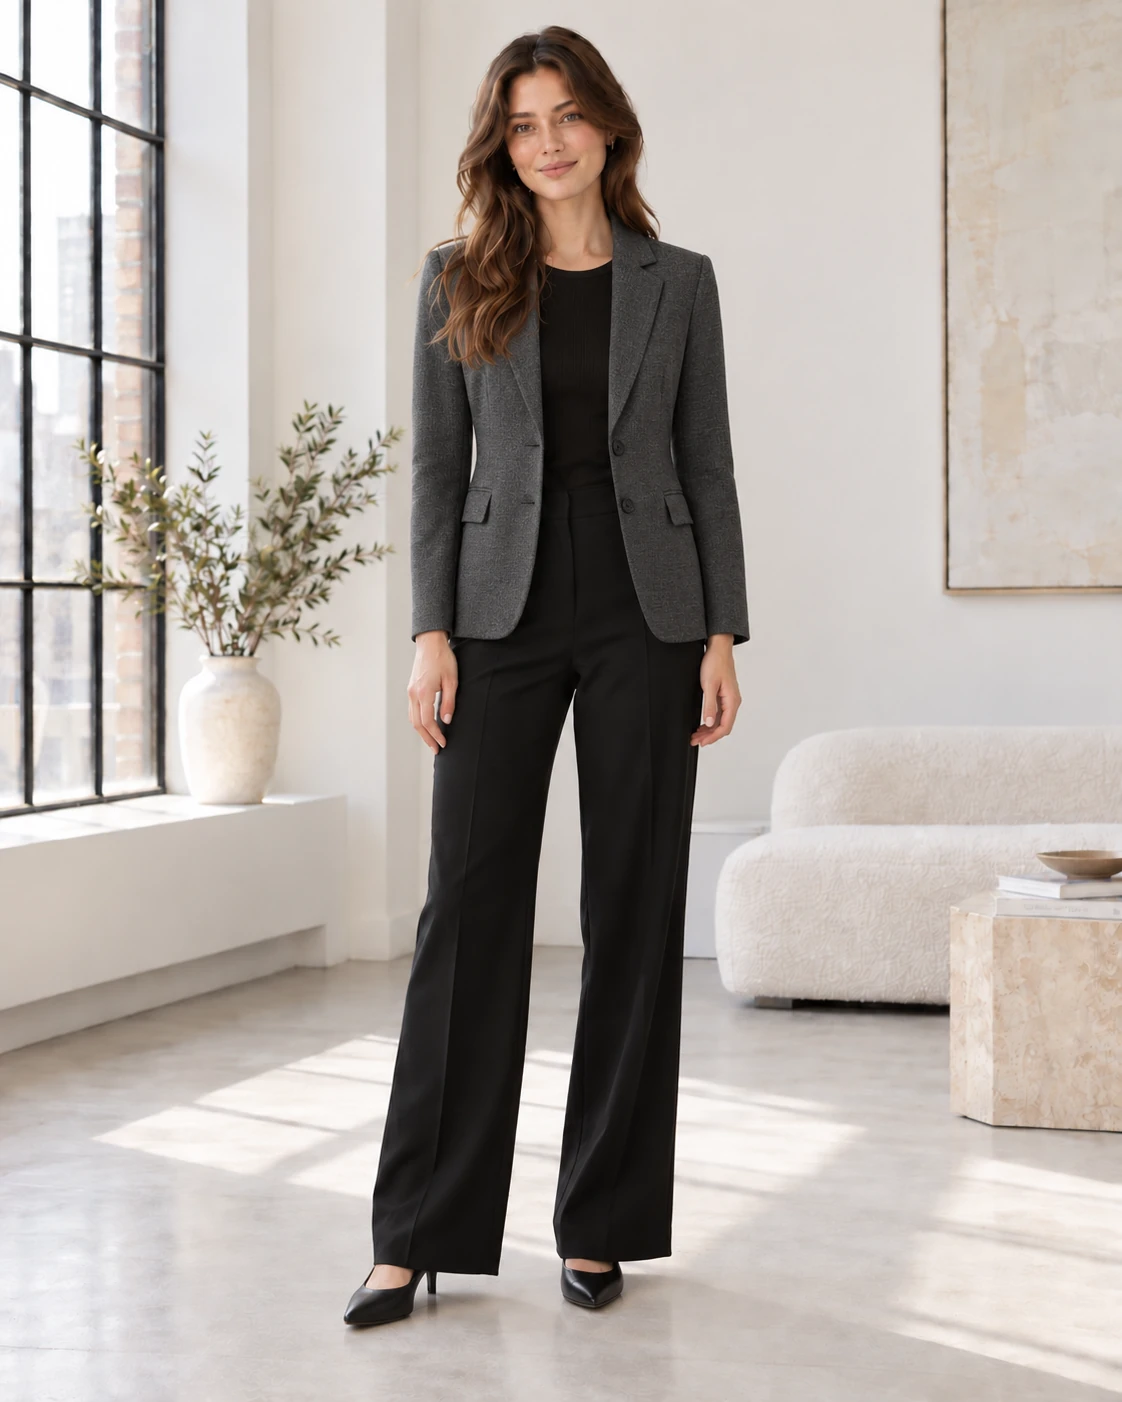
The generated outfit followed several important reference details, including the blazer texture, lapels, two-button front, and flap pockets.
However, the model also introduced a black inner layer that wasn’t explicitly requested.
What we learned:
A garment reference gives the AI stronger visual guidance, but it doesn’t guarantee an exact copy.
Specify the details that matter most and explicitly rule out unwanted additions when necessary.
What These AI Clothes Changer Tests Tell Us
Across all three tests, one pattern is clear:
The best prompts define both the edit area and the preservation boundary.
Instead of:
Give her a green shirt.
Try:
Change only the current shirt to muted sage green. Keep the same collar, buttons, sleeve length, trousers, accessories, pose, skin tone, and background unchanged. Do not add patterns, logos, or additional layers.
This gives the model much clearer boundaries.
Another useful rule is to avoid asking for too many unrelated edits at once.
If your real goal is to change the jacket, don’t simultaneously request a new hairstyle, different background, new lighting, different shoes, and a new camera angle.
Make the clothing edit first.
Then refine other elements separately if needed.
How to Write Better AI Clothes Changer Prompts
You don’t need extremely long prompts.
You need specific prompts.
1. Name the Exact Garment
Instead of:
Change the clothes.
Use:
Replace only the gray hoodie.
This defines the editing target immediately.
2. Describe Material Behavior
Don’t stop at “sweater” or “jacket.”
Details such as:
soft wool texture
subtle woven fabric
matte cotton
natural satin sheen
can help communicate how the material should look.
Avoid over-describing texture if it isn’t important.
3. Tell AI What to Preserve
Preservation instructions are especially important.
For example:
Keep the face, hairstyle, pose, trousers, shoes, accessories, camera angle, and background unchanged.
This doesn’t guarantee perfect preservation, but it clearly communicates your intent.
4. Use Negative Constraints
If something should not appear, say so.
For example:
No logos, lettering, patches, jewelry, or additional layers.
This is especially useful when AI starts introducing unnecessary decorative details.
5. Keep the First Edit Simple
Start with one garment or one color.
Once that works, move on to more complicated outfit changes.
This makes it easier to identify which part of your prompt is causing unwanted results.
Which AI Clothes Changer Method Should You Use?
Different clothing edits benefit from different approaches.
Your Goal | Recommended Method |
|---|---|
Change a shirt or dress color | Text prompt only |
Replace a simple garment | Detailed text prompt |
Copy the look of a specific jacket or dress | Garment reference + prompt |
Change an entire outfit | Detailed prompt with preservation instructions |
Keep most of the original image unchanged | Make one small edit at a time |
Test several outfit ideas | Start at 1K before refining |
If you’re unsure where to begin, start with the smallest possible change.
For example, changing only the color of a shirt gives you a better idea of how the model handles your source photo before you attempt a complete outfit replacement.
5 Mistakes That Make AI Clothes Changes Look Worse
1. Describing the New Outfit Without Saying What to Preserve
A detailed description of a new jacket doesn’t tell the model what should happen to the trousers, accessories, face, or background.
Pair your change instruction with a preservation instruction.
2. Assuming a Color Change Is Pixel-Preserving
AI clothing editing is generative.
Even a color-only request can redraw fabric texture, folds, shadows, or garment edges.
Always compare the generated result against the original.
3. Using an Obstructed Source Photo
Hands, crossed arms, bags, or objects covering the garment create ambiguous clothing boundaries.
A cleaner source image gives the AI a clearer editing area.
4. Ignoring the Aspect Ratio
The output doesn’t automatically preserve the exact dimensions of the source photo.
Check your selected aspect ratio before generating to avoid unwanted reframing.
5. Changing Too Many Things at Once
A prompt asking for a new outfit, hairstyle, background, lighting, pose, and accessories gives the model many opportunities to drift.
If clothing is your priority, edit the clothing first.
How to Check an AI Outfit Before Using It
A result can look convincing at thumbnail size while still containing small inconsistencies.
Compare the original and generated image at approximately the same zoom level.
First, check whether the requested garment matches your prompt.
Then inspect the areas immediately around it:
For tops: collar, shoulders, cuffs, hands, waistline.
For trousers and skirts: waistband, hands, hem, legs.
For full outfits: body proportions, pose, overlapping garments, shoes.
Finally, check the face, hair, accessories, and background.
If only one detail is wrong, don’t rewrite the entire prompt.
Identify that specific problem and make the next instruction more precise.
AI Clothes Changer FAQ
How do I change clothes in a photo with AI?
Upload a clear person photo to an AI clothes changer, describe the garment you want to change, specify what should remain unchanged, optionally provide a garment reference, and generate the edited image.
Do I need a garment reference?
No. A clear text prompt can handle many outfit changes. A garment reference is more useful when you want the AI to follow a specific design, pattern, neckline, or silhouette.
Can AI change only one piece of clothing?
Yes. Identify the exact garment in your prompt and explicitly list nearby elements that should remain unchanged. Review the result afterward because generative editing can still affect adjacent details.
Will AI Clothes Changer keep my face unchanged?
It can be instructed to preserve the face, hairstyle, and other unrequested areas, but preservation isn’t guaranteed. Always compare the generated image against the original.
Can I use AI Clothes Changer on a group photo?
A clear single-person photo is the better choice for this workflow because there is no dedicated control for selecting one specific person within a group.
How much does AI Clothes Changer cost on ZMS AI?
At the time of writing, a 1K generation costs 12 credits and a 2K generation costs 20 credits. Each new generation or retry uses credits, so testing the clothing concept at 1K first can be more efficient.
Change Clothes in a Photo with ZMS AI
AI clothes changing works best when you treat it as a controlled image edit rather than simply asking the model to “make a better outfit.”
Start with a clear person photo.
Define exactly which garment should change.
Describe important color, material, and design details.
Tell the AI what should remain untouched.
Then compare the result carefully against your original image.
The most useful rule from our tests is simple:
Be specific about what should change — and equally specific about what should stay the same.
Ready to try it on your own photo?
Try AI Clothes Changer on ZMS AI →
For broader AI image editing tasks, you can also explore GPT Image 2 on ZMS AI.