Guides
How to Use Grok Imagine Video 1.5 on ZMS AI Guide
Learn how to use Grok Imagine Video 1.5 on ZMS AI. Explore three video modes, step-by-step instructions, real examples, prompts, settings, and credits.

Grok Imagine Video 1.5 offers several ways to turn creative ideas and visual materials into short videos. You can start with a written prompt, animate an existing image, or combine multiple reference images to guide a generated scene.
On ZMS AI, Grok Imagine Video 1.5 provides three generation modes: Text to Video, Starting Image, and Reference Images. The workspace also lets you choose the aspect ratio, resolution, and duration before generating.
The best workflow depends on what you already have. If you only have an idea, start with Text to Video. If you have a photograph that needs movement, choose Starting Image. If you want to bring together several visual elements, use Reference Images.
This guide explains how to use each mode on ZMS, how to prepare your inputs, and how to configure your video settings. It also includes three real generation examples: an underwater ocean scene, a hot air balloon taking off, and a glass cabin beneath the northern lights.
What You Can Create with Grok Imagine Video 1.5
Before opening the generator, it helps to understand the three creative workflows available on ZMS.
Create a Scene from a Written Idea
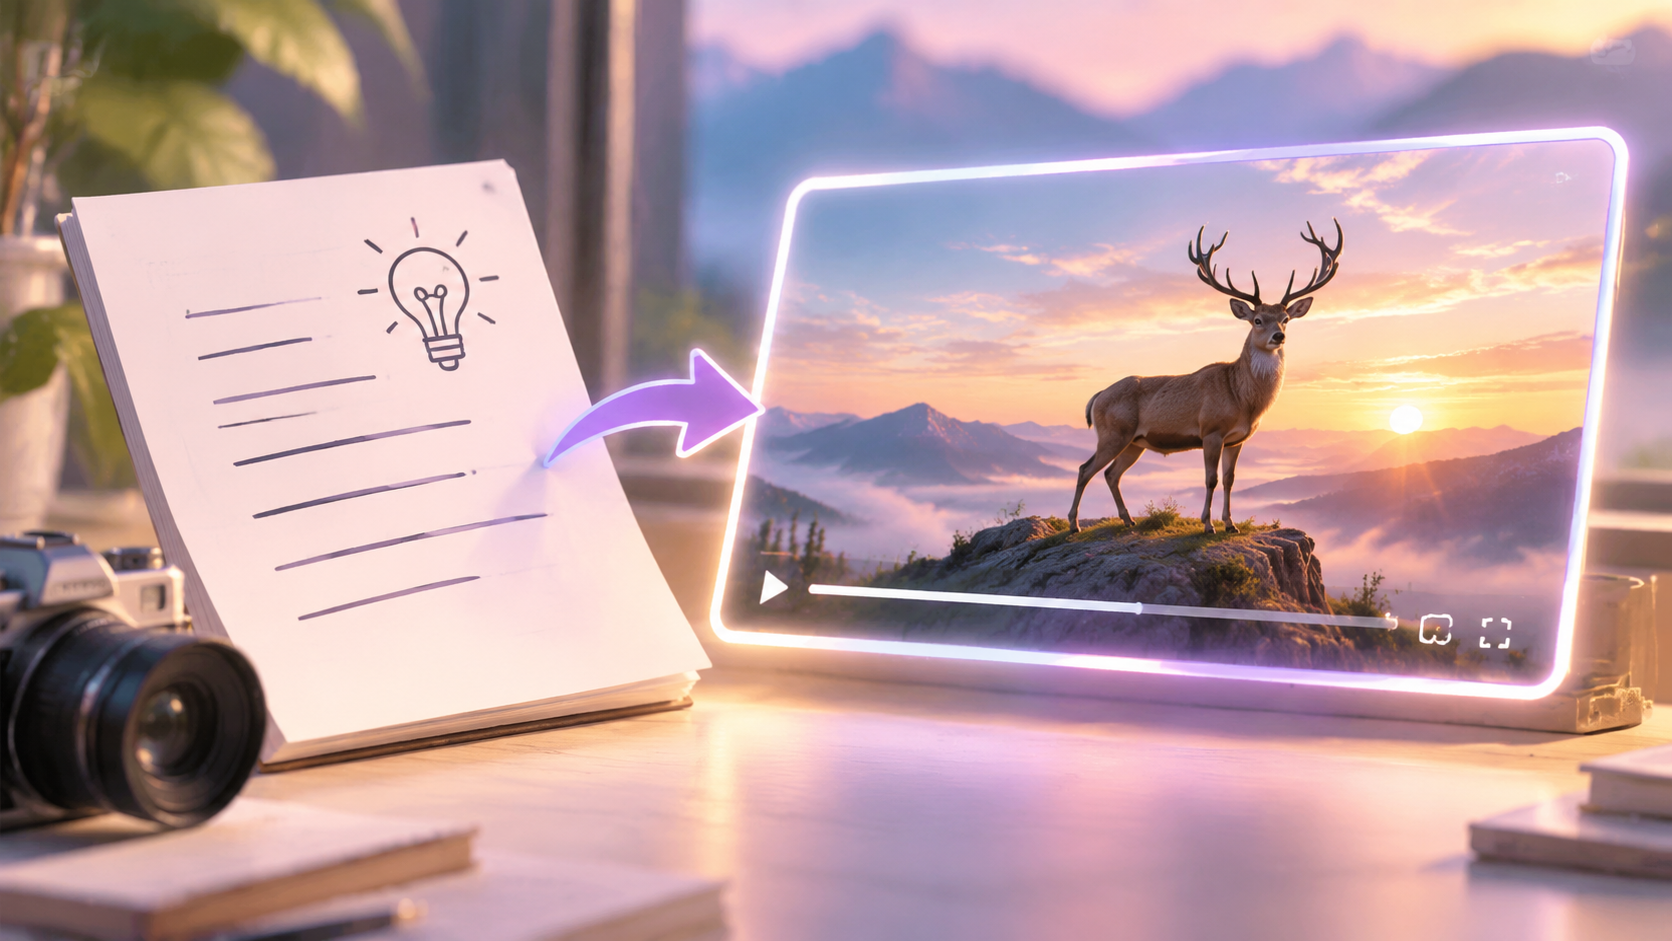
Text to Video is designed for situations where you have an idea but no source image.
You describe the subject, environment, action, and camera movement. The model then generates a video based on your instructions.
Examples include:
Cinematic nature and wildlife scenes
Travel and landscape videos
Creative visual concepts
Short promotional clips
Atmospheric environments
Animate an Existing Image
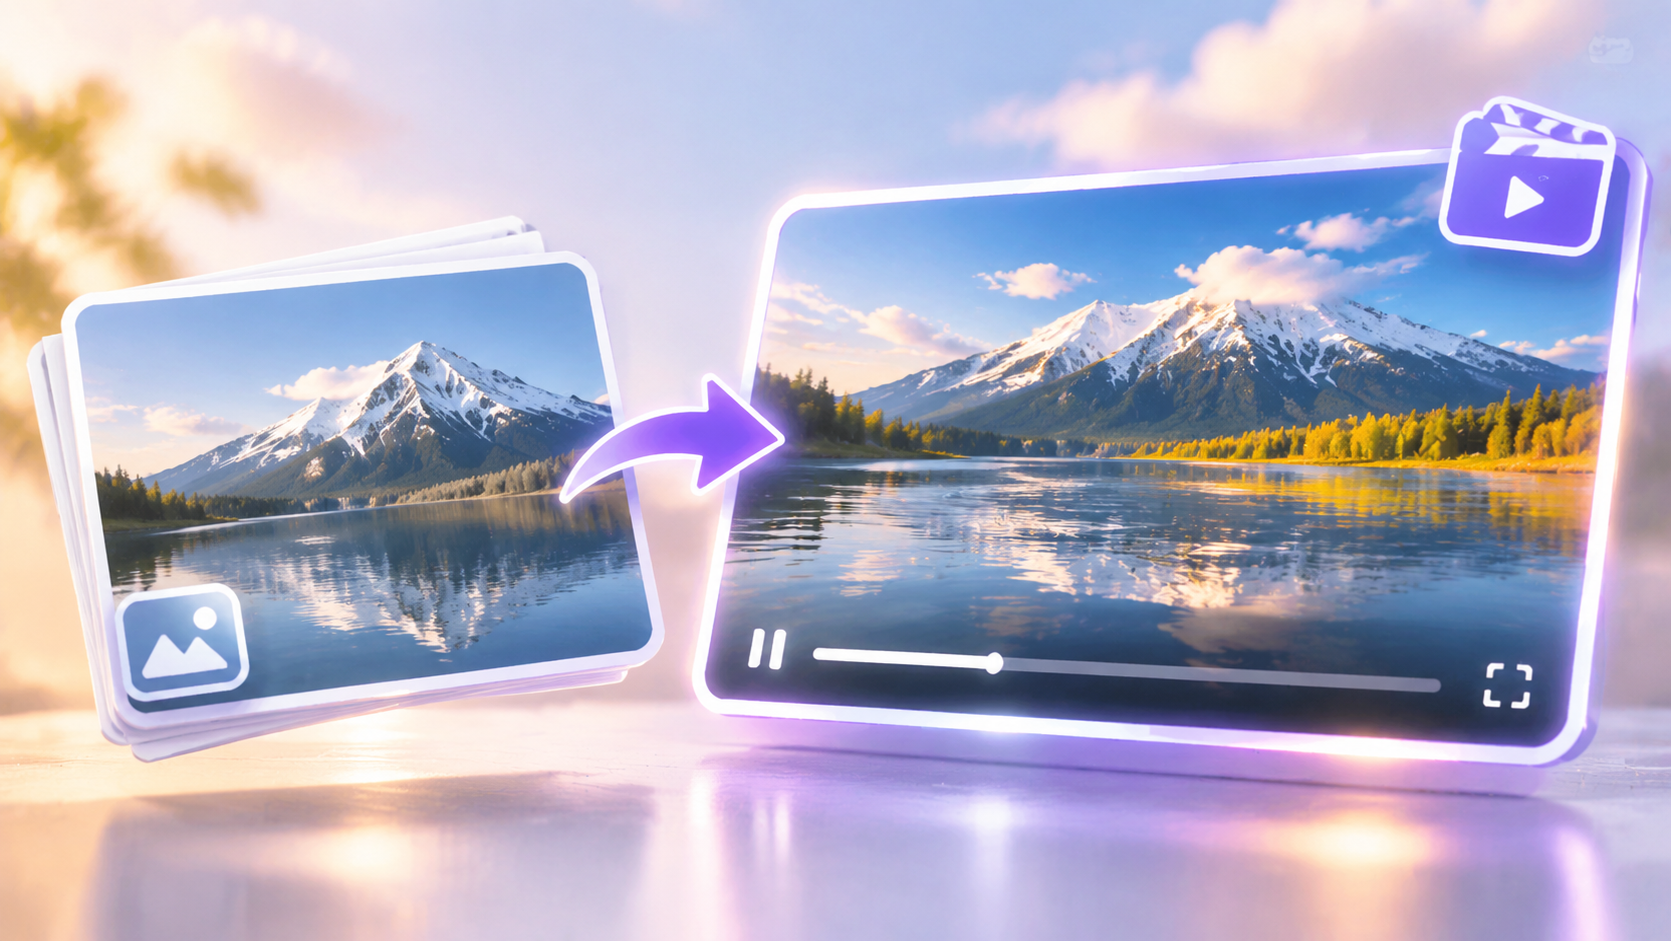
Starting Image is the right choice when you already have a photograph or generated image that you want to bring to life.
The uploaded image provides the starting visual composition. Your prompt describes the movement that should happen next.
For example, you can turn a still photograph of a hot air balloon into a short takeoff sequence.
Build a Scene from Multiple References
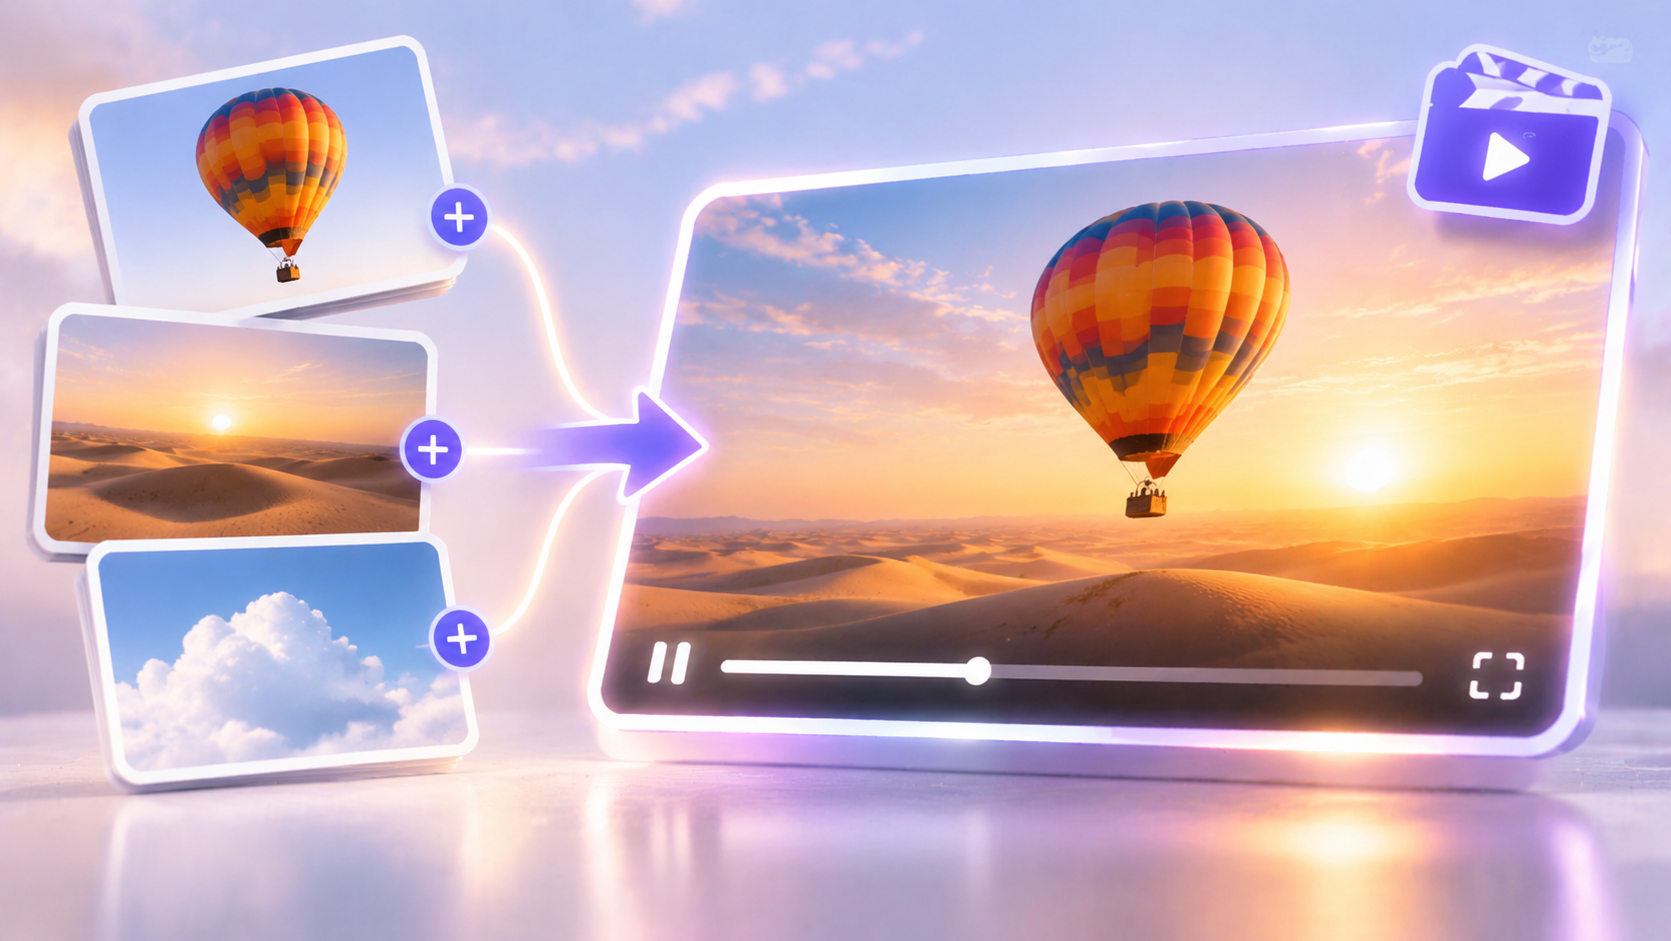
Reference Images is useful when a single image cannot communicate everything you want in the final scene.
You can use different images to guide separate visual elements, such as a building, an environment, a character, or a lighting style.
The ZMS interface describes support for up to seven image references.
For example, you can combine a glass cabin reference, a snowy forest reference, and a northern lights reference to create one winter landscape.
Before You Generate: Understand the ZMS Workspace
Open the Grok Imagine Video 1.5 generator on ZMS AI.
The main workspace contains a prompt area, a generation mode selector, an output settings control, and a Generate button.
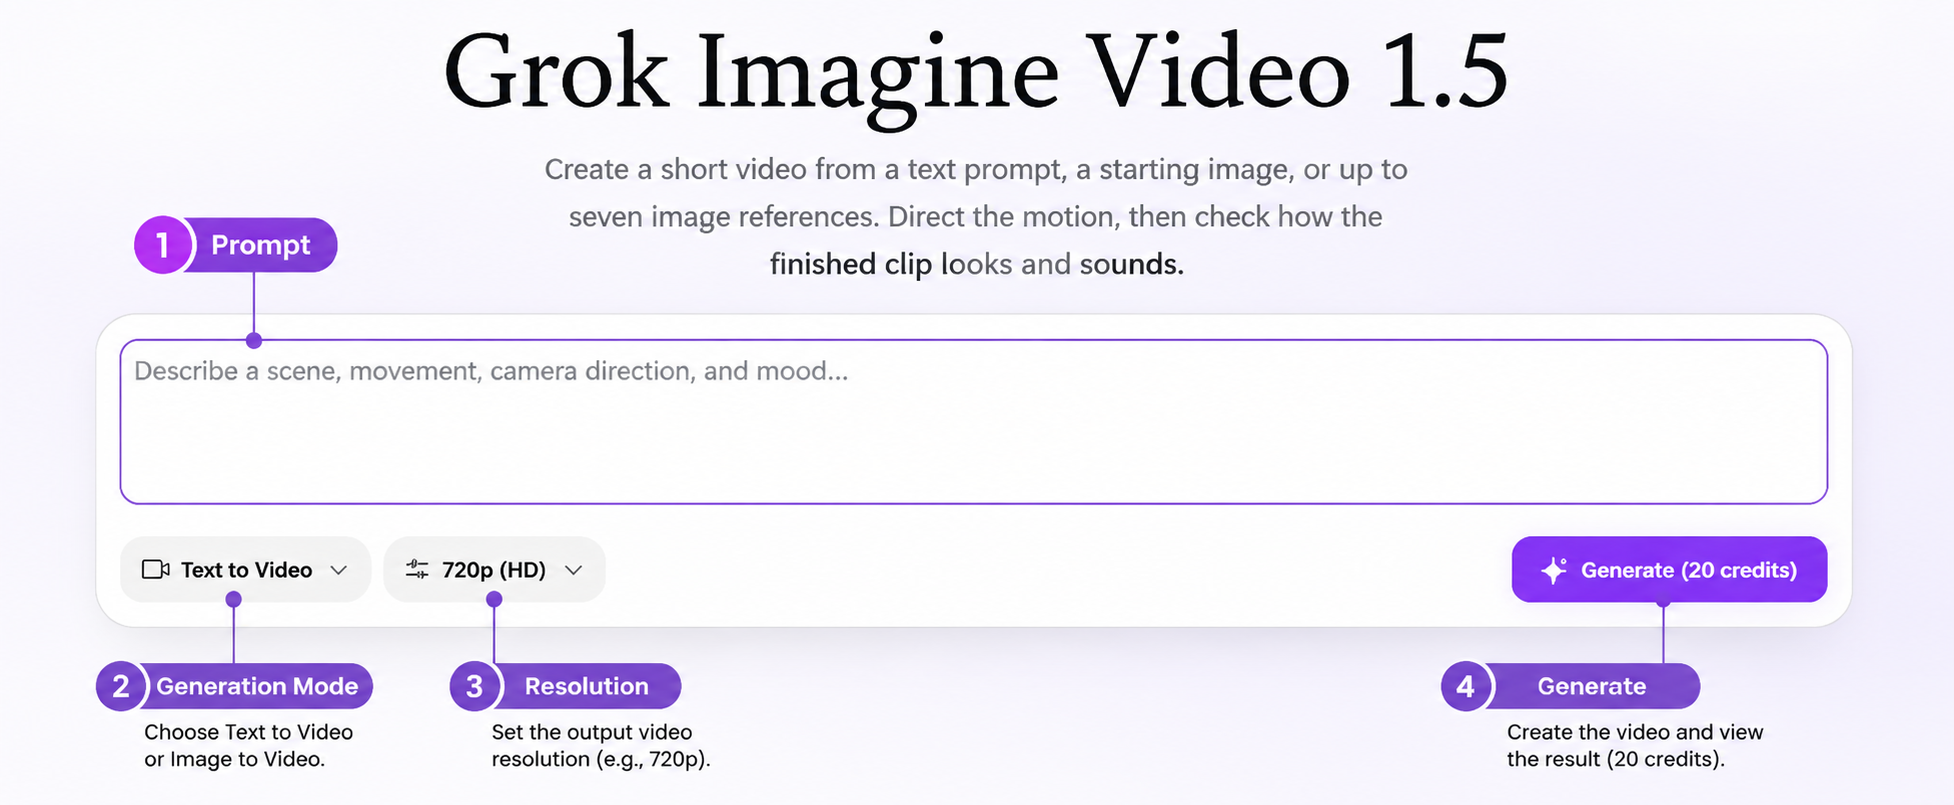
Choose a Generation Mode
Click the mode selector at the bottom-left of the prompt area.
You will see three options:
Mode | Input | Main Purpose |
|---|---|---|
Text to Video | Text prompt | Generate a new scene |
Starting Image | One starting image + prompt | Animate a still image |
Reference Images | Multiple reference images + prompt | Guide different visual elements |
Understand the Output Settings
Click the settings control next to the mode selector to open the output panel.
The ZMS interface displays these options:
Parameter | Available Options |
|---|---|
Aspect Ratio | 16:9, 1:1, 9:16, 3:2, 2:3 |
Resolution | 480p, 720p, 1080p |
Duration | 1–15 seconds |
You can select a landscape format for cinematic scenes, a portrait format for mobile content, or a square format for social media posts.
The interface displays the available resolution and duration choices. Actual availability and credit estimates should be checked for the selected generation mode.
Check the Credit Estimate
After selecting your mode and settings, look at the Generate button.
In our workspace, the default configuration of 16:9, 720p, and five seconds displayed an estimate of 225 credits.
The displayed estimate can vary depending on the selected workflow and settings.
Once everything is ready, you can generate your video.
Choose Your Workflow: Three Ways to Create Videos
The following three workflows take you from preparing your input materials to generating and reviewing the finished video.
Each includes a practical example created on ZMS.
Workflow 1: Create a Video from Text
Mode: Text to Video
Use this workflow when you want to generate a complete scene without uploading any images.
For this example, we created an underwater ocean scene featuring a sea turtle swimming through a tropical coral reef.
Step 1: Select Text to Video
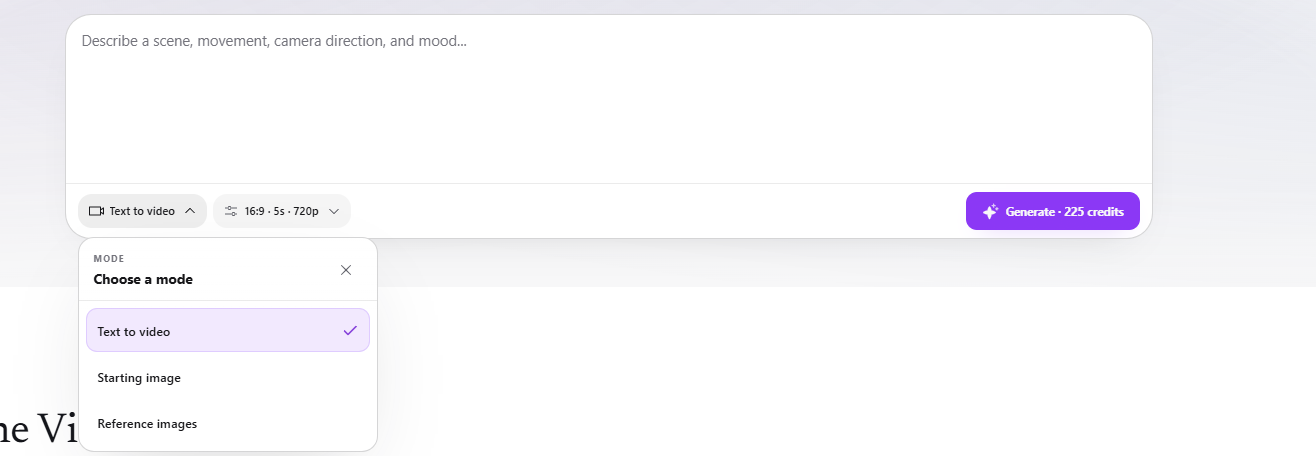
Open the generation mode selector and choose Text to Video.
No image upload is required.
Step 2: Describe the Scene
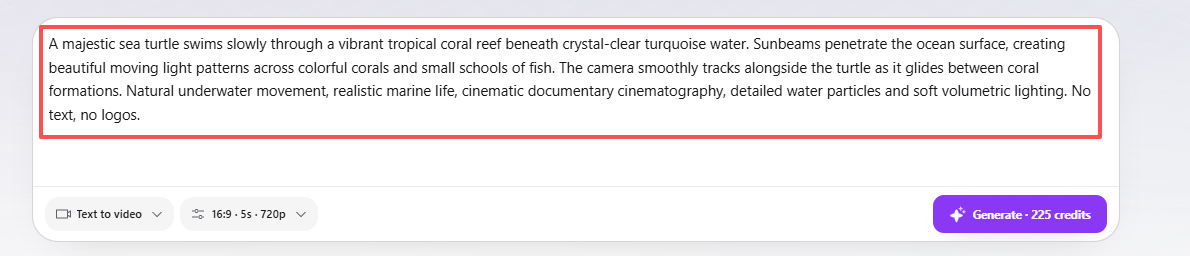
Enter a prompt explaining the subject, environment, action, and camera direction.
A useful structure is:
Subject + Environment + Action + Camera Movement + Lighting + Visual Style
For our test, we used:
Test 1 Prompt:
A majestic sea turtle swims slowly through a vibrant tropical coral reef beneath crystal-clear turquoise water. Sunbeams penetrate the ocean surface, creating beautiful moving light patterns across colorful corals and small schools of fish. The camera smoothly tracks alongside the turtle as it glides between coral formations. Natural underwater movement, realistic marine life, cinematic documentary cinematography, detailed water particles and soft volumetric lighting. No text, no logos.
Step 3: Configure Your Settings
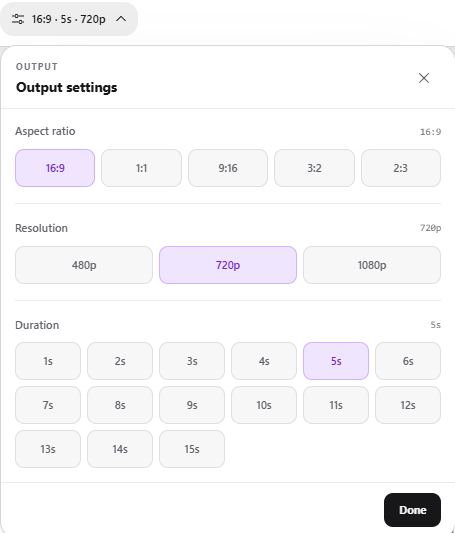
For this test, we selected:
Parameter | Value |
|---|---|
Aspect Ratio | 16:9 |
Resolution | 720p |
Duration | 5 seconds |
Actual Credits | 225 |
Step 4: Generate Your Video
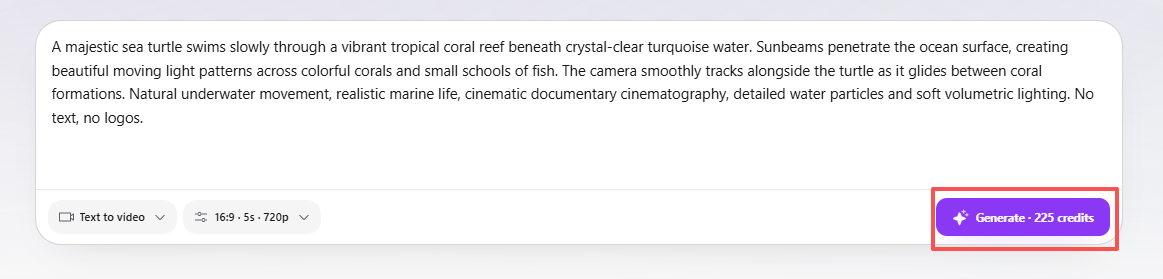
Review the estimated credits and click Generate.
Wait for the generation to finish, then open the resulting video.
Step 5: Review the Result
Real ZMS generation
Generated Video: Underwater Ocean Exploration
The generated video shows a sea turtle swimming above a colorful coral reef in clear turquoise water. Small fish are visible in the surrounding environment, while sunlight penetrates the water from above.
The turtle remains the main subject, and the underwater environment creates a recognizable marine documentary-style scene.
This example demonstrates how Text to Video can generate both a moving subject and a detailed environment from a written description alone.
What to Check:
Whether the turtle’s swimming movement looks natural.
Whether the surrounding marine environment remains visually coherent.
Whether the underwater lighting and water effects match the prompt.
Whether the camera movement maintains focus on the main subject.
When to Use This Workflow: Choose Text to Video when you have a clear visual idea but no source image to upload.
Workflow 2: Animate a Starting Image
Mode: Starting Image
Starting Image is useful when you already have a still image and want to turn it into a moving video.
The uploaded image provides the opening visual composition, while your prompt describes what should happen next.
For this example, we used a red hot air balloon standing on a golden desert plain and generated a short takeoff sequence.
Step 1: Prepare Your Starting Image
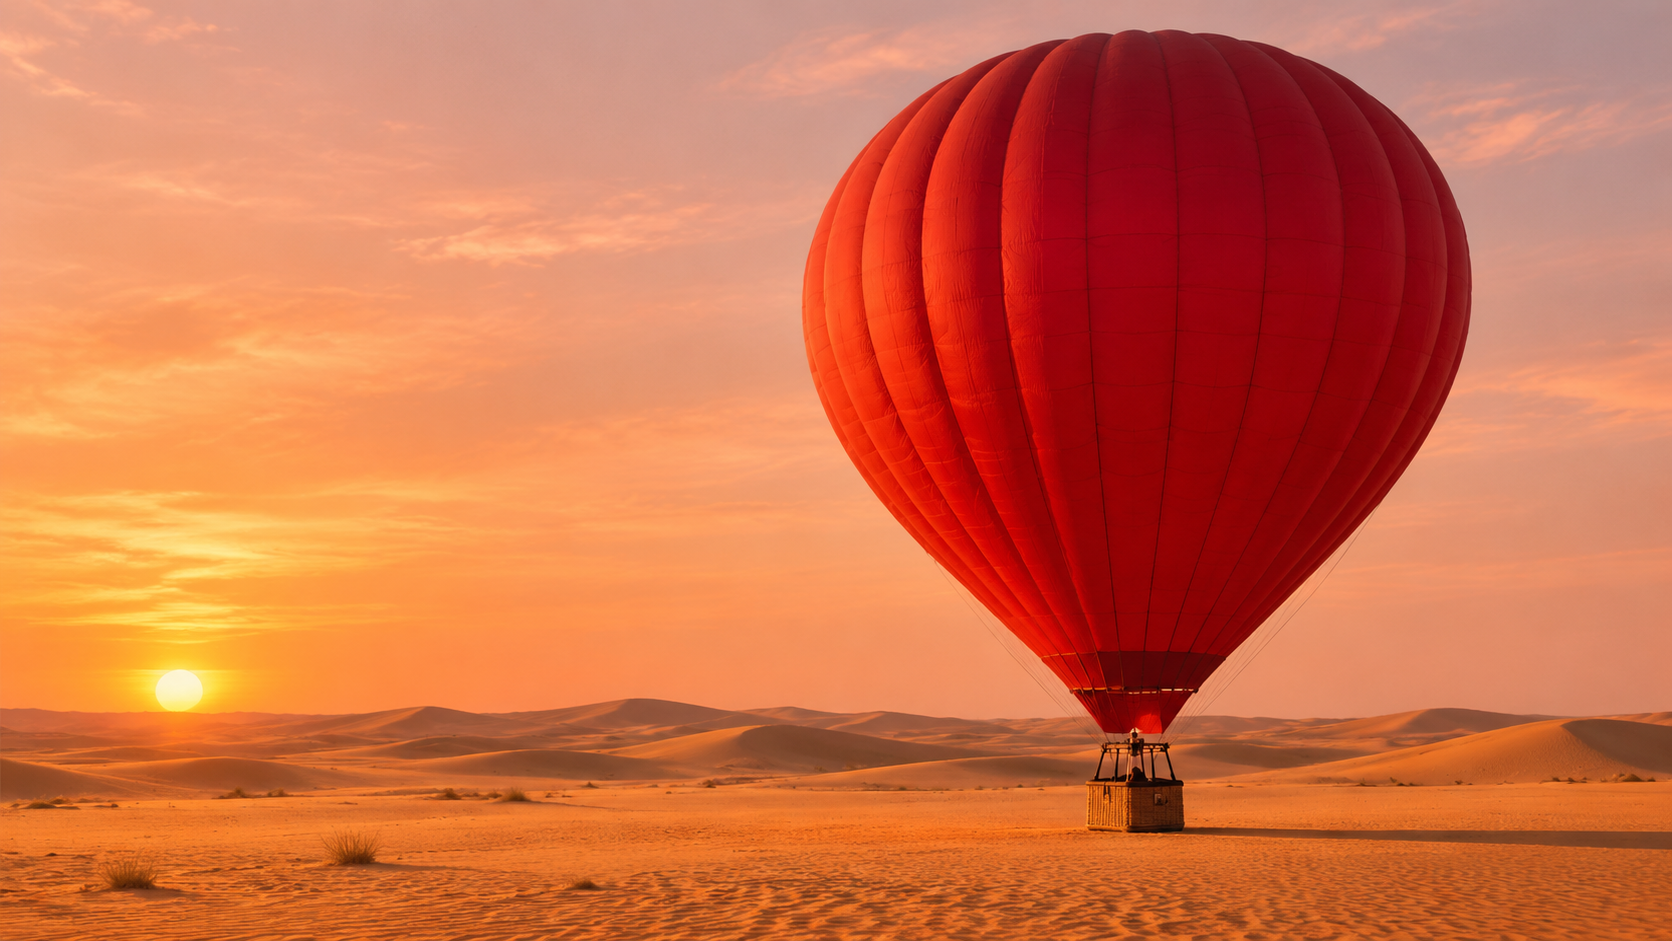
Before opening the generator, prepare a clear image that shows the main subject and its environment.
For our test, we created the following image:
Starting Image Prompt:
A large red hot air balloon standing upright on a wide golden desert plain at sunrise. The balloon is fully inflated, with its basket resting on the sand. Distant sand dunes stretch toward the horizon under a warm peach-colored sky. Cinematic landscape photography, realistic fabric texture, soft golden morning light, wide-angle composition, 16:9. No people, no text, no logos.
Step 2: Select Starting Image
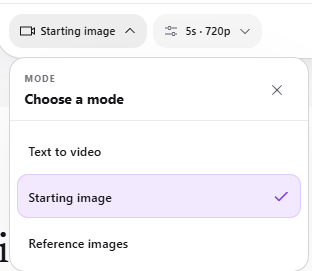
Open the generation mode selector and choose Starting Image.
Upload your prepared hot air balloon image.
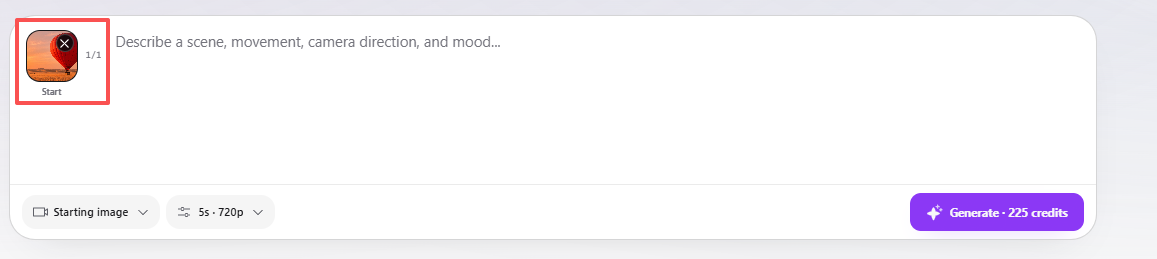
Step 3: Describe the Desired Movement
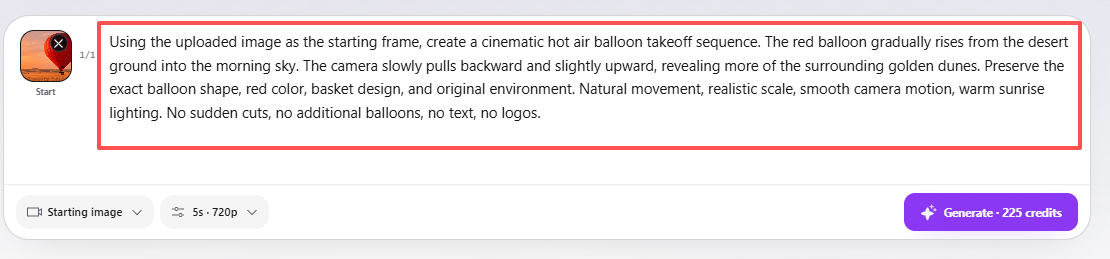
Explain how the still image should become a video.
For example, you can describe:
How the main subject should move.
Whether the camera should move.
Which visual details should remain unchanged.
How the environment should develop.
For our test, we used:
Test 2 Video Prompt:
Using the uploaded image as the starting frame, create a cinematic hot air balloon takeoff sequence. The red balloon gradually rises from the desert ground into the morning sky. The camera slowly pulls backward and slightly upward, revealing more of the surrounding golden dunes. Preserve the exact balloon shape, red color, basket design, and original environment. Natural movement, realistic scale, smooth camera motion, warm sunrise lighting. No sudden cuts, no additional balloons, no text, no logos.
Step 4: Configure Your Settings
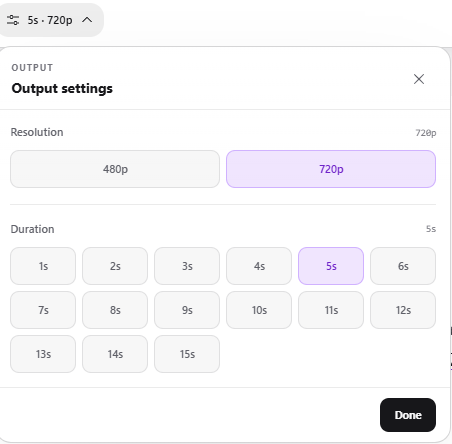
We used the same output settings as Test 1:
Parameter | Value |
|---|---|
Aspect Ratio | 16:9 |
Resolution | 720p |
Duration | 5 seconds |
Actual Credits | 225 |
Step 5: Generate and Review
Click Generate and wait for the video to finish.
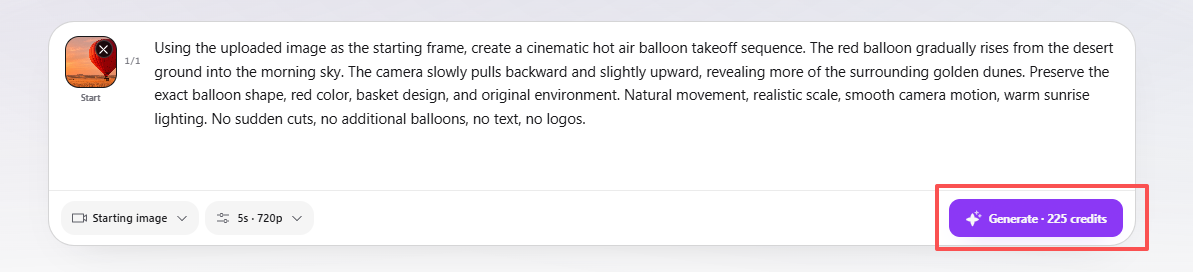
Real ZMS generation
Generated Video: Hot Air Balloon Takeoff
The generated video shows the red hot air balloon rising above the desert landscape. The balloon remains visually recognizable, while its position and apparent scale change as it moves upward.
The warm sunrise-colored sky and surrounding dunes provide continuity with the original starting image.
This example demonstrates how Starting Image can turn a static composition into a short animated sequence without requiring multiple reference frames.
What to Check:
Whether the balloon retains its original appearance.
Whether the basket and balloon proportions remain consistent.
Whether the upward movement looks natural.
Whether the desert environment and lighting remain consistent with the starting image.
When to Use This Workflow: Choose Starting Image when you already have a photograph, product image, or generated image that should define the opening composition of your video.
Workflow 3: Build a Scene from Multiple Reference Images
Mode: Reference Images
Use Reference Images when you want to guide different visual elements with multiple source images.
For this example, we created a winter landscape featuring a modern glass cabin, a snow-covered pine forest, and green northern lights.
Step 1: Prepare Your Reference Images
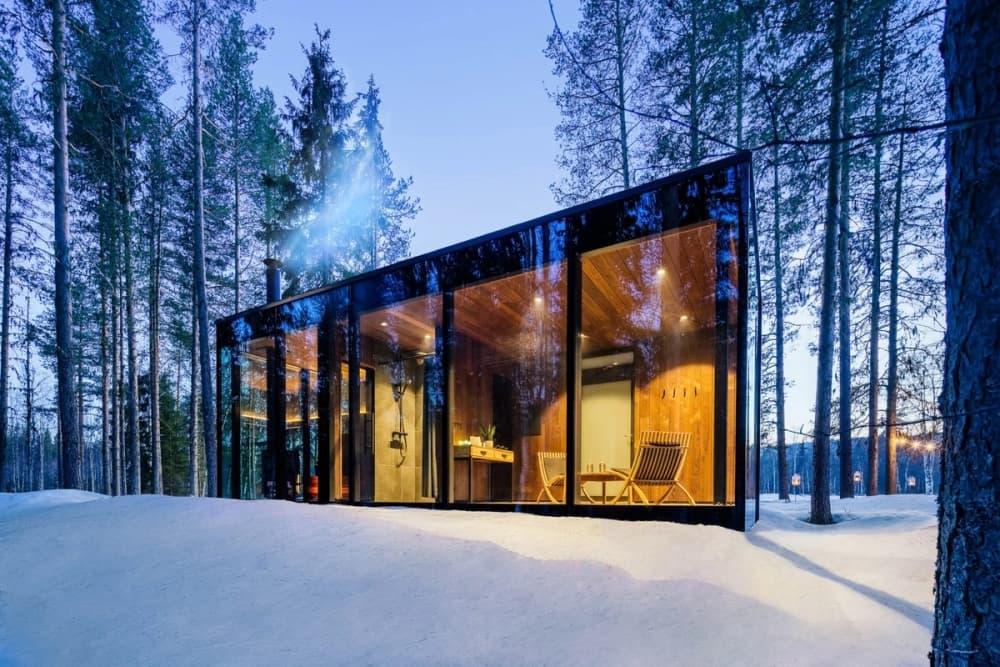
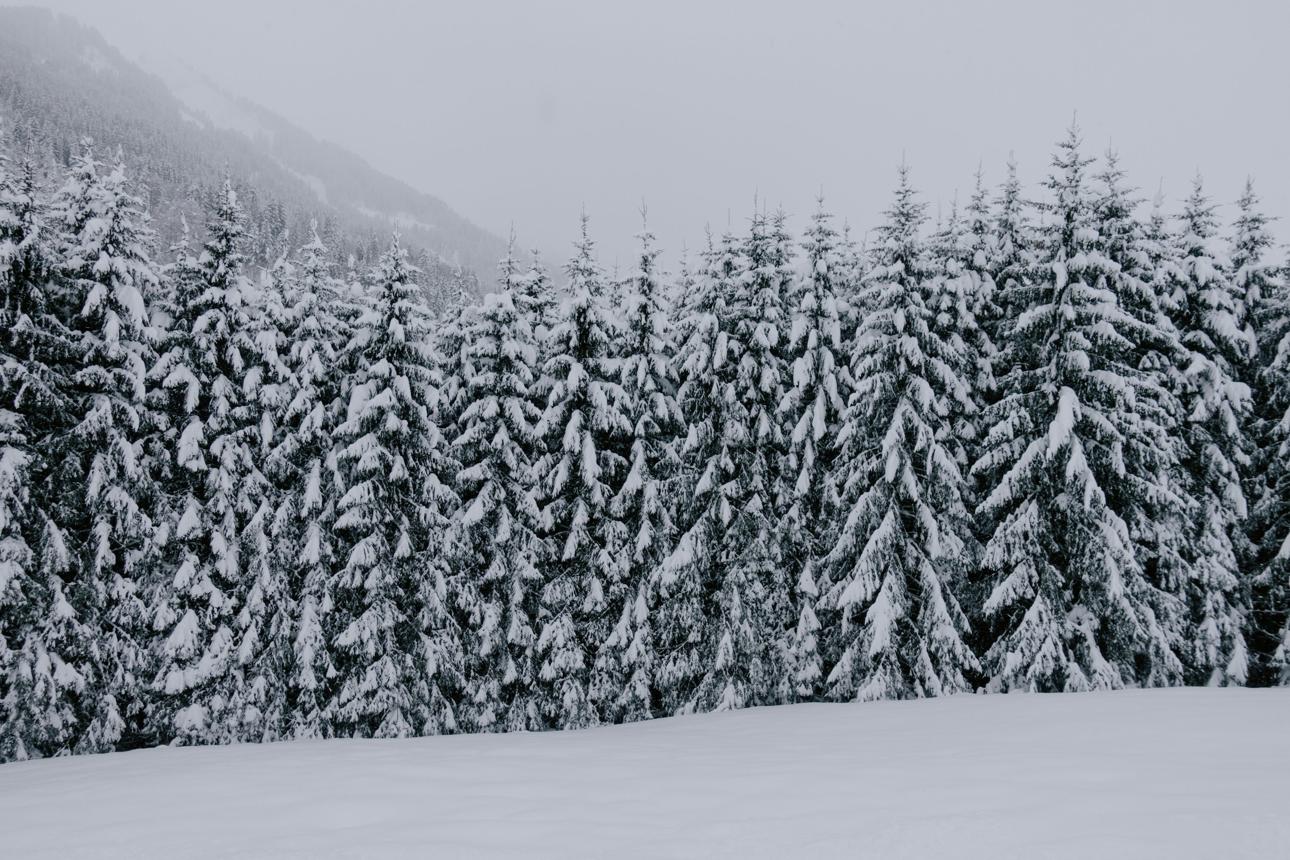
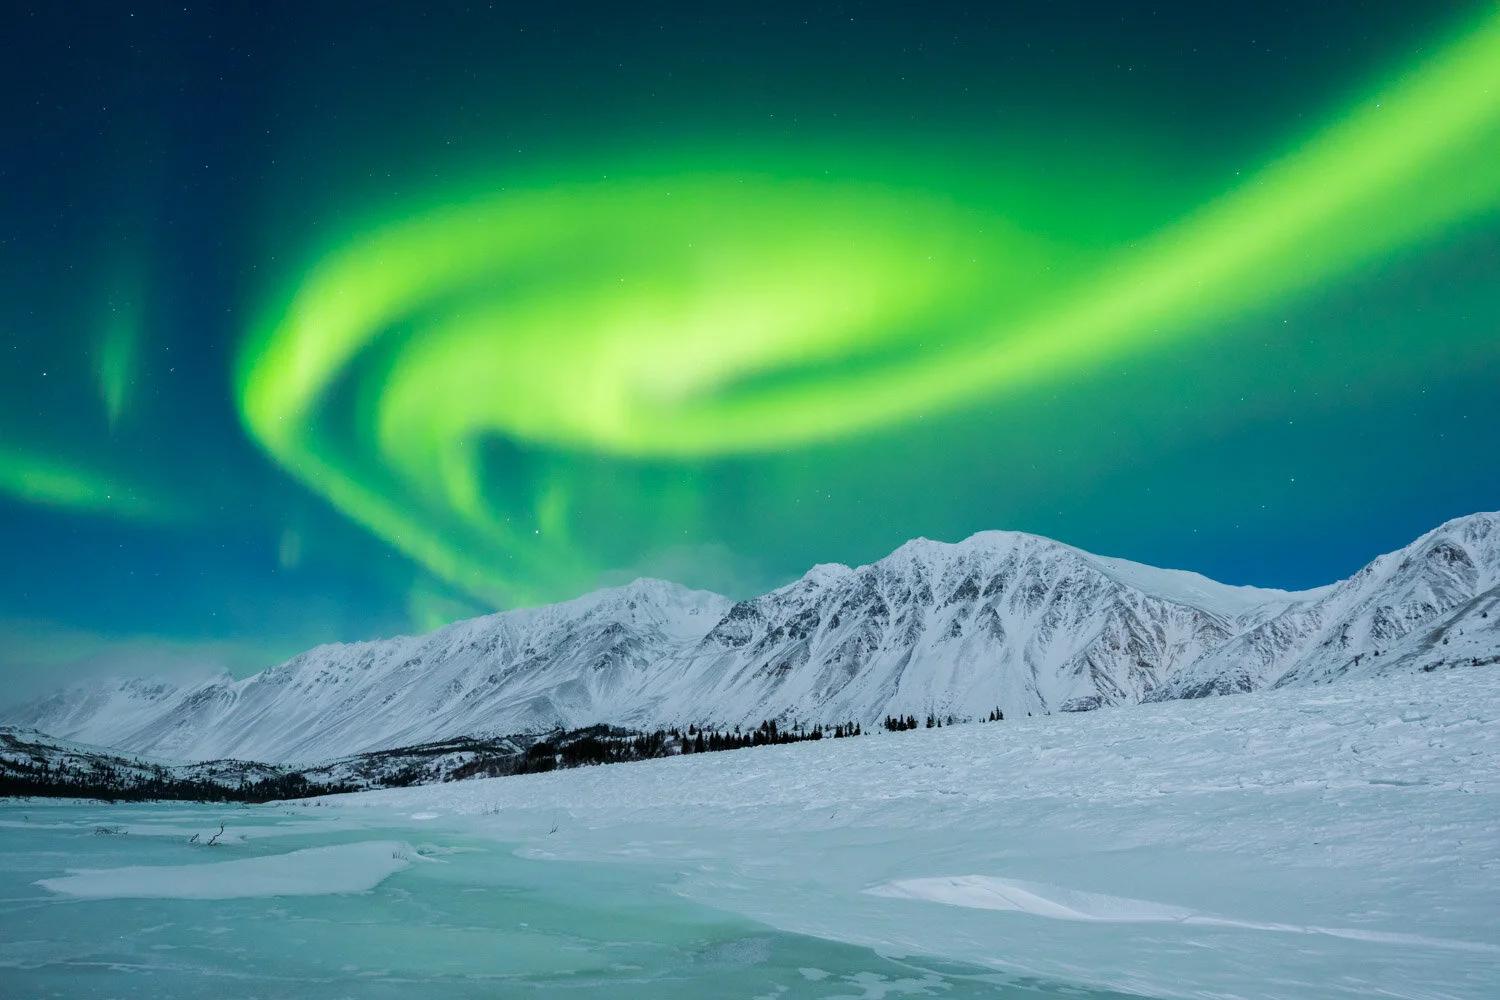
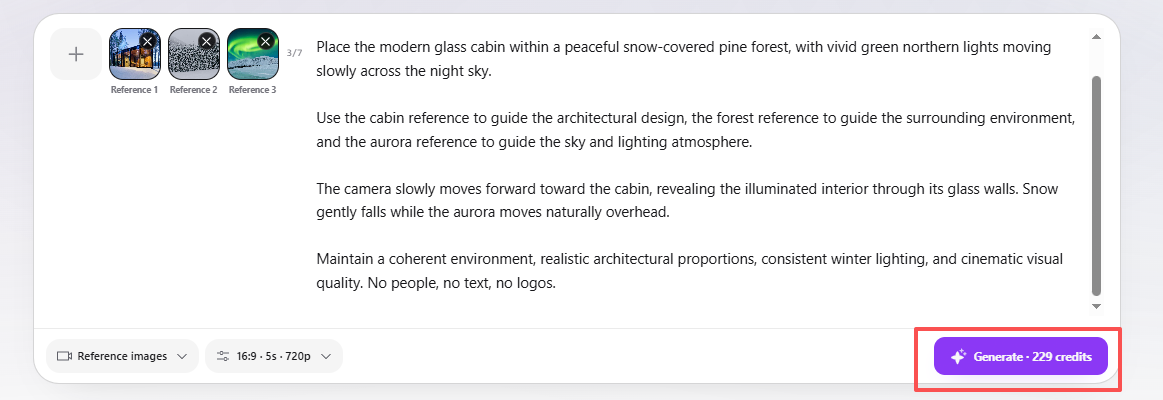
We prepared three separate images, each with a specific purpose.
Reference | Visual Purpose |
|---|---|
Reference 1 | Guide the glass cabin’s architectural design |
Reference 2 | Define the snowy forest environment |
Reference 3 | Guide the northern lights and night-sky atmosphere |
You do not need to use seven images just because the interface allows up to seven references. A small set of relevant images is a practical starting point.
Step 2: Select Reference Images
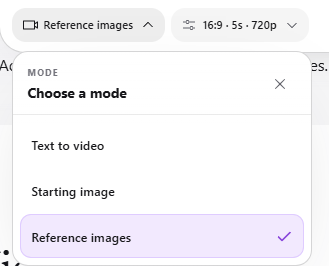
Open the generation mode selector and choose Reference Images.
Upload the three prepared images into the reference area.
Step 3: Assign a Purpose to Each Reference
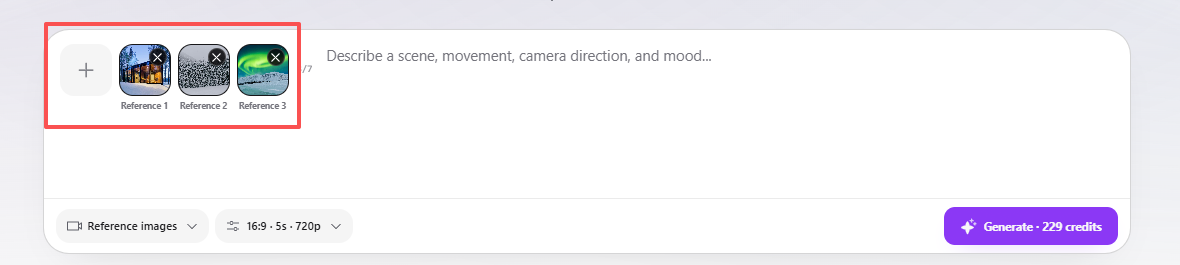
Do not simply ask the model to combine all the uploaded images.
Explain which visual element each reference should guide.
For example, the cabin image should influence the architecture, while the forest image should define the surrounding environment.
Step 4: Write Your Generation Prompt
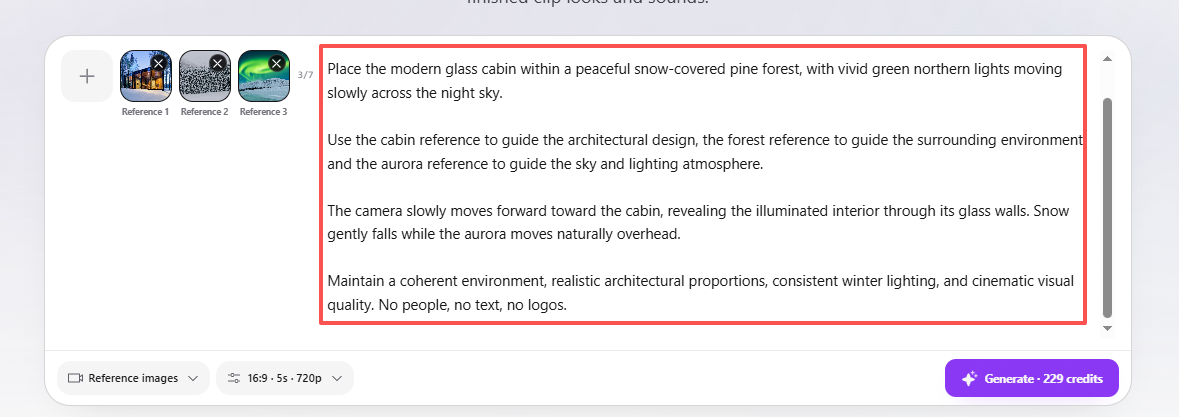
For our test, we used:
Test 3 Prompt:
Create a cinematic winter landscape video using the uploaded reference images.

Place the modern glass cabin within a peaceful snow-covered pine forest, with vivid green northern lights moving slowly across the night sky.

Use the cabin reference to guide the architectural design, the forest reference to guide the surrounding environment, and the aurora reference to guide the sky and lighting atmosphere.

The camera slowly moves forward toward the cabin, revealing the illuminated interior through its glass walls. Snow gently falls while the aurora moves naturally overhead.

Maintain a coherent environment, realistic architectural proportions, consistent winter lighting, and cinematic visual quality. No people, no text, no logos.
Step 5: Configure Your Settings
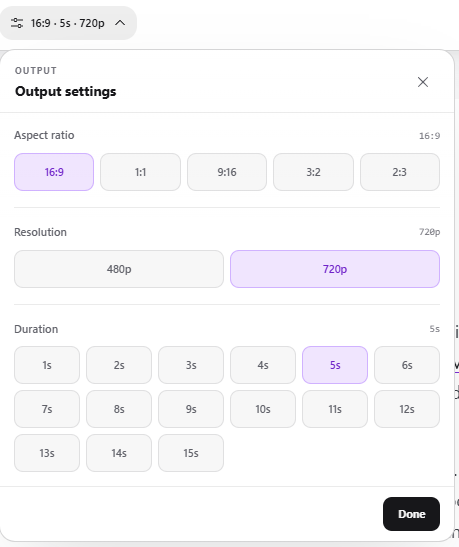
We used:
Parameter | Value |
|---|---|
Aspect Ratio | 16:9 |
Resolution | 720p |
Duration | 5 seconds |
Actual Credits | 229 |
Step 6: Generate and Review
Click Generate and inspect the completed video.
Real ZMS generation
Generated Video: Northern Lights Glass Cabin
The generated video combines a modern glass cabin, a snow-covered pine forest, and a green aurora in one winter landscape.
The cabin remains the main architectural subject, with warm interior lighting contrasting against the cold outdoor environment. The northern lights provide a distinct visual element in the sky.
The result demonstrates how multiple reference images can guide different parts of a generated scene.
What to Check:
Whether the cabin’s appearance follows the architectural reference.
Whether the snow-covered forest is integrated naturally.
Whether the northern lights match the intended visual direction.
Whether the different reference elements form a coherent environment.
When to Use This Workflow: Choose Reference Images when you need more control over the visual elements of a scene and want several images to guide one generation.
How to Choose Aspect Ratio, Resolution, and Duration
After choosing a generation workflow, you can adjust the output settings to match your project.
Choose the Right Aspect Ratio
The aspect ratio determines the shape of your generated video.
Aspect Ratio | Recommended Use |
|---|---|
16:9 | YouTube, cinematic scenes, landscape videos |
1:1 | Square social media posts |
9:16 | TikTok, Instagram Reels, YouTube Shorts |
3:2 | Photography-style landscape content |
2:3 | Portrait-oriented visual content |
For our three tests, we used 16:9 because all three scenes were designed as landscape videos.
Select a Resolution
The ZMS interface displays three resolution options:
480p: A lower-resolution option for lighter output.
720p: A practical HD setting for general video creation.
1080p: A higher-resolution option for projects that need more detail.
The options displayed in the workspace should be checked for the selected mode before generation. A setting appearing in the general selector does not necessarily mean every mode supports it.
Choose the Video Duration
The ZMS interface displays duration options from 1 to 15 seconds.
Consider the complexity of your scene when selecting a duration.
Short clips are suitable for a single action or simple camera movement.
Longer clips provide more time for a sequence with multiple visual changes.
For our three real-world tests, we used five seconds to keep the settings consistent.
What We Learned from Three Generation Workflows
After completing the three tests, we recorded the following results.
Actual Credit Comparison
Test | Mode | Input | Duration | Actual Credits |
|---|---|---|---|---|
Test 1 | Text to Video | Text prompt | 5s | 225 |
Test 2 | Starting Image | 1 image | 5s | 225 |
Test 3 | Reference Images | 3 images | 5s | 229 |
Total | 3 workflows | 15s | 679 |
All three generated files were checked:
Output Property | Test 1 | Test 2 | Test 3 |
|---|---|---|---|
Resolution | 1280 × 720 | 1280 × 720 | 1280 × 720 |
Frame Rate | 24 FPS | 24 FPS | 24 FPS |
Actual Duration | 5.04s | 5.04s | 5.04s |
Audio Track | Present | Present | Present |
The Reference Images test used four more credits than the other two tests under our recorded settings.
These figures describe our specific generations, not fixed prices for every future task.
Which Workflow Should You Choose?
The three modes serve different creative needs.
Your Starting Point | Recommended Mode |
|---|---|
You only have a written idea | Text to Video |
You have one image to animate | Starting Image |
You have multiple visual references | Reference Images |
The most suitable mode depends on the materials you already have and how much visual guidance you need.
Prompting Tips for Better Grok Imagine Video Results
Once you understand the three workflows, a few adjustments can help make your prompts more useful.
1. Give the Main Subject a Clear Action
Describe what the subject should do rather than listing several unrelated movements.
For example:
A sea turtle swims slowly through a coral reef.
A hot air balloon gradually rises into the sky.
A camera moves forward toward a glass cabin.
One clear action gives the scene a more focused direction.
2. Specify Camera Movement
Camera movement helps define how the viewer experiences the scene.
Useful descriptions include:
Slow camera push-in
Smooth backward movement
Side-tracking shot
Gentle upward movement
Stable wide-angle shot
Choose a camera direction that supports the subject instead of adding unnecessary movement.
3. Preserve Important Visual Details
When using Starting Image or Reference Images, identify the elements that should remain consistent.
For example:
Subject shape and proportions
Main colors
Building architecture
Product design
Lighting direction
Environmental layout
This is particularly important when the main subject needs to remain recognizable throughout the video.
4. Give Each Reference Image One Main Role
When combining multiple references, explain what each image contributes.
Avoid using several images with conflicting visual directions.
A simple structure is:
Reference 1 = Main Subject + Reference 2 = Environment + Reference 3 = Lighting or Atmosphere
5. Describe Lighting and Atmosphere
Lighting helps establish the visual identity of a scene.
Try descriptions such as:
Warm golden sunrise
Soft natural daylight
Cool blue nighttime lighting
Volumetric underwater sunlight
Green aurora illuminating a snowy landscape
Keep the lighting direction and atmosphere consistent in your instructions.
6. Review Audio Separately
Grok Imagine Video 1.5 supports generated audio as part of its video generation capabilities.
If sound matters for your project, review the audio separately from the visuals.
Check whether the sound matches the scene, whether there are unwanted noises, and whether the timing feels appropriate.
Our three test files contained audio tracks, but we did not conduct a separate subjective evaluation of sound quality.
Frequently Asked Questions
What is the difference between Starting Image and Reference Images?
Starting Image uses one uploaded image as the visual starting point of the generated video. Your prompt describes what should happen after that opening frame.
Reference Images uses multiple images to guide the appearance of subjects, objects, and environments. These references guide the generated scene without requiring the video to begin with one of those images.
How many reference images can I upload on ZMS?
The ZMS page describes support for up to seven image references. Check the upload area in the current workspace for the available limit.
What resolutions are available on ZMS?
The output settings panel displays 480p, 720p, and 1080p. Actual availability may depend on the selected generation mode.
How long can videos be?
The ZMS interface displays duration options from 1 to 15 seconds. Choose the duration according to your project requirements and the options available in the workspace.
How much does Grok Imagine Video 1.5 cost on ZMS?
The credit cost depends on the selected generation mode and output settings.
In our tests, a five-second, 720p, 16:9 video consumed 225 credits in Text to Video, 225 credits in Starting Image, and 229 credits in Reference Images.
Always check the displayed estimate before generating.
Does Grok Imagine Video 1.5 generate audio?
Yes. xAI’s official documentation describes native audio generation as part of its video generation capabilities. Our three test files also contained audio tracks, although we did not conduct a separate sound-quality evaluation.
Which generation mode should I choose?
Choose Text to Video when you only have an idea and want to generate a scene from a written description.
Choose Starting Image when you already have a still image and want to animate it.
Choose Reference Images when you have multiple images that should guide different visual elements of your generated video.
Start Creating with Grok Imagine Video 1.5 on ZMS
Grok Imagine Video 1.5 on ZMS gives you three practical ways to create short AI videos.
Start with a written idea if you want to generate a completely new scene. Upload a starting image if you want to introduce movement into an existing composition. Use multiple references when you need more visual guidance over the final result.
Our three examples demonstrate these workflows through different creative scenarios: an underwater ocean scene, a hot air balloon takeoff, and a northern lights cabin environment.
The best starting point is to choose the workflow that matches your available materials, write a focused prompt, and review the generated video before using it in your project.
Ready to create your own video? Open the Grok Imagine Video 1.5 generator on ZMS AI, select a generation mode, and start creating.