Guides
How to Use Gemini Omni 1.2 Flash on ZMS AI: Step by step
Learn how to use Gemini Omni 1.2 Flash on ZMS AI with five step-by-step video workflows, practical prompts, real examples, and credit tips.

Gemini Omni 1.2 Flash is Google’s multimodal video generation and editing model. It allows creators to generate videos from text prompts, work with image and video references, edit existing footage, and extend video clips with additional content.
On ZMS AI, you can access Gemini Omni 1.2 Flash directly through the AI Video Generator. You can select a generation mode, upload your source materials, describe the result you want, and generate videos within one workspace.
But knowing which mode to select is only part of the process. You also need to understand what materials each mode requires, how to write effective prompts, and how to check the generated result.
This guide walks you through all five Gemini Omni 1.2 Flash modes available on ZMS, with step-by-step instructions and five real generation examples. Whether you want to create a new scene, change an existing video, animate a transformation, or extend a short clip, you will learn how to complete each workflow.
What Is Gemini Omni 1.2 Flash?
Gemini Omni 1.2 Flash is Google’s multimodal video generation and editing model. It combines text understanding with visual generation capabilities, allowing users to create new videos or modify existing footage through natural-language instructions.
Compared with Gemini Omni 1.1 Flash, the 1.2 version introduces several improvements:
Longer video generation: Google supports native video generation and editing of up to 15 seconds.
Improved reference following: The model is designed to maintain visual details from supplied images and video references more consistently.
Conversational editing: Users can refine existing footage through follow-up instructions instead of restarting the entire generation process.
Flexible resolution workflows: Google supports draft generation at 360p and 720p, with options to upscale selected results to 1080p or 4K.
Lower generation pricing: Google announced a 30% reduction in 720p video generation pricing compared with Gemini Omni 1.1 Flash.
These are Google model-level capabilities. The specific options available in a third-party workspace depend on how that platform integrates the model.
On ZMS, Gemini Omni 1.2 Flash is available through the AI Video Generator, with five generation modes displayed in the model interface.
How to Access Gemini Omni 1.2 Flash on ZMS
Before generating a video, you need to open the correct model in the ZMS workspace.
Follow these steps:
Step 1: Open the AI Video Generator
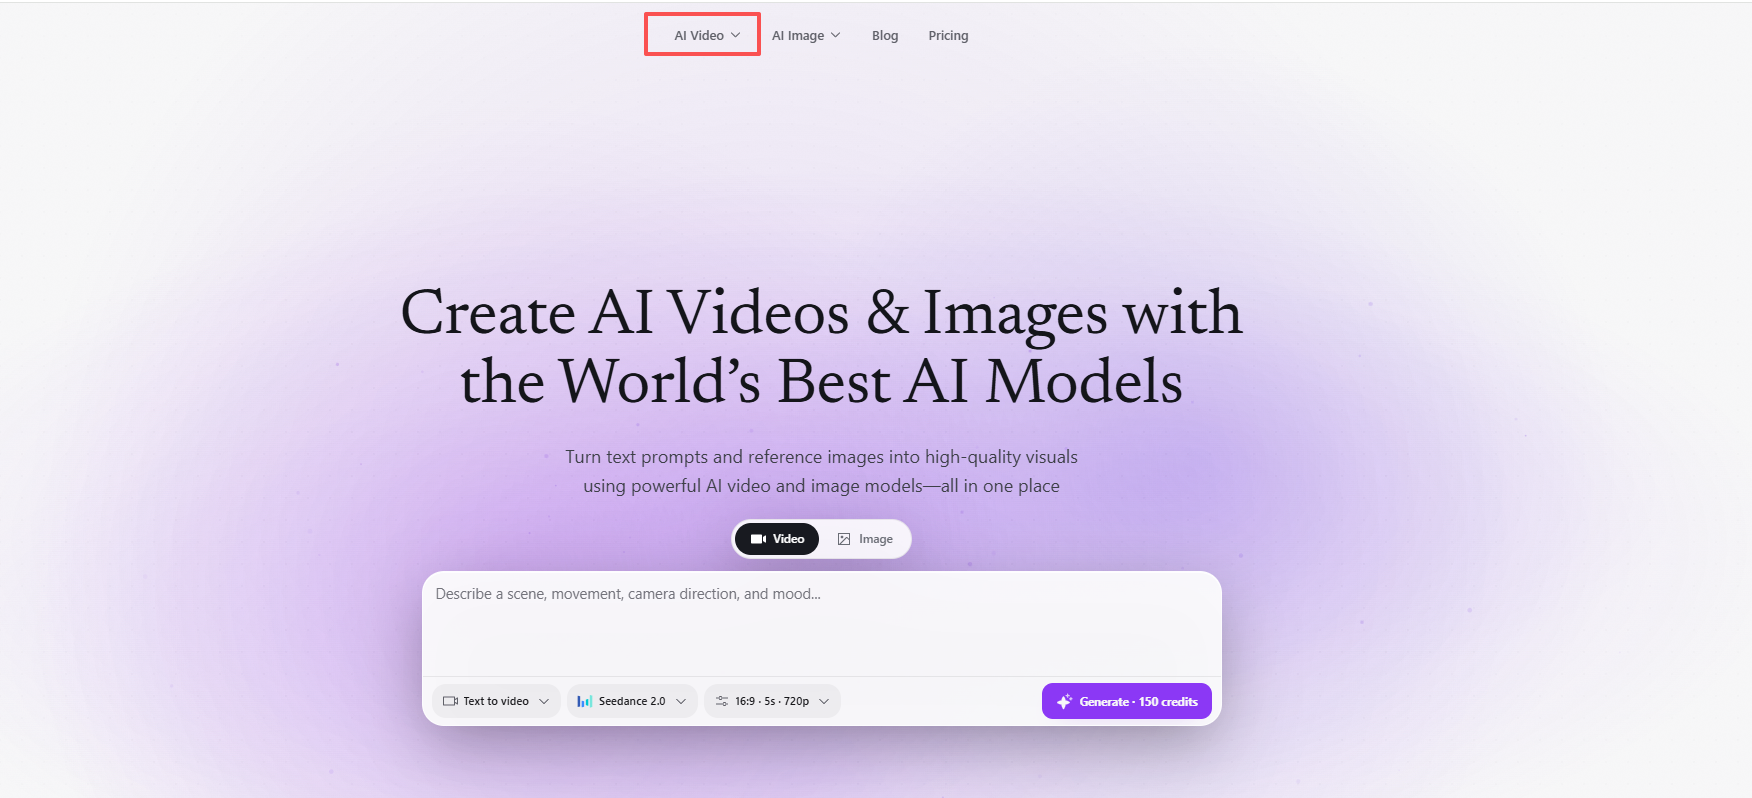
Visit ZMS AI Video Generator to access the video generation workspace.
Step 2: Select Gemini Omni 1.2 Flash
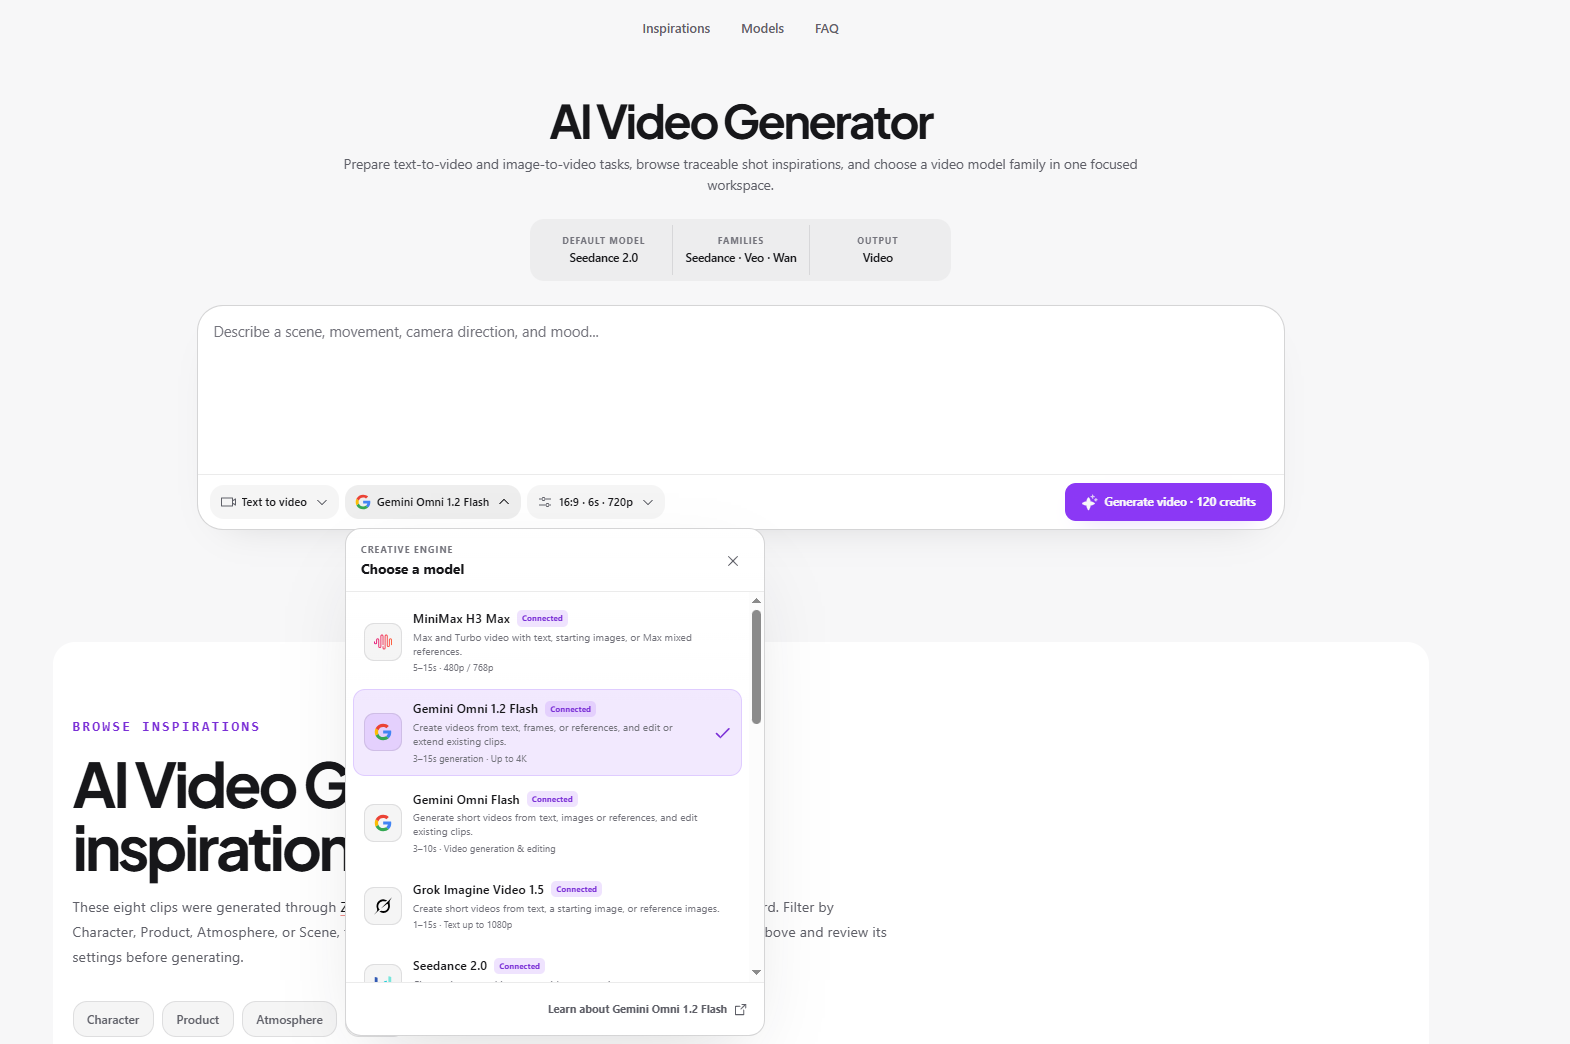
Open the model selector in the generation panel. Find Google in the model list and select Gemini Omni 1.2 Flash.
Make sure the selected model displays the 1.2 version rather than the older 1.1 version.
Step 3: Choose a Generation Mode
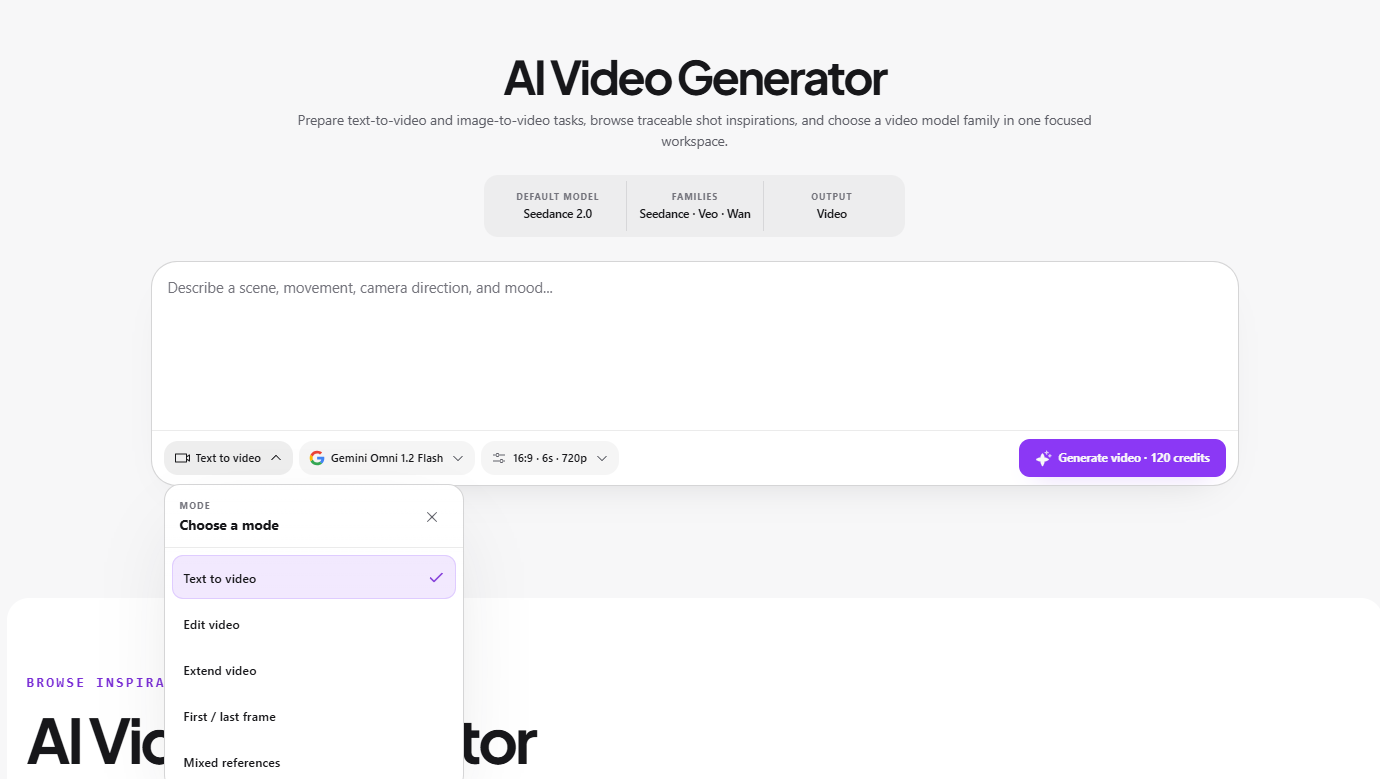
Open the mode selector to view the five available workflows:
Text to Video
Edit Video
Extend Video
First / Last Frame
Mixed References
Each mode has different input requirements. Choose the one that matches your source materials and the result you want to create.
Step 4: Prepare Your Prompt and Reference Materials
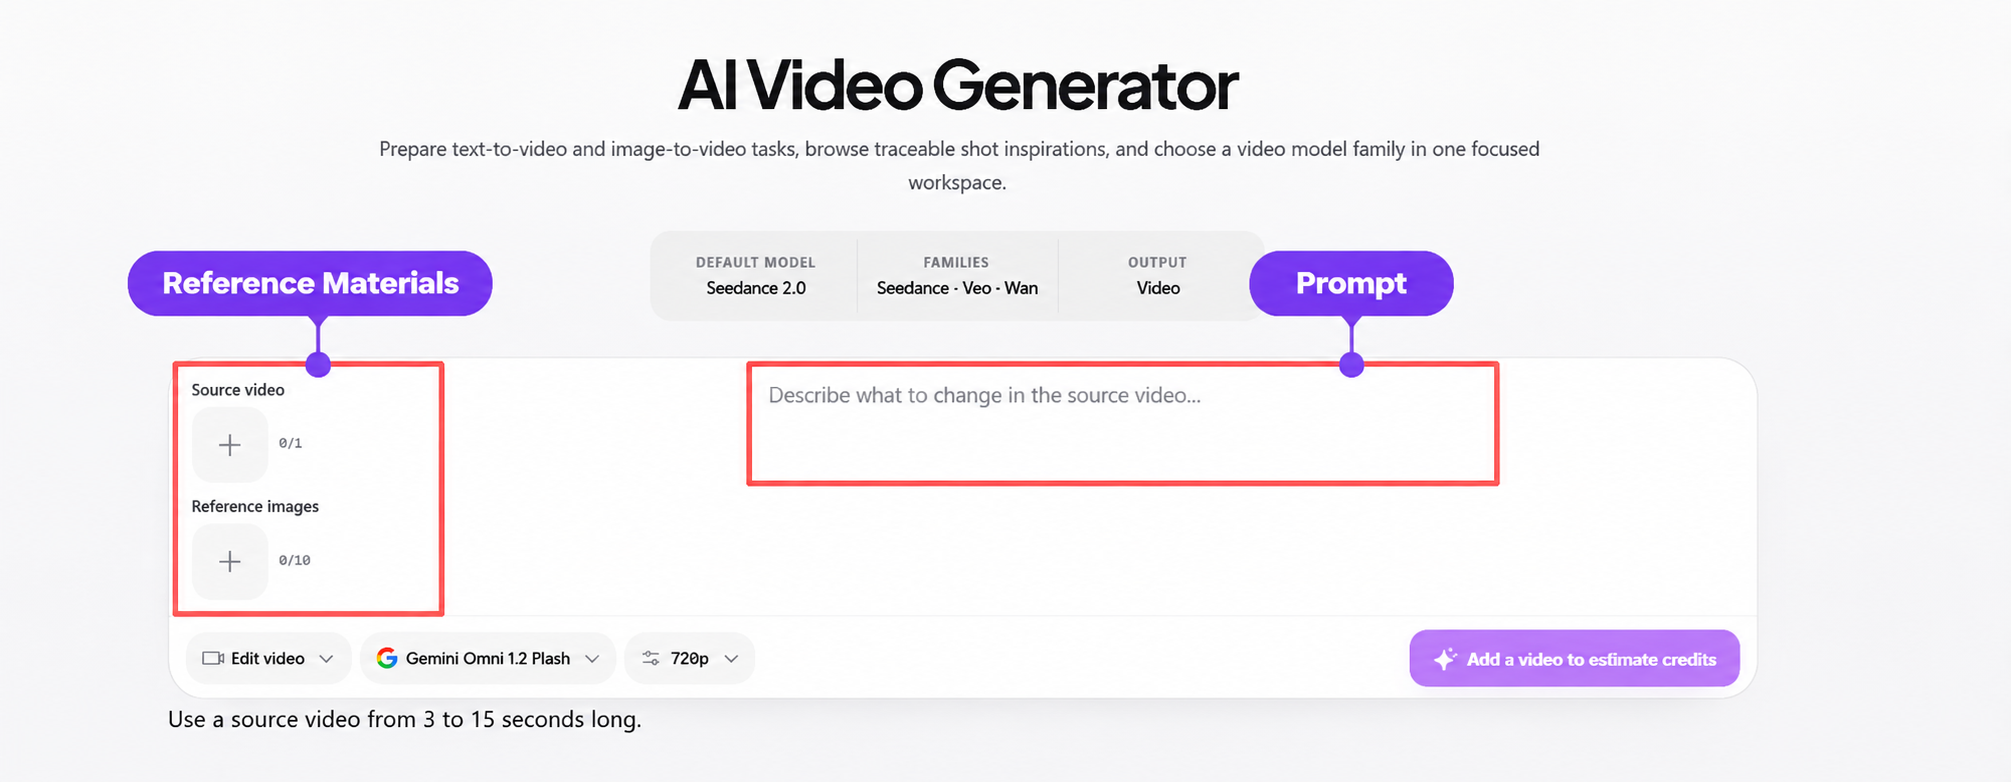
Depending on the selected mode, prepare a text prompt, an existing video, reference images, or a combination of image and video materials.
Your prompt should explain:
What the main subject is.
What action should happen.
Where the scene takes place.
How the camera should move.
Which details must remain unchanged.
Step 5: Configure Your Output Settings
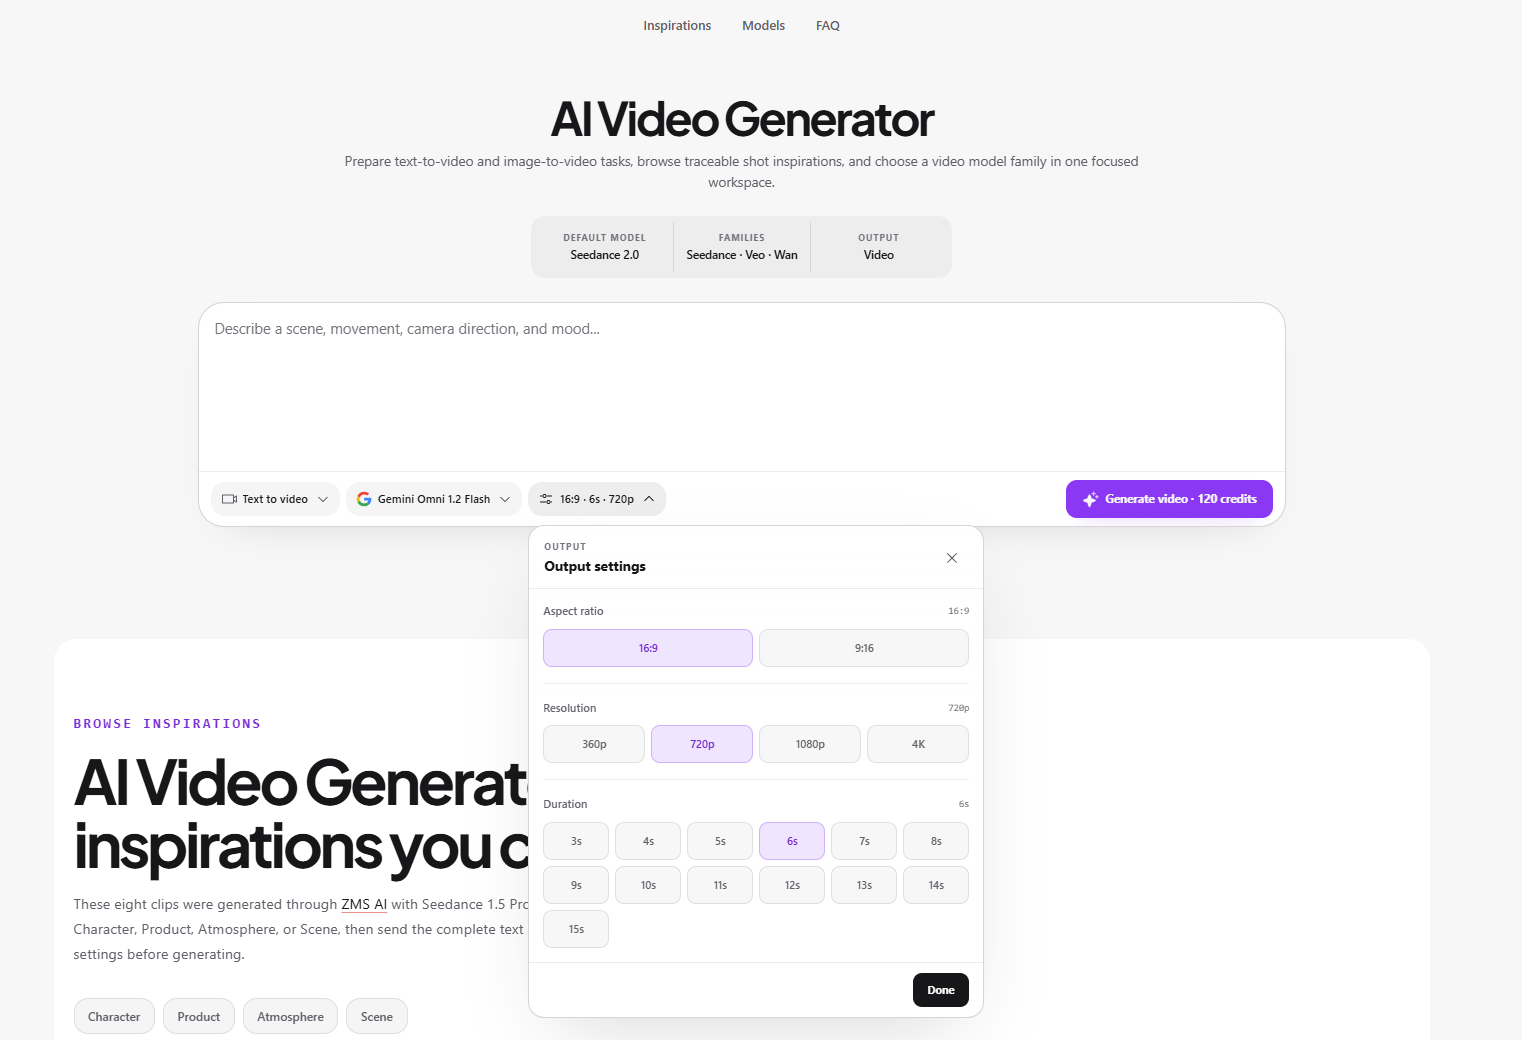
Choose the available aspect ratio, resolution, and duration for your task.
For our five real-world tests, we used 16:9, 720p, and six-second generation settings. The video extension test produced a final clip of approximately 12 seconds.
Available settings can vary by generation mode, so check the options displayed in the workspace.
Step 6: Review Credits and Generate
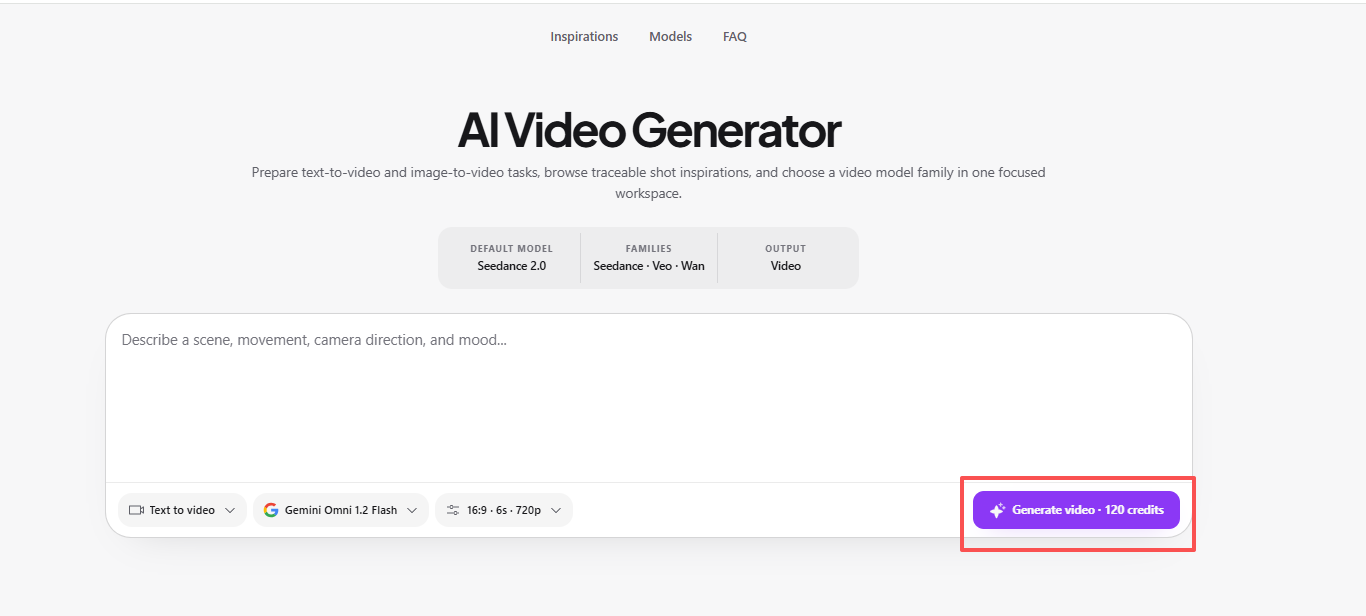
Check the displayed credit estimate before submitting your task.
Click Generate Video, wait for the generation to finish, and review the output. Pay attention to subject consistency, motion, camera movement, and any unintended changes.
How to Use the Five Gemini Omni 1.2 Flash Modes on ZMS
The most important part of using Gemini Omni 1.2 Flash is choosing the right generation mode.
Each mode solves a different video creation problem. The following tutorials explain what to prepare, how to use each mode, and how to write prompts for better results.
1. How to Generate a Video from Text
Mode: Text to Video
Use Text to Video when you want to create a completely new scene without uploading an existing image or video.
This mode is suitable for:
Cinematic scenes
Product advertisements
Lifestyle videos
Atmospheric environments
Creative visual concepts
Step 1: Select Text to Video
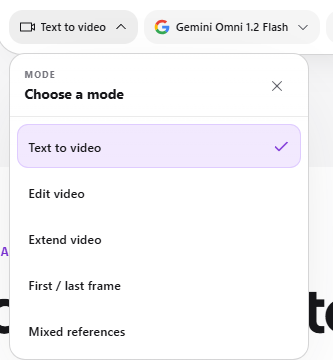
Choose Text to Video from the mode selector.
Step 2: Write Your Video Prompt
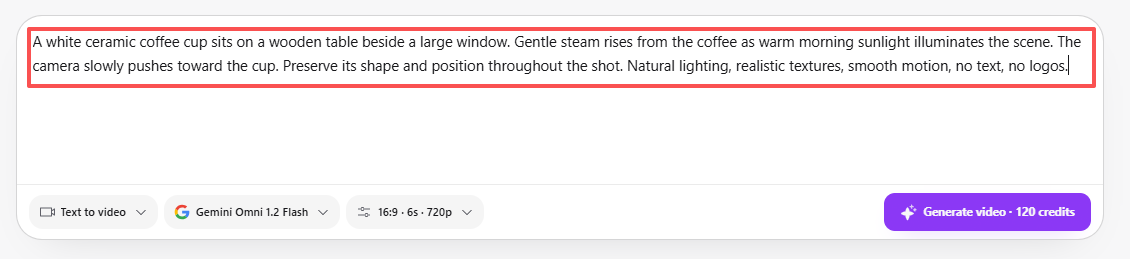
Describe the scene you want to generate. Include the subject, environment, action, camera movement, and visual requirements.
A useful prompt structure is:
Subject + Environment + Action + Camera Movement + Visual Requirements
For example:
A white ceramic coffee cup sits on a wooden table beside a large window. Gentle steam rises from the coffee as warm morning sunlight illuminates the scene. The camera slowly pushes toward the cup. Preserve its shape and position throughout the shot. Natural lighting, realistic textures, smooth motion, no text, no logos.
Step 3: Choose Output Settings
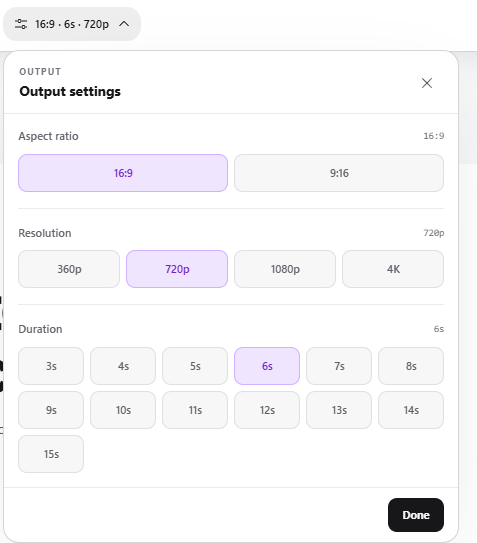
Select your preferred aspect ratio, resolution, and duration from the available options.
Step 4: Check Credits and Generate
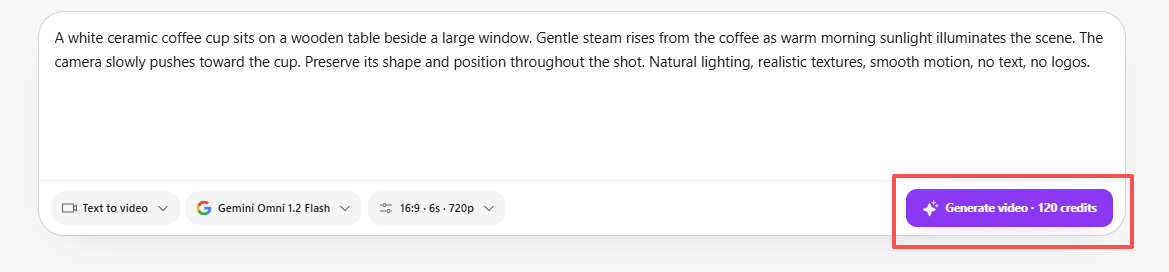
Review the estimated credits and click Generate Video.
Step 5: Review the Output
Check whether the main subject, environment, action, and camera movement match your prompt.
If the generated result is too complicated or misses an important action, simplify the prompt and focus on one main movement.
Practical Tip: Text to Video works best as a starting point when you have an idea but no source footage. Avoid describing too many unrelated actions in a short clip.
2. How to Edit an Existing Video
Mode: Edit Video
Use Edit Video when you already have a video but want to change a specific part of it.
For example, you may want to change a background, adjust the environment, or modify the lighting while keeping the main subject recognizable.
Step 1: Select Edit Video
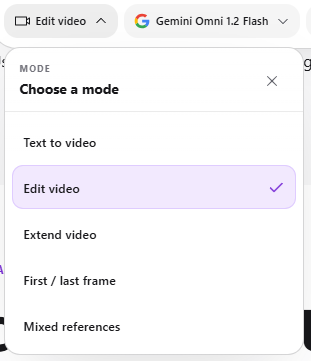
Choose Edit Video from the mode selector.
Step 2: Upload Your Original Video
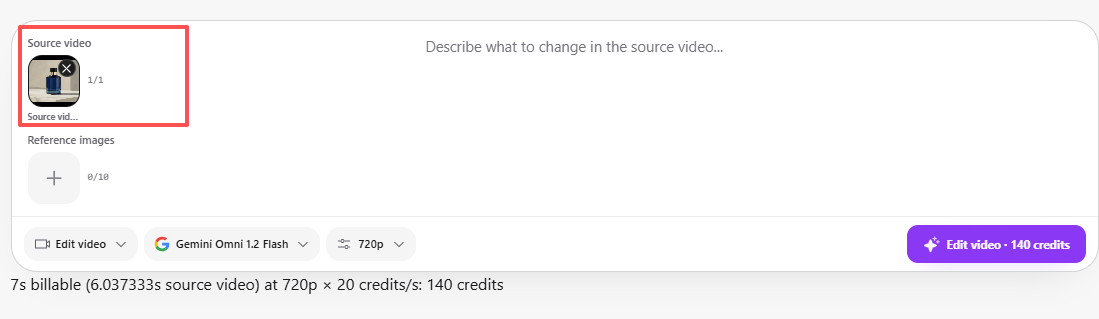
Select the video you want to modify.
Before uploading, make sure the source footage clearly shows the subject or scene you want to edit.
Step 3: Describe the Changes
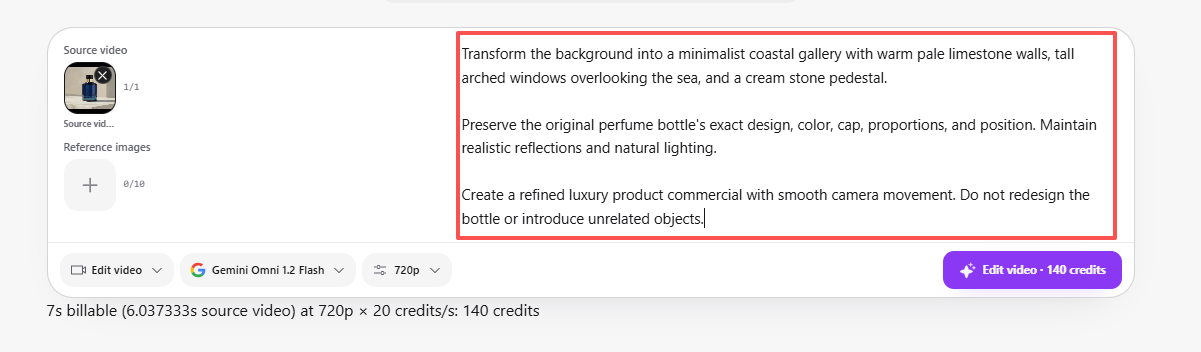
Explain exactly what should change and what should remain unchanged.
For example, if you want to change the background of a product video, you can use:
Transform the background into a minimalist coastal gallery with warm pale limestone walls, tall arched windows overlooking the sea, and a cream stone pedestal.

Preserve the original perfume bottle's exact design, color, cap, proportions, and position. Maintain realistic reflections and natural lighting.

Create a refined luxury product commercial with smooth camera movement. Do not redesign the bottle or introduce unrelated objects.
Step 4: Review Your Settings
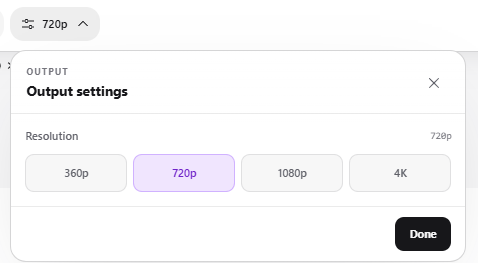
Check the available output settings and displayed credit estimate before generating.
Step 5: Generate and Compare
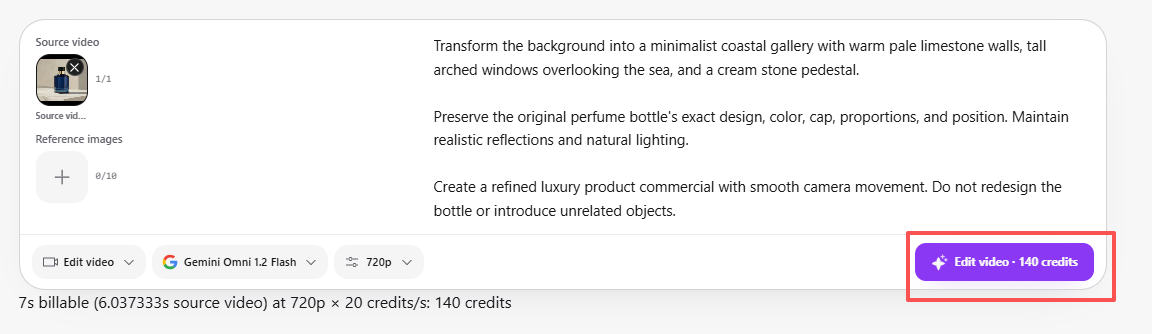
Generate the edited video and compare it with your original footage.
Pay attention to:
Whether the requested background or visual changes were applied.
Whether the main subject remains recognizable.
Whether lighting and shadows look natural.
Whether unintended changes appear in other parts of the video.
Practical Tip: Separate your instructions into two categories: what should change and what must remain unchanged. This makes your editing request more specific.
3. How to Extend an Existing Video
Mode: Extend Video
Use Extend Video when your original clip is too short or when you want to continue an existing action or camera movement.
Instead of creating a completely new scene, the model generates additional footage based on the existing video.
Step 1: Select Extend Video
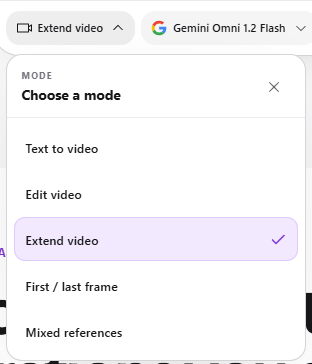
Choose Extend Video from the mode selector.
Step 2: Upload Your Existing Video
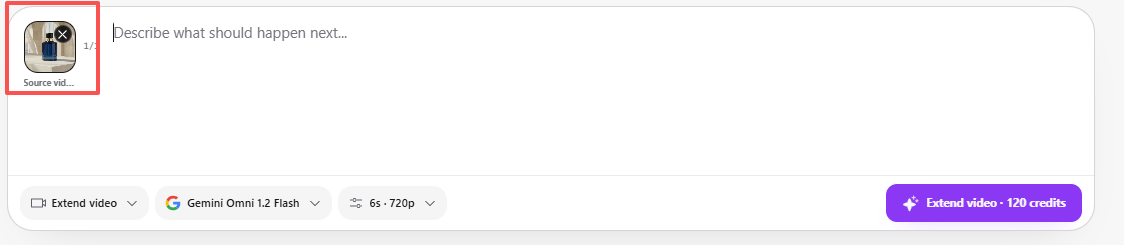
Select the video you want to continue.
Choose a clip with a clear ending point and stable subject movement.
Step 3: Describe How the Video Should Continue
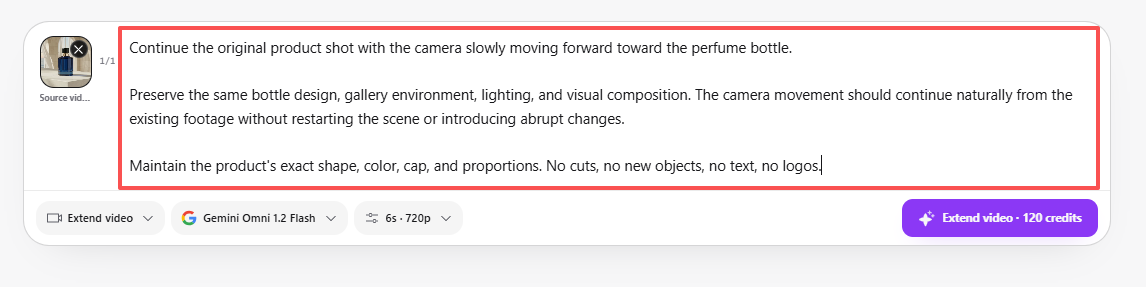
Your prompt should focus on what happens next rather than repeating the entire original scene.
For example:
Continue the original product shot with the camera slowly moving forward toward the perfume bottle.

Preserve the same bottle design, gallery environment, lighting, and visual composition. The camera movement should continue naturally from the existing footage without restarting the scene or introducing abrupt changes.

Maintain the product's exact shape, color, cap, and proportions. No cuts, no new objects, no text, no logos.
Step 4: Check the Extension Settings
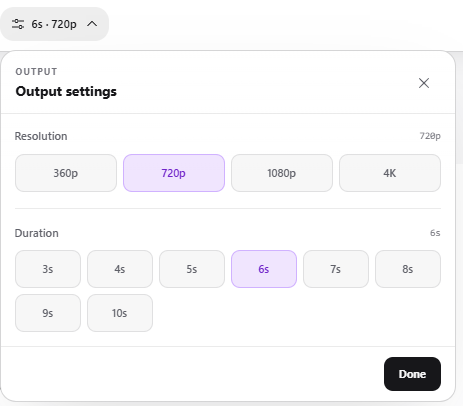
Review the available extension duration, resolution, and credit estimate.
Step 5: Generate and Check Continuity
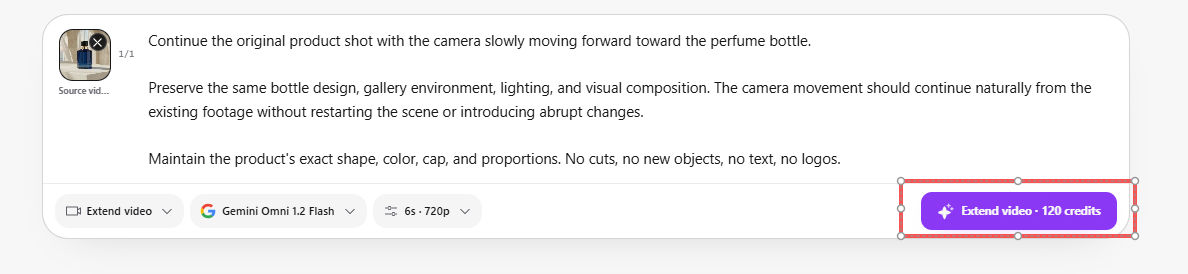
After generation, review the complete video rather than only the newly generated section.
Pay particular attention to the transition point between the original footage and the extension.
Check whether:
The subject remains consistent.
The camera movement continues naturally.
The lighting and environment remain recognizable.
There are no obvious jumps or abrupt changes.
Practical Tip: A focused continuation prompt usually works better than asking the model to introduce several new actions at once.
4. How to Use First / Last Frame
Mode: First / Last Frame
Use First / Last Frame when you already know how your video should begin and end.
You provide two images, and the model generates the intermediate motion needed to connect those visual states.
This mode is useful for:
Product transformations
Before-and-after sequences
Flower blooming animations
Object changes
Planned visual transitions
Step 1: Select First / Last Frame
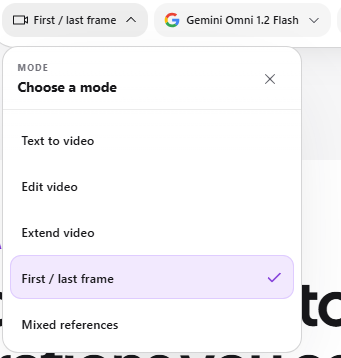
Choose First / Last Frame from the mode selector.
Step 2: Prepare Your First and Last Images

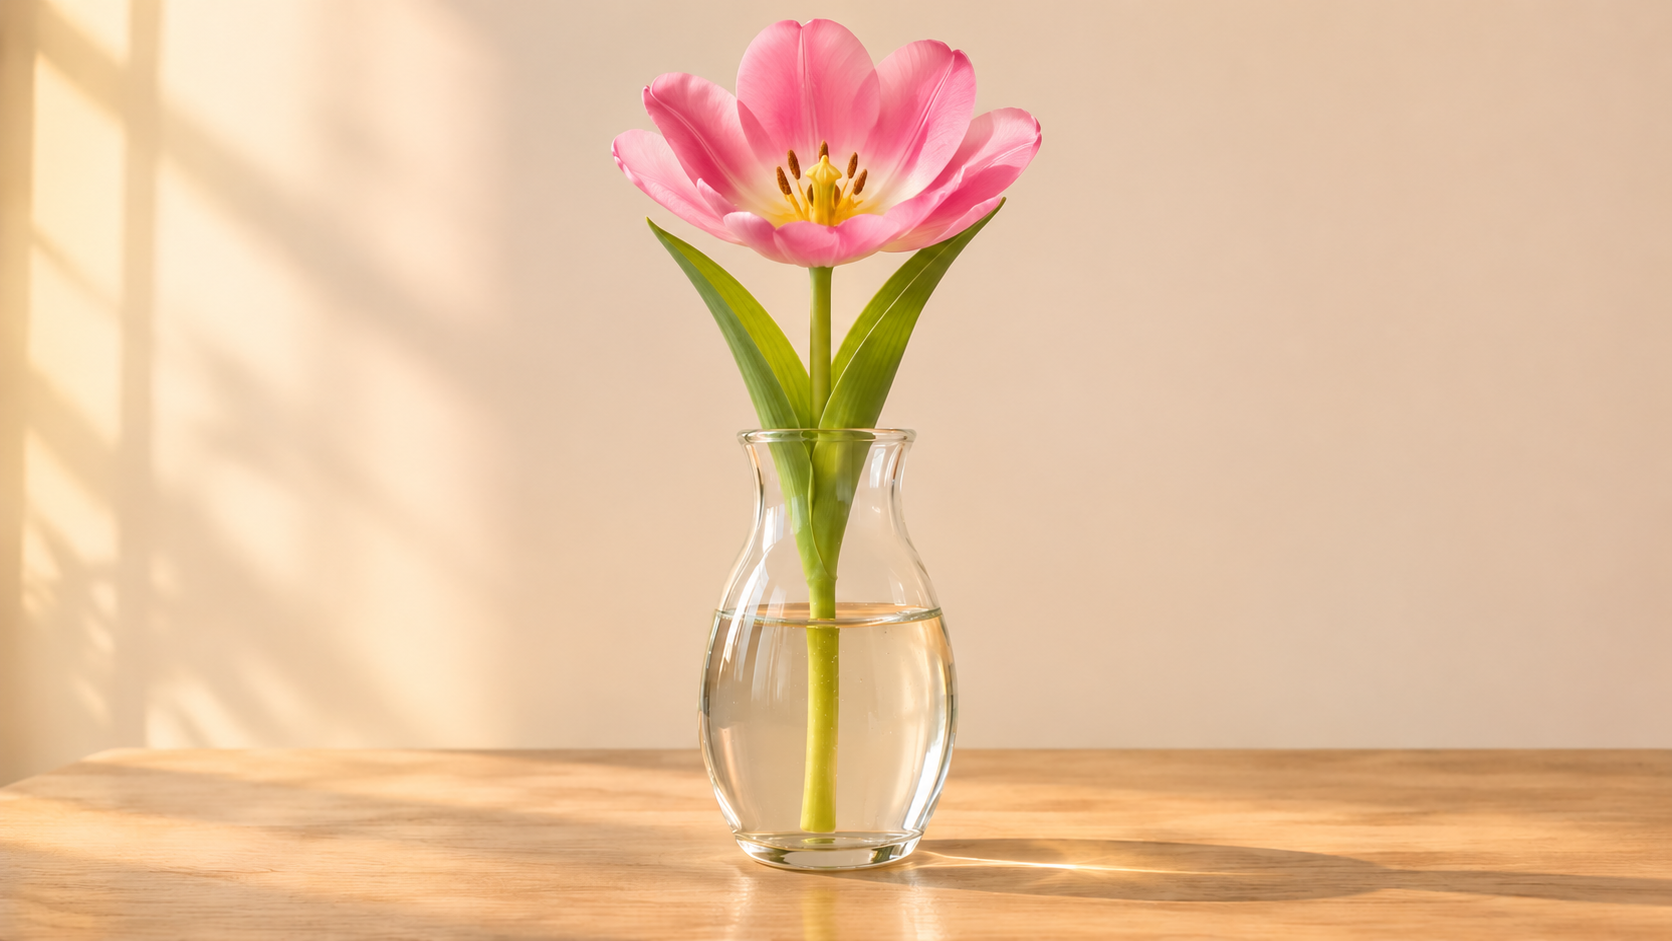
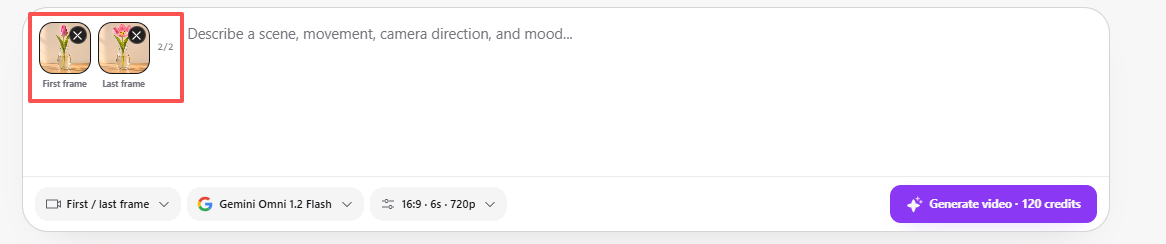
Upload the image that represents the beginning of your video and the image that represents the desired ending.
For better results, use images with compatible compositions and consistent subjects.
Step 3: Describe the Transition
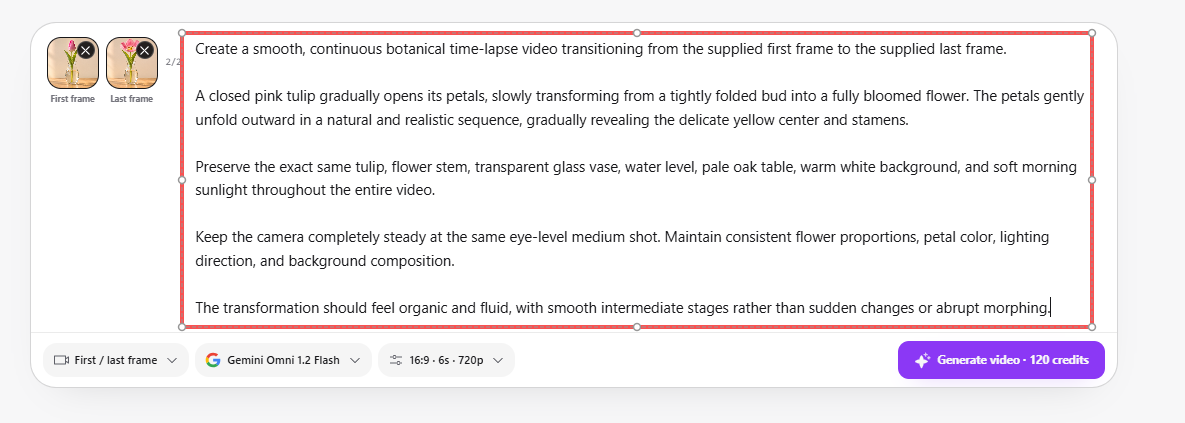
Explain how the subject should change between the two frames.
For example:
Create a smooth, continuous botanical time-lapse video transitioning from the supplied first frame to the supplied last frame.

A closed pink tulip gradually opens its petals, slowly transforming from a tightly folded bud into a fully bloomed flower. The petals gently unfold outward in a natural and realistic sequence, gradually revealing the delicate yellow center and stamens.

Preserve the exact same tulip, flower stem, transparent glass vase, water level, pale oak table, warm white background, and soft morning sunlight throughout the entire video.

Keep the camera completely steady at the same eye-level medium shot. Maintain consistent flower proportions, petal color, lighting direction, and background composition.

The transformation should feel organic and fluid, with smooth intermediate stages rather than sudden changes or abrupt morphing.
Step 4: Configure the Output
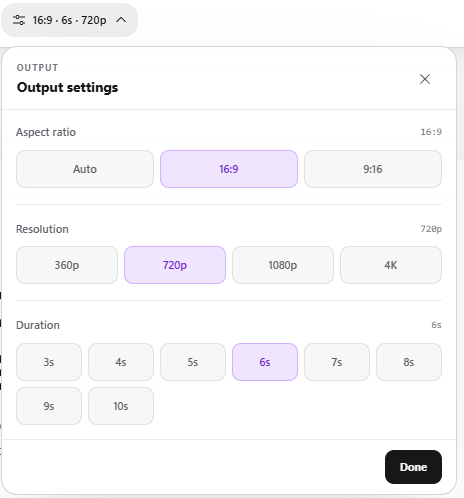
Choose the available aspect ratio, resolution, and duration. Check the estimated credits.
Step 5: Generate and Review the Transition
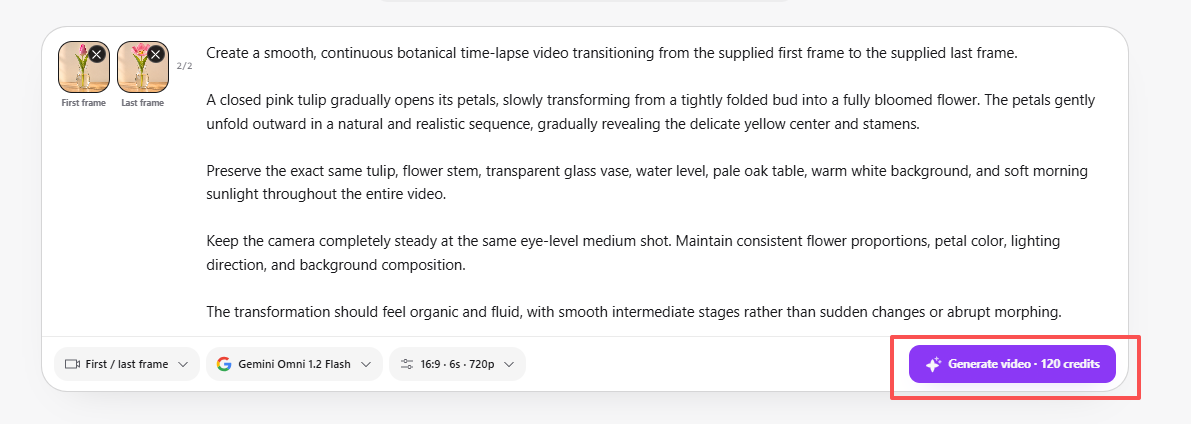
After generation, check whether the video follows the intended beginning and ending states.
Pay attention to the movement between the two images, not just whether the final frame looks correct.
Practical Tip: The two images should show the same subject and a clear visual progression. If the compositions are too different, the transition may be less predictable.
5. How to Use Mixed References
Mode: Mixed References
Use Mixed References when you want to combine image and video references to guide the generated result.
This is especially useful for product videos, where you may want to preserve a specific product appearance while using a video to guide camera movement.
In the ZMS interface we used, separate upload areas were available for reference images and reference videos. The counters showed support for up to 10 images and 3 videos.
Step 1: Select Mixed References
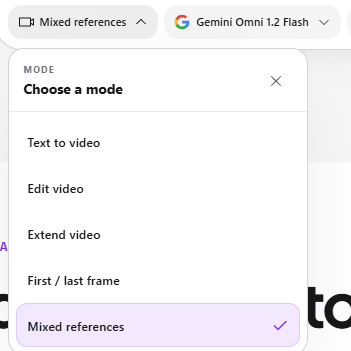
Choose Mixed References from the mode selector.
Step 2: Upload Your Reference Materials
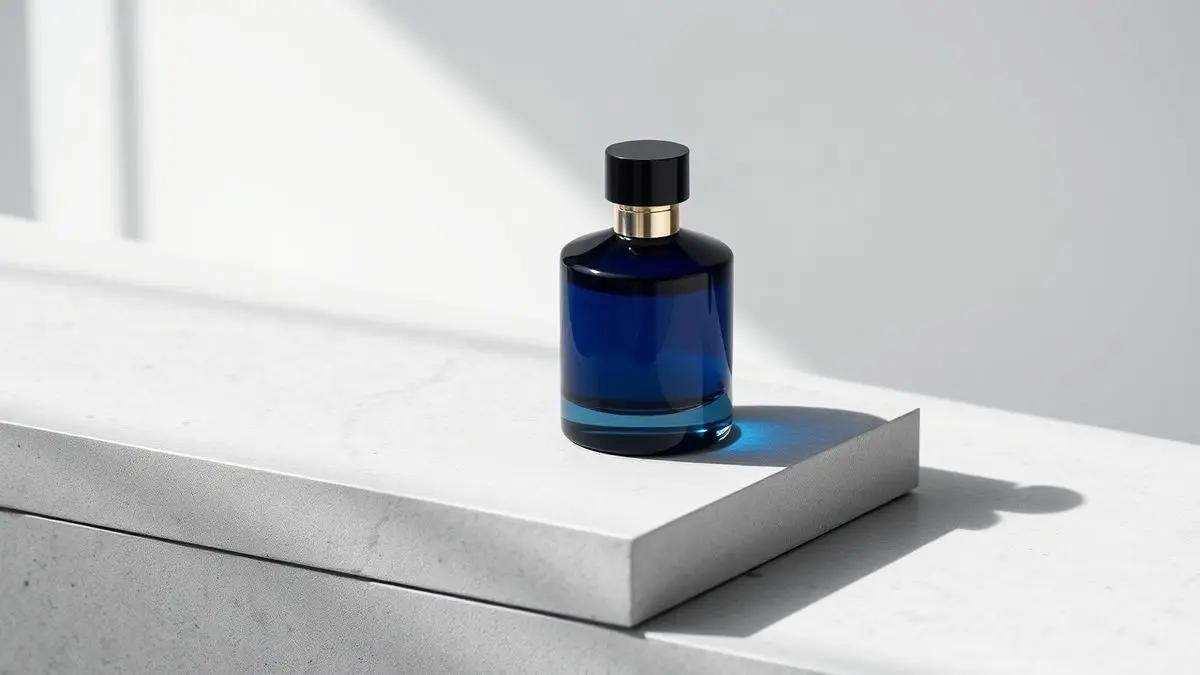
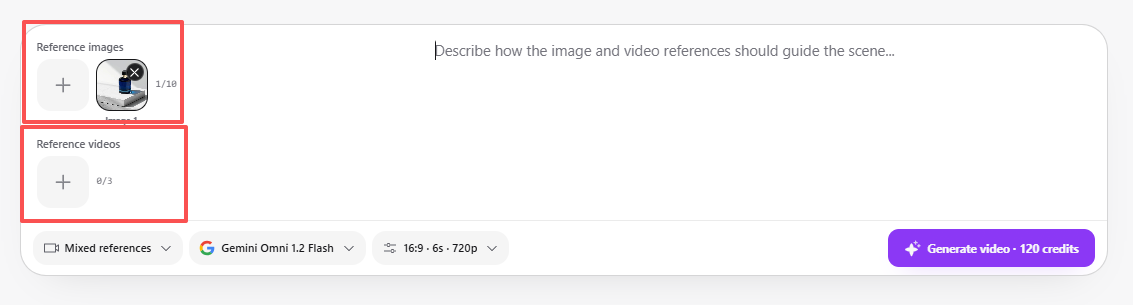
Add the images or videos you want to use as references.
For example:
An image can define the appearance of a product.
A video can guide camera movement.
Additional images can provide visual details or alternative views.
Step 3: Explain the Role of Each Reference
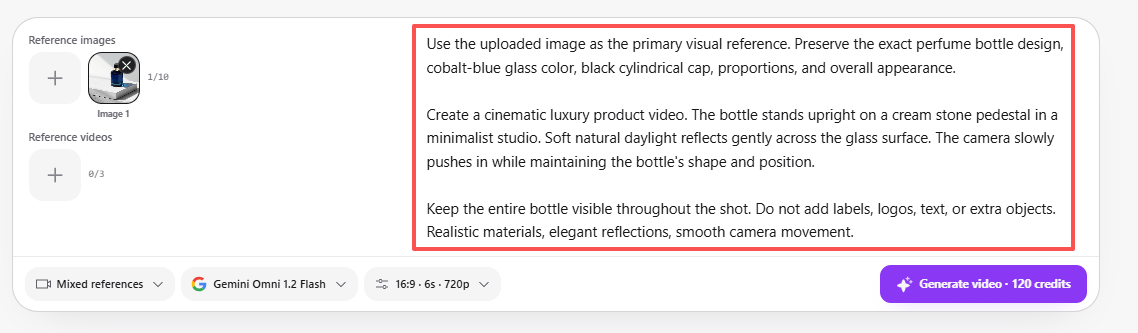
Do not simply upload several files without explaining how they should influence the result.
For a product video, you could use:
Use the uploaded image as the primary visual reference. Preserve the exact perfume bottle design, cobalt-blue glass color, black cylindrical cap, proportions, and overall appearance.

Create a cinematic luxury product video. The bottle stands upright on a cream stone pedestal in a minimalist studio. Soft natural daylight reflects gently across the glass surface. The camera slowly pushes in while maintaining the bottle's shape and position.

Keep the entire bottle visible throughout the shot. Do not add labels, logos, text, or extra objects. Realistic materials, elegant reflections, smooth camera movement.
Step 4: Configure Your Output
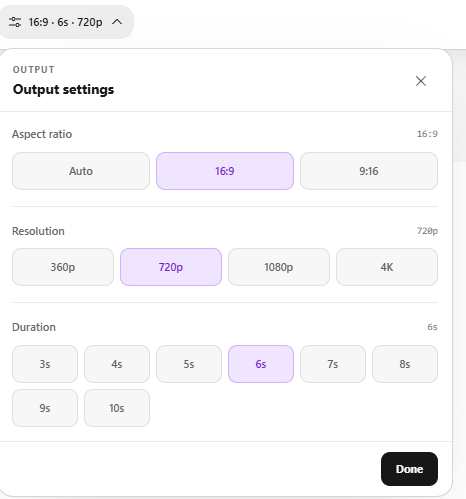
Select the available aspect ratio, resolution, and duration. Review the displayed credit estimate.
Step 5: Generate and Check Reference Consistency
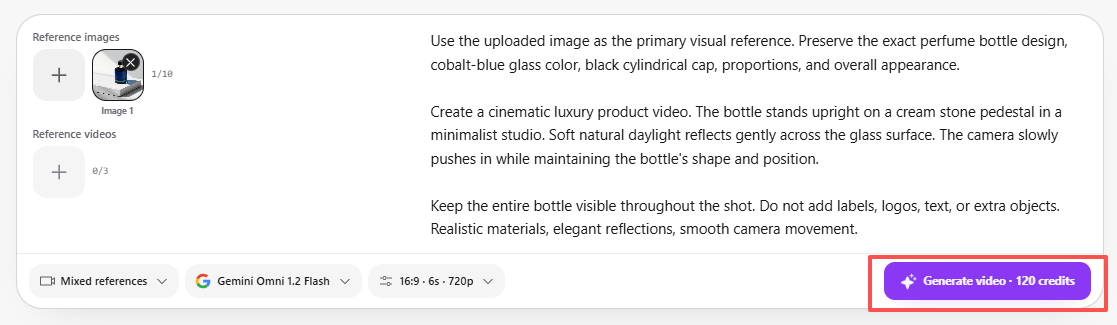
After generation, compare the result with your uploaded materials.
Check whether the product appearance, colors, proportions, and requested visual direction have been retained.
Practical Tip: Give each reference a clear purpose. Avoid conflicting instructions about product appearance, environment, or movement.
5 Real-World Gemini Omni 1.2 Flash Examples on ZMS
To demonstrate how the five modes work in practice, we generated five videos on ZMS using different input types and workflows.
All five output files were verified at 1280 × 720 resolution and 24 FPS. Four clips were approximately six seconds long, while the extended clip was approximately 12 seconds.
The following examples show the actual prompts, input materials, and results from our tests.
Example 1: Creating a Coffee Scene with Text to Video
Goal: Generate a realistic coffee product scene using only a text prompt.
Input: Text prompt only.
Prompt:
A small white ceramic coffee cup sits on a wooden table beside a large window. Warm morning sunlight gradually moves across the table as gentle steam rises from the coffee. The camera slowly pushes toward the cup, creating a calm and cinematic lifestyle commercial. Preserve the cup's exact shape and position throughout the shot. Natural lighting, realistic textures, smooth motion, no people, no text, no logos.
Settings:
Parameter | Value |
|---|---|
Mode | Text to Video |
Aspect Ratio | 16:9 |
Resolution | 720p |
Duration | 6 seconds |
Displayed Estimate | 120 credits |
Observed Result:
The generated video showed a white ceramic cup on a wooden table near a window. Steam was visible rising from the coffee, and the camera gradually moved closer to the cup.
The gradual sunlight movement was less noticeable than requested, but the main subject and camera movement were recognizable.
Example Takeaway: A clear subject and one main camera movement are a practical starting point for text-to-video generation.
Example 2: Creating a Perfume Video with Mixed References
Goal: Use a product image as a visual reference to generate a luxury perfume advertisement.
Input: One reference image of a cobalt-blue glass perfume bottle with a black cylindrical cap.
Prompt:
Use the uploaded image as the primary visual reference. Preserve the exact perfume bottle design, cobalt-blue glass color, black cylindrical cap, proportions, and overall appearance.

Create a cinematic luxury product video. The bottle stands upright on a cream stone pedestal in a minimalist studio. Soft natural daylight reflects gently across the glass surface. The camera slowly pushes in while maintaining the bottle's shape and position.

Keep the entire bottle visible throughout the shot. Do not add labels, logos, text, or extra objects. Realistic materials, elegant reflections, smooth camera movement.
Settings:
Parameter | Value |
|---|---|
Mode | Mixed References |
Reference Images | 1 |
Reference Videos | 0 |
Aspect Ratio | 16:9 |
Resolution | 720p |
Duration | 6 seconds |
Displayed Estimate | 120 credits |
Observed Result:
The generated video retained the main appearance of the blue perfume bottle and placed it on a minimalist stone pedestal.
The bottle remained upright and recognizable while the camera gradually moved closer to the product. Small product details still required comparison with the original reference.
Example Takeaway: Mixed References is useful when you want to guide product appearance instead of generating an entirely new subject.
Example 3: Changing a Perfume Video Background with Edit Video
Goal: Change the environment of an existing perfume video while preserving the main product.
Input: An original perfume bottle video.
Prompt:
Transform the background into a minimalist coastal gallery with warm pale limestone walls, tall arched windows overlooking the sea, and a cream stone pedestal.

Preserve the original perfume bottle's exact design, color, cap, proportions, and position. Maintain realistic reflections and natural lighting.

Create a refined luxury product commercial with smooth camera movement. Do not redesign the bottle or introduce unrelated objects.
Settings:
Parameter | Value |
|---|---|
Mode | Edit Video |
Input | Existing perfume video |
Resolution | 720p |
Output Duration | Approximately 6 seconds |
Observed Result:
The generated video placed the perfume bottle in a coastal gallery environment with tall arched windows and the sea visible in the background.
The bottle remained upright and visually recognizable, and the overall scene was visually coherent.
Example Takeaway: Edit Video is a useful workflow when you already have footage worth keeping but want to change its visual environment.
Example 4: Creating a Blooming Tulip with First / Last Frame
Goal: Generate a transformation between a closed flower bud and a fully bloomed tulip.
Input:
First frame: A closed pink tulip bud.
Last frame: The same pink tulip in full bloom.
Prompt:
Create a smooth, continuous botanical time-lapse video transitioning from the supplied first frame to the supplied last frame.

A closed pink tulip gradually opens its petals, slowly transforming from a tightly folded bud into a fully bloomed flower. The petals gently unfold outward in a natural and realistic sequence, gradually revealing the delicate yellow center and stamens.

Preserve the exact same tulip, flower stem, transparent glass vase, water level, pale oak table, warm white background, and soft morning sunlight throughout the entire video.

Keep the camera completely steady at the same eye-level medium shot. Maintain consistent flower proportions, petal color, lighting direction, and background composition.

The transformation should feel organic and fluid, with smooth intermediate stages rather than sudden changes or abrupt morphing.
Settings:
Parameter | Value |
|---|---|
Mode | First / Last Frame |
Input | 2 reference images |
Aspect Ratio | 16:9 |
Resolution | 720p |
Duration | 6 seconds |
Displayed Estimate | 120 credits |
Observed Result:
The video showed the tulip progressing from a closed bud to an open flower. The petals gradually separated, and the yellow center became increasingly visible.
The vase, table, and background remained visually consistent.
Example Takeaway: First / Last Frame is useful when you already know the beginning and ending visual states of your video.
Example 5: Extending an Edited Perfume Video
Goal: Extend an existing video while maintaining visual continuity.
Input: The six-second edited perfume video generated in Example 3.
Prompt:
The cobalt-blue glass perfume bottle remains upright on the cream-stone surface inside the coastal gallery. The camera continues its slow, smooth forward movement toward the bottle.

Soft morning sunlight shifts gently across the glass surface, creating subtle and realistic reflections. The sheer curtains move slightly in a gentle ocean breeze, while the calm sea remains visible through the arched windows.

Maintain the exact bottle design, glass color, black cylindrical cap, proportions, and existing environment. Preserve visual continuity with the original footage.

Create a natural continuation without restarting the scene or introducing abrupt camera changes.

No cuts, no new objects, no people, no text, no logos.
Settings:
Parameter | Value |
|---|---|
Mode | Extend Video |
Input | Example 3 output |
Original Duration | 6 seconds |
Extension Duration | 6 seconds |
Final Duration | Approximately 12 seconds |
Resolution | 720p |
Displayed Estimate | 120 credits |
Observed Result:
The final video was approximately 12 seconds long. The perfume bottle and coastal gallery environment remained recognizable, and the camera continued moving closer to the product.
This example also demonstrates a connected workflow: first edit an existing video, then extend the edited result.
Example Takeaway: Extending a suitable existing clip can help create a longer product sequence without starting from scratch.
Gemini Omni 1.2 Flash Settings and Credits on ZMS
Before generating a video, review the available output settings and displayed credit estimate.
For our tests, the common configuration was:
Setting | Test Configuration |
|---|---|
Aspect Ratio | 16:9 |
Resolution | 720p |
Standard Generation Duration | 6 seconds |
Frame Rate | 24 FPS in generated files |
The ZMS interface displayed a 120-credit estimate for several six-second, 720p configurations, including Text to Video, Mixed References, First / Last Frame, and Extend Video.
The estimate for the Edit Video test was not separately recorded.
These are observed interface estimates from our testing screenshots, not a universal price guarantee. Actual costs may differ depending on the selected settings and current workspace configuration.
Google’s API pricing and ZMS credit pricing are also different. Google’s announced API price reduction does not automatically determine the credits charged on ZMS.
Always check the current estimate before submitting a generation request. Actual account deductions should be verified in your generation history.
Tips for Getting Better Results with Gemini Omni 1.2 Flash
Choosing the correct mode is important, but prompt quality and source materials also affect the final result.
Here are five practical tips based on the workflows above.
1. Focus on One Main Action
Avoid combining several unrelated actions into a short video.
Instead of asking a product to rotate, change color, move across a room, and transform into another object, focus on one primary action.
A focused prompt makes it easier to evaluate whether the model followed your instructions.
2. Specify Camera Movement
Use direct descriptions such as:
Slow camera push-in
Smooth backward movement
Gentle left-to-right camera pan
Stable eye-level shot
Slow camera orbit around the subject
Remember that specifying a camera movement does not guarantee that the generated video will reproduce it exactly. Always review the output.
3. Identify Details That Must Remain Unchanged
For product videos, specify important visual characteristics:
Product shape
Color and material
Cap or packaging design
Position and proportions
Background and lighting
For reference-based generation, these instructions help clarify which details matter most.
4. Give Each Reference a Clear Purpose
When using Mixed References, explain what each uploaded file should guide.
For example, an image can define product appearance, while a video can guide movement. Avoid giving conflicting instructions to different references.
5. Check the Original Video Before Extending It
If you plan to extend a clip, review the original output first.
Check whether the subject is stable, whether the movement is natural, and whether the scene is suitable for continuation.
Extending an unsuitable clip may carry its visual problems into the next section.
Frequently Asked Questions
What generation modes are available on ZMS?
The interface displays five modes: Text to Video, Edit Video, Extend Video, First / Last Frame, and Mixed References.
Does ZMS have a separate Image to Video mode?
The current mode selector does not show a separate option named Image to Video. Instead, you can use First / Last Frame when you want to control a video using beginning and ending images, or Mixed References when you want to guide a generation with reference images and videos.
Can Gemini Omni 1.2 Flash generate 15-second videos?
Google officially documents native video generation and editing of up to 15 seconds. However, the maximum duration available in ZMS should be checked in its current settings selector rather than assumed from Google’s model specifications.
Can I use an existing video as input?
Yes. ZMS provides Edit Video and Extend Video modes for existing footage. Mixed References also provides a separate reference-video upload area.
How much does Gemini Omni 1.2 Flash cost on ZMS?
The cost depends on the selected settings and the estimate displayed in the workspace.
In our screenshots, several six-second, 720p tasks displayed an estimate of 120 credits. Always check the current estimate before generating.
What is the difference between Edit Video and Extend Video?
Edit Video is used to change something in an existing clip, such as its background or lighting.
Extend Video adds new footage after an existing clip, allowing the original scene to continue.
Can I use Gemini Omni 1.2 Flash for product videos?
Yes. Product videos are one of the practical workflows demonstrated in our examples.
Mixed References can help guide product appearance, while Edit Video and Extend Video provide additional ways to refine and continue existing product footage.
What is new in Gemini Omni 1.2 Flash compared with 1.1?
Google introduced several updates in Gemini Omni 1.2 Flash, including native video generation of up to 15 seconds, improved reference following, conversational editing, and lower 720p generation pricing.
The actual features and settings available on ZMS depend on its integration and workspace configuration.
Final Thoughts
Gemini Omni 1.2 Flash on ZMS provides five different workflows for creating and editing short videos.
The right mode depends on what you want to accomplish. Choose Text to Video when you are starting with an idea, Edit Video when you want to modify existing footage, Extend Video when you need additional content, First / Last Frame when you want to control the beginning and ending states, and Mixed References when you need visual guidance from multiple source materials.
Our five practical examples demonstrate how these modes can be used for coffee scenes, product advertisements, background changes, flower transformations, and video extension.
The best way to get started is to choose one workflow, prepare the right source materials, and write a focused prompt. Review the generated video carefully and adjust your instructions when necessary.
Ready to create your first video? Open the ZMS AI Video Generator, select Gemini Omni 1.2 Flash, choose a generation mode, and start creating.