Nano Banana
Nano Banana 2 on ZMS AI: Prompts, References, Output
Learn how to create and edit AI images with Nano Banana 2 on ZMS AI, from writing effective prompts and assigning reference roles to choosing output settings and reviewing results.
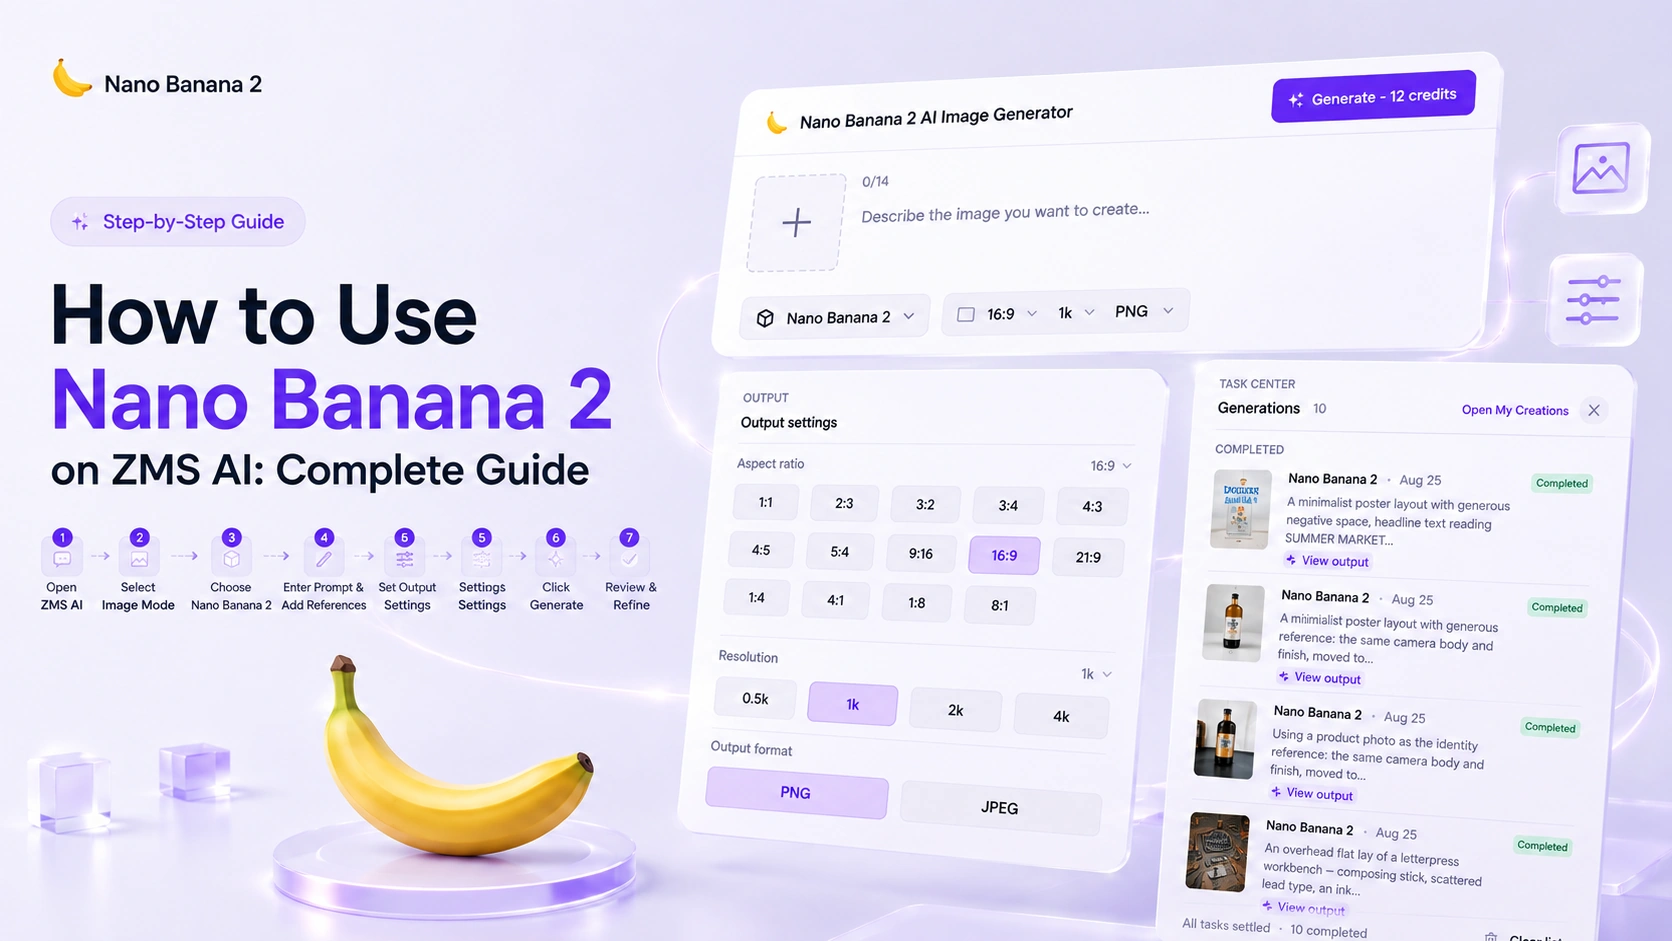
Nano Banana 2 lets you generate new images or edit existing ones from text prompts and up to 14 reference images, making it useful for product photography, brand assets, editorial illustration, and reference-led design work.
With ZMS AI, you can access Nano Banana 2 from a focused creative workspace, enter your prompt, add references, choose resolution and aspect ratio, and generate without configuring anything outside the page.
In this guide, you’ll learn how to use Nano Banana 2 on ZMS AI step by step, how to choose the right settings, and how to write prompts that produce consistent, reviewable results.
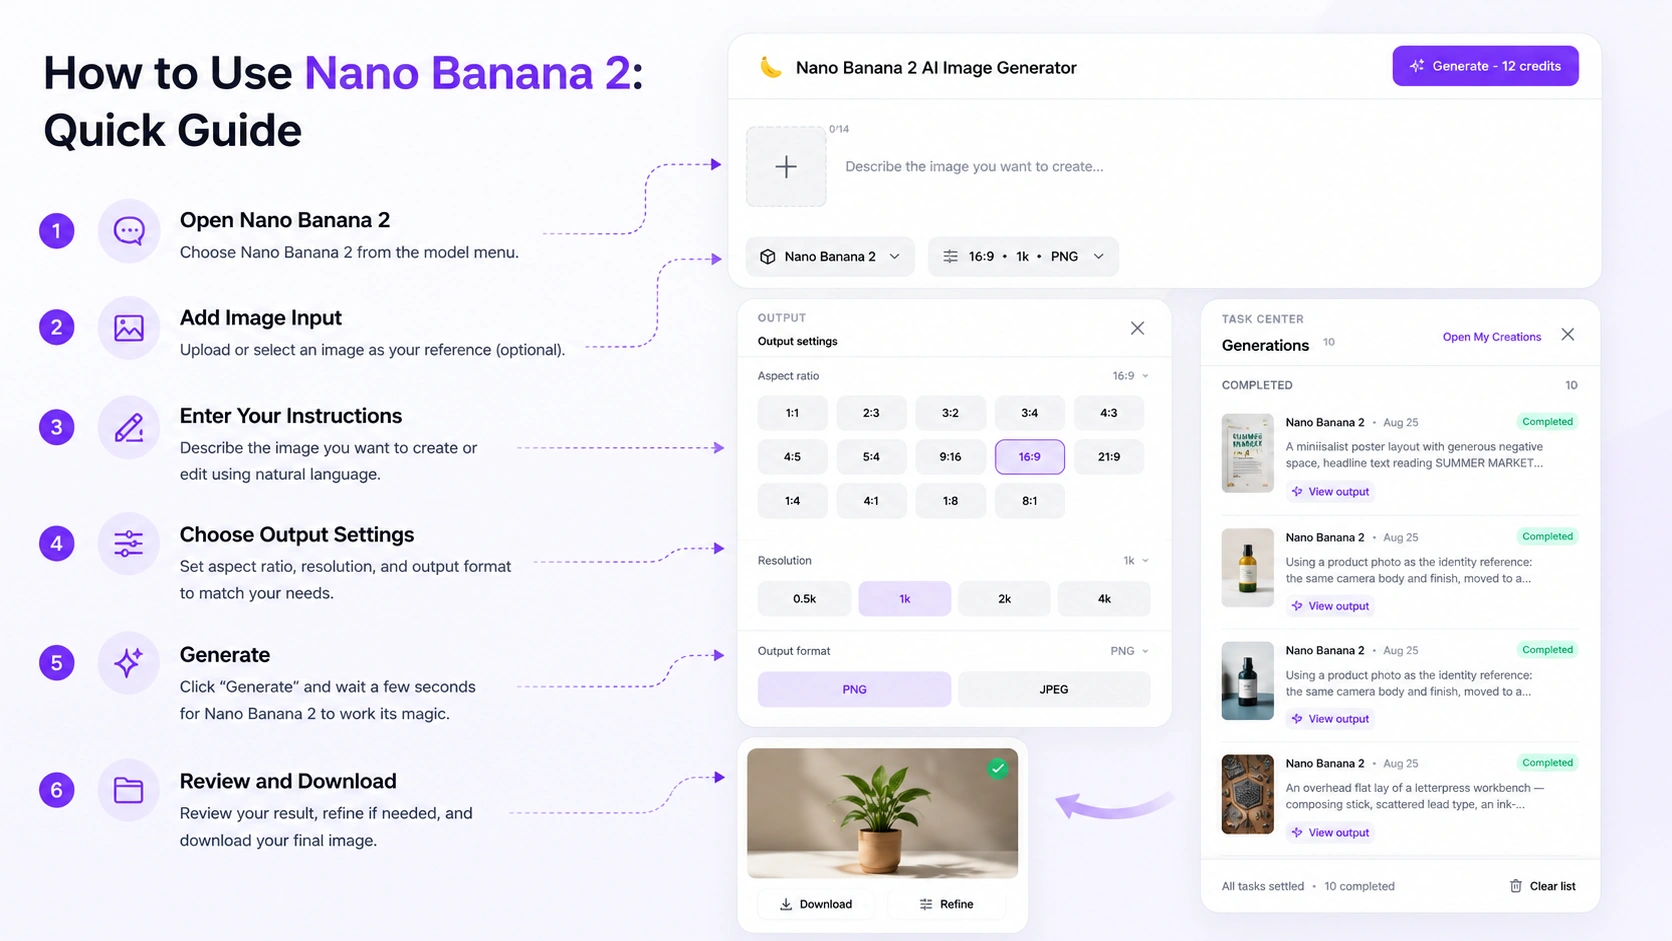
How to Use Nano Banana 2: Quick Guide
The basic workflow is simple:
Open ZMS AI.
Select Image mode.
Choose Nano Banana 2.
Enter your prompt, and add references if the task needs them.
Choose resolution, aspect ratio, and format.
Click Generate.
Review and refine your result.
In short:
Idea → Prompt (+ references) → Nano Banana 2 → Output settings → Generate → Refine
For better results, describe not only what you want to see, but also what each reference contributes and what must stay stable if you’re editing an existing image.
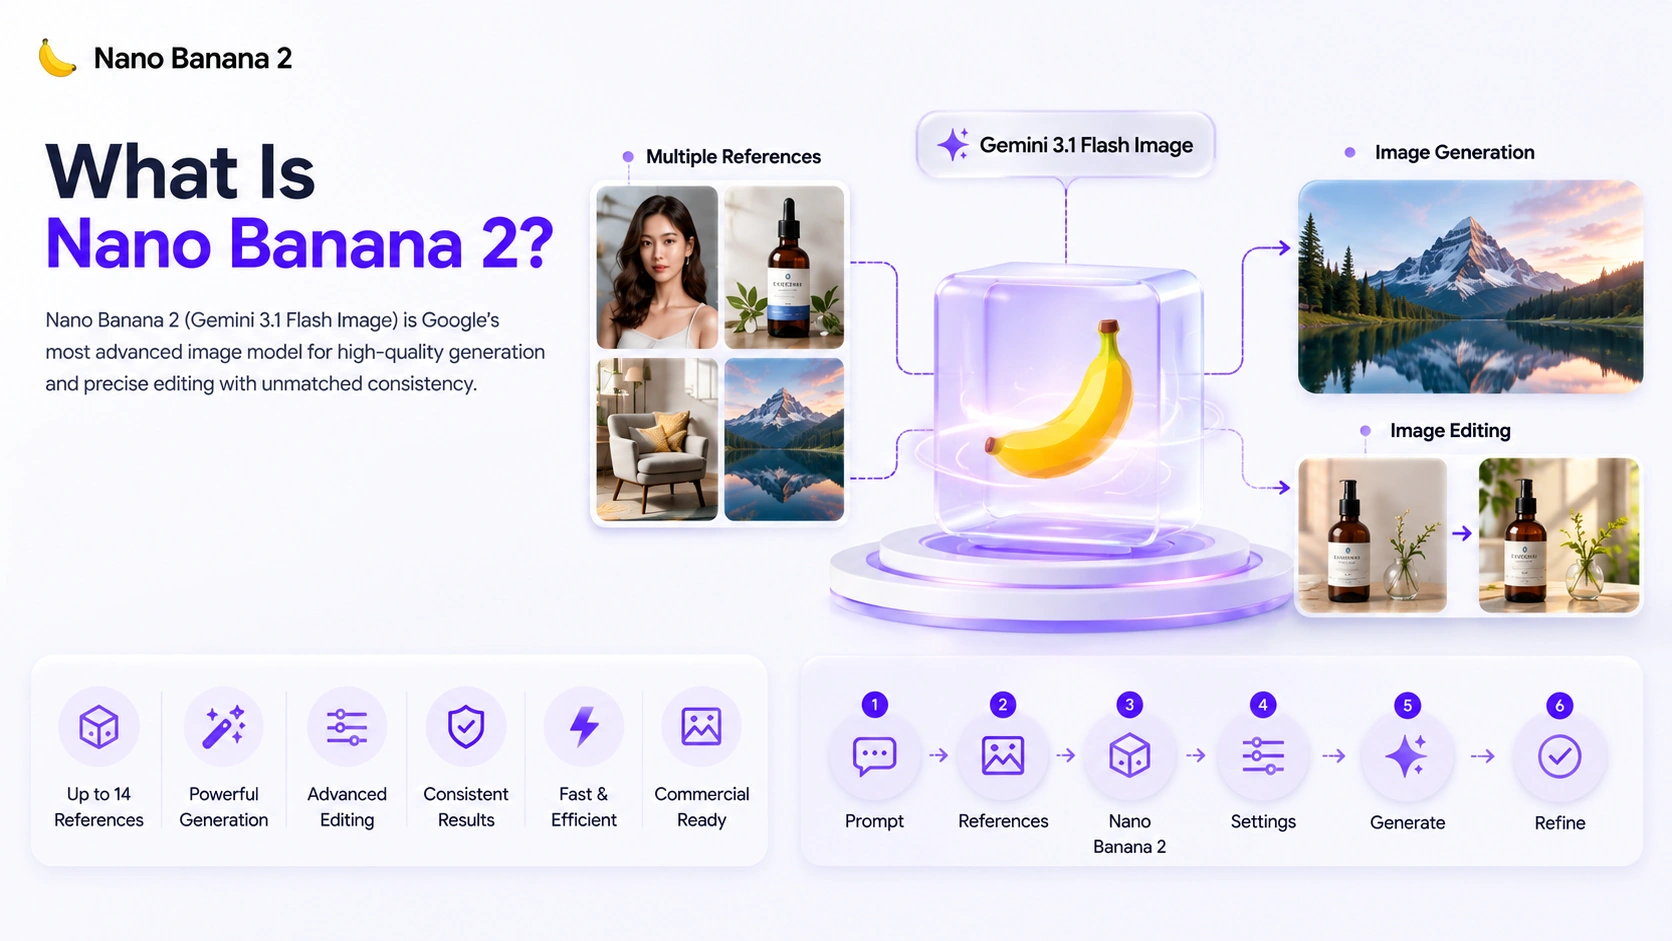
What Is Nano Banana 2?
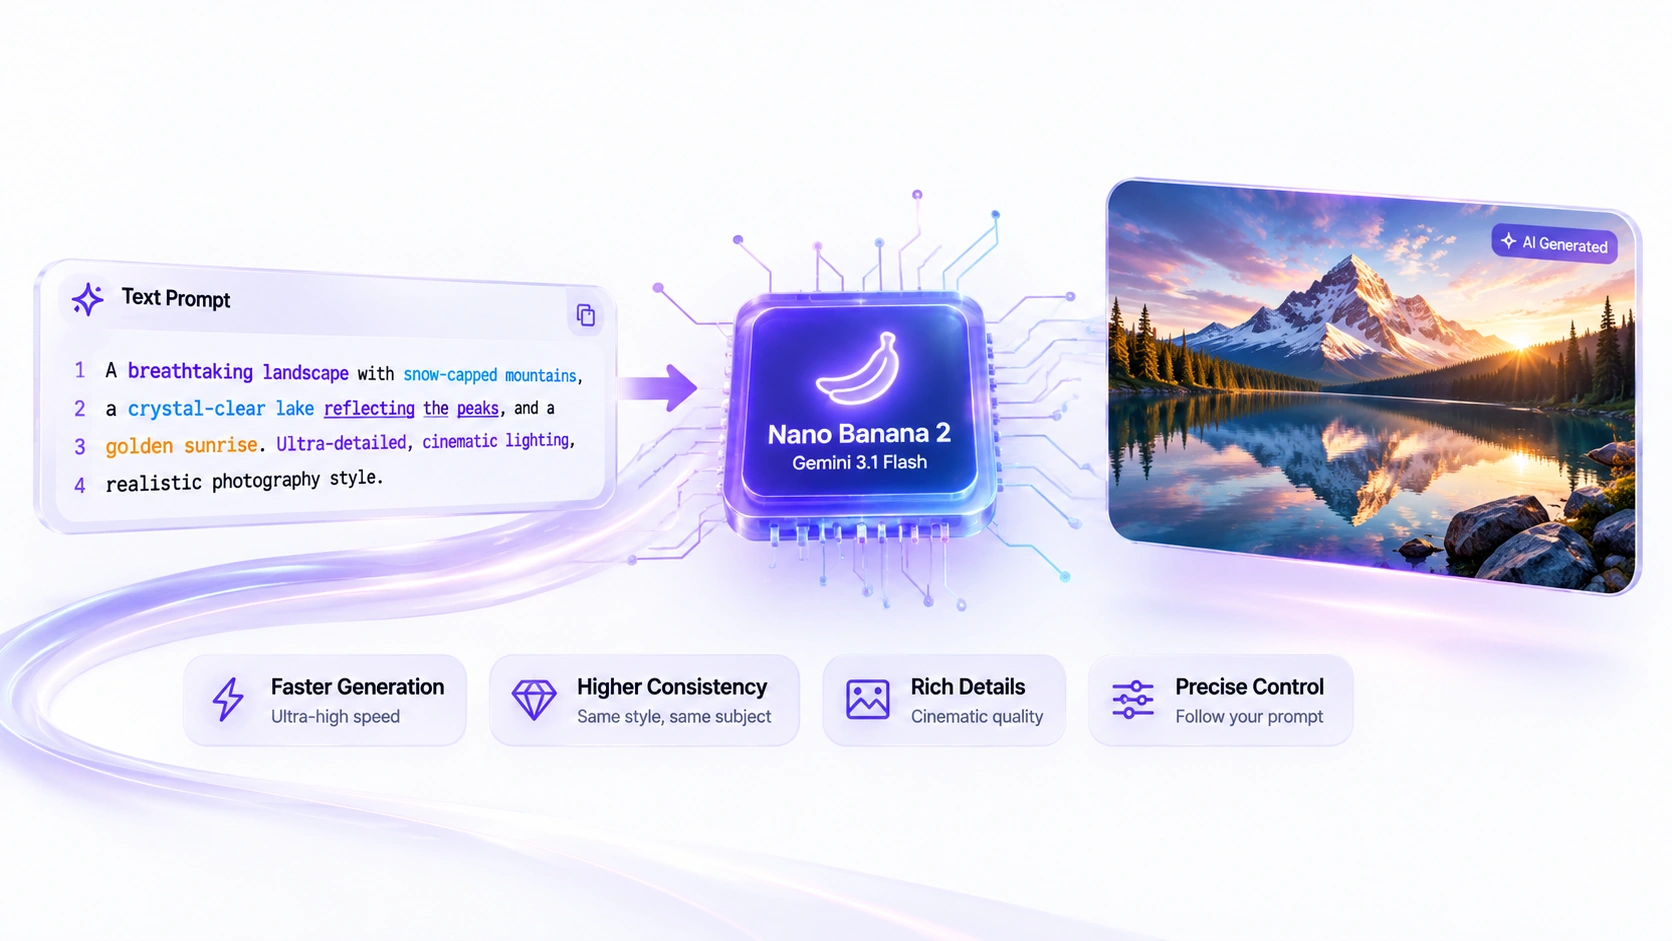
Nano Banana 2 is Google’s Gemini 3.1 Flash Image model (gemini-3.1-flash-image), built for both fresh image generation and reference-led editing from natural-language instructions.
Instead of manually building every part of an image, you describe the result — or you describe the change, if you’re starting from an existing image or reference set.
For example, instead of:
A nice product photo.
Try:
A matte-black field camera on a wet stone ledge, three-quarter view, foggy mountain valley behind it, soft overcast morning light, realistic metal and rubber materials, restrained outdoor editorial photography, wide composition with clean negative space on the left.
The second prompt gives Nano Banana 2 a clear subject, setting, lighting, and composition to work from.
Nano Banana 2 can be useful for:
Product photography
Brand and marketing visuals
Editorial and concept illustration
Reference-led variations and edits
Social media content
Layout and text-in-image drafts
Multi-reference identity or style matching
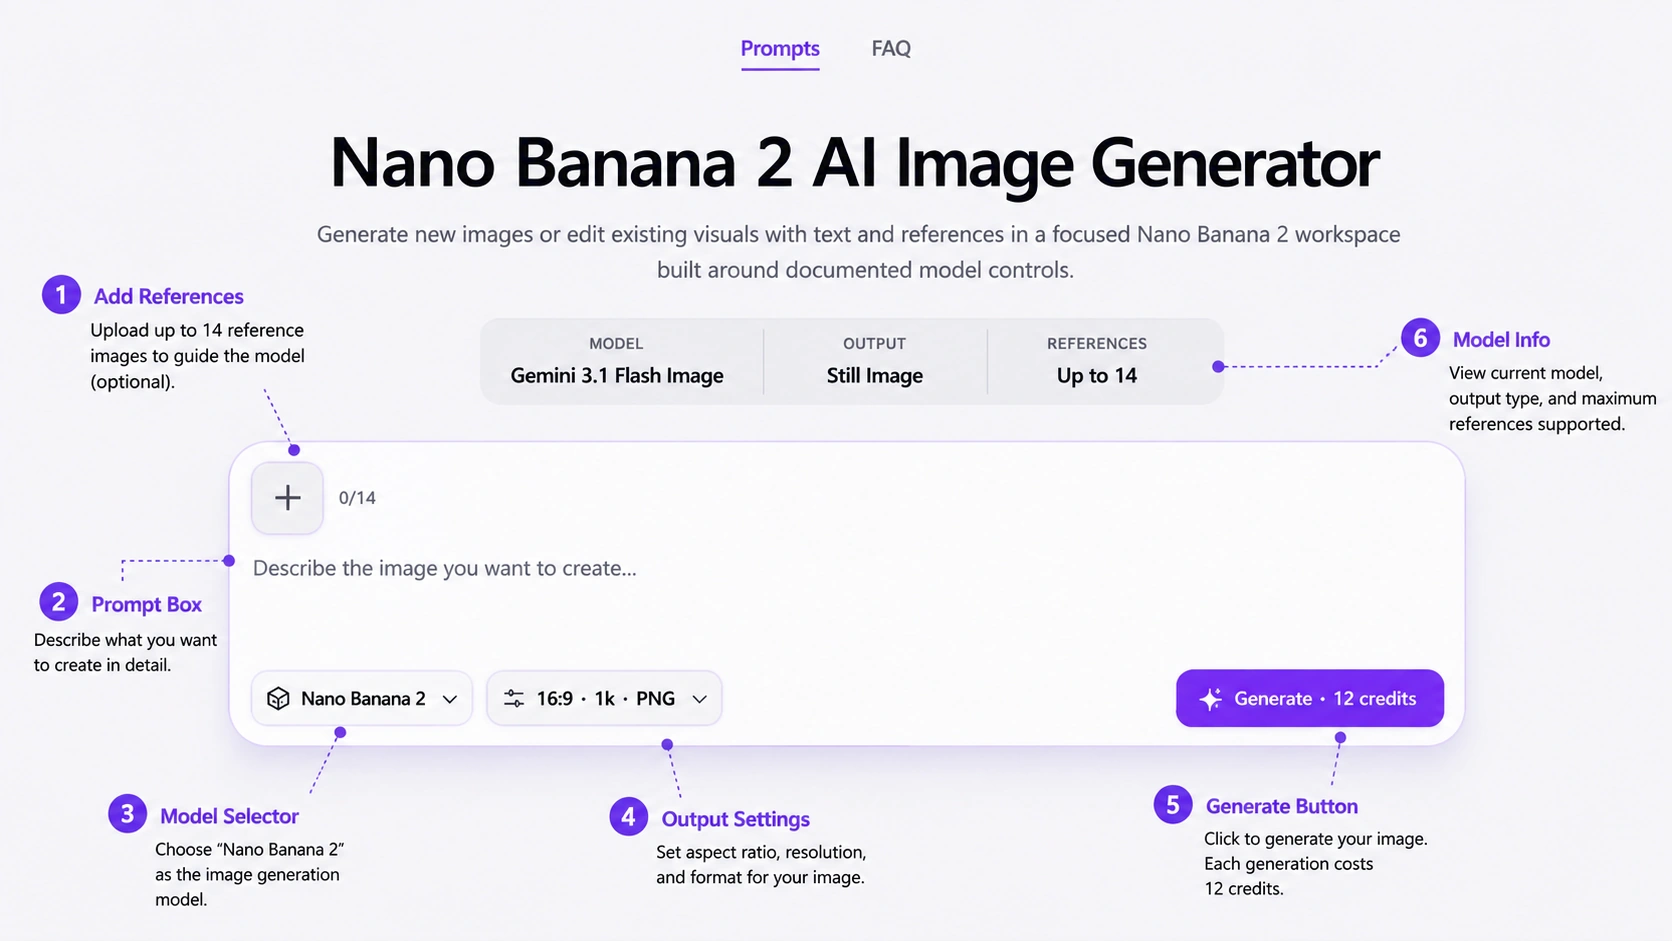
Why Use Nano Banana 2 on ZMS AI?
ZMS AI brings image and video creation into the same creative workspace. When using Nano Banana 2, you select the model, write your prompt, add references, configure the output, and generate without moving between separate tools.
The current workflow provides:
Nano Banana 2 model selection (Gemini 3.1 Flash Image)
Up to 14 reference images per task, added with a simple upload control
0.5k, 1k, 2k, and 4k output resolutions
14 aspect ratios, including extreme ratios like 1:4 and 8:1
PNG or JPEG export
Separate Web search and Image search toggles
Visible credit cost before you generate
This keeps the process approachable for a first test image and precise enough for reference-heavy production work.
How to Use Nano Banana 2 on ZMS AI Step by Step
Step 1: Open ZMS AI and Select Nano Banana 2
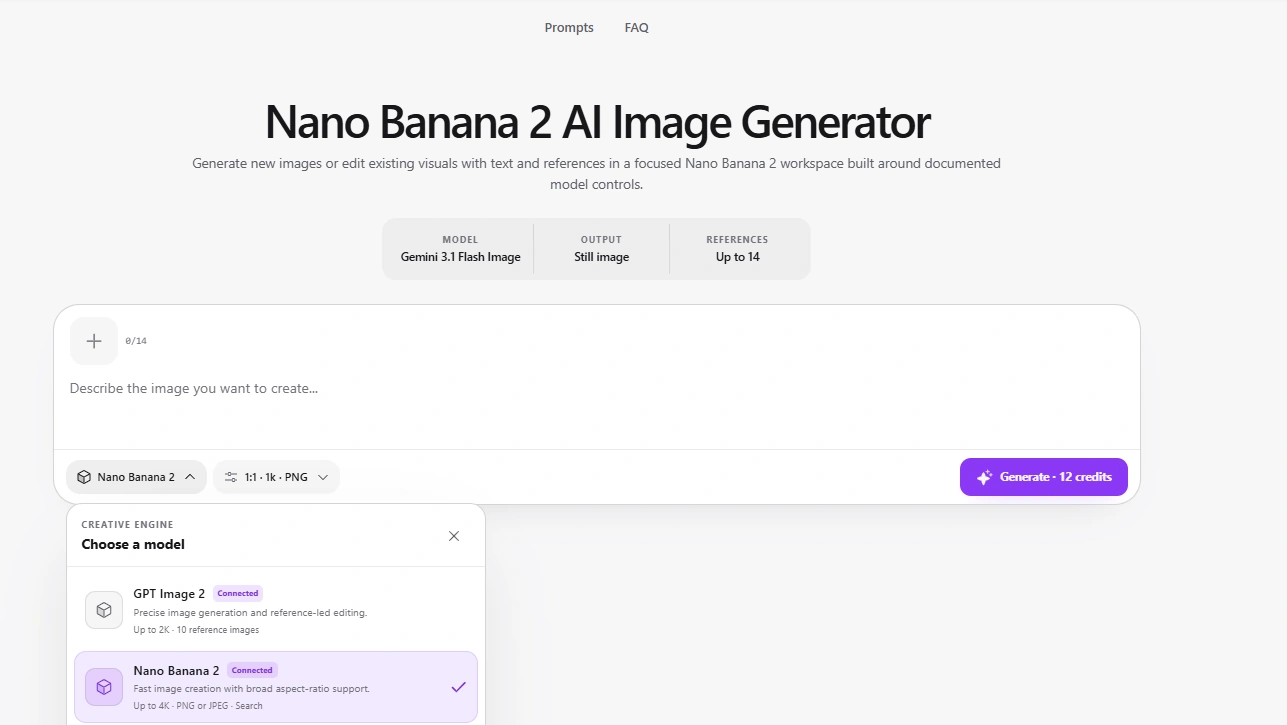
Open the ZMS AI Creative Suite, choose Image from the creation panel, then select Nano Banana 2 from the model list — or go directly to zms.com/nano-banana/nano-banana-2.
Before generating, think about where you plan to use the image. A product hero, a social post, and a panoramic banner call for different aspect ratios and compositions.
Tip: Decide your final placement first. This makes it easier to choose the right aspect ratio and resolution later, rather than cropping a finished image to fit.
Step 2: Add References if the Task Needs Them
Next to the prompt box, a small + upload button and a counter (starting at 0/14) let you attach reference images before you write anything. Whether you use zero references, one, or several changes what kind of prompt you should write:
No references — you’re generating from text alone. Describe the full scene.
One reference — often used to edit or extend an existing image. State what changes and what stays the same.
Several references — each one should answer a different question: which defines the subject, which defines the composition, which defines the color or material.
Start from text when the composition is still open. Add references when identity, product geometry, or a specific visual fact needs to stay recognizable.
Tip: Decide how many references you need before writing the prompt — a prompt written for open generation reads differently than one written to direct a set of references.
Step 3: Write Your Prompt

The prompt box — placeholder text reads “Describe the image you want to create…” — is where you describe the image in natural language. No special syntax is required.
A useful structure is:
Subject + Action or state + Environment + Composition + Lighting + Material + Style + Constraints
For example:
A botanist in a linen shirt labels seedling trays inside a Victorian glasshouse, condensation beading on the panes behind her, soft overcast light diffused through glass, palms and ferns receding into humid haze, muted green palette, shallow depth of field on the handwritten labels.
Compare that with:
A person in a greenhouse.
The first version gives Nano Banana 2 a subject, an action, an environment, and a specific visual treatment. Put the most important facts early — later phrases should refine the scene, not contradict its foundation.
Tip: Avoid stacking undirected style words like “cinematic,” “premium,” or “stunning.” Replace them with observable direction — camera angle, light direction, surface finish, and palette.
Step 4: Assign Each Reference a Job
If you’ve uploaded references, upload only the images that answer a specific question in the prompt — up to 14, but more isn’t automatically better. Before uploading, decide:
Which one defines the subject or product
Which one defines the composition or layout
Which one defines color, material, or mood
Then say so directly in the prompt: “Keep the device shape, controls, and black finish from reference one; use only the lighting mood and stone environment from reference two.” Two references giving conflicting answers to the same question will pull the result in two directions — trim references rather than add more if a result looks confused.
Tip: When you’re exploring rather than matching a specific look, use fewer references. A strong reference can narrow the result so much that variations start to feel repetitive.
Step 5: Set Resolution, Aspect Ratio, and Format
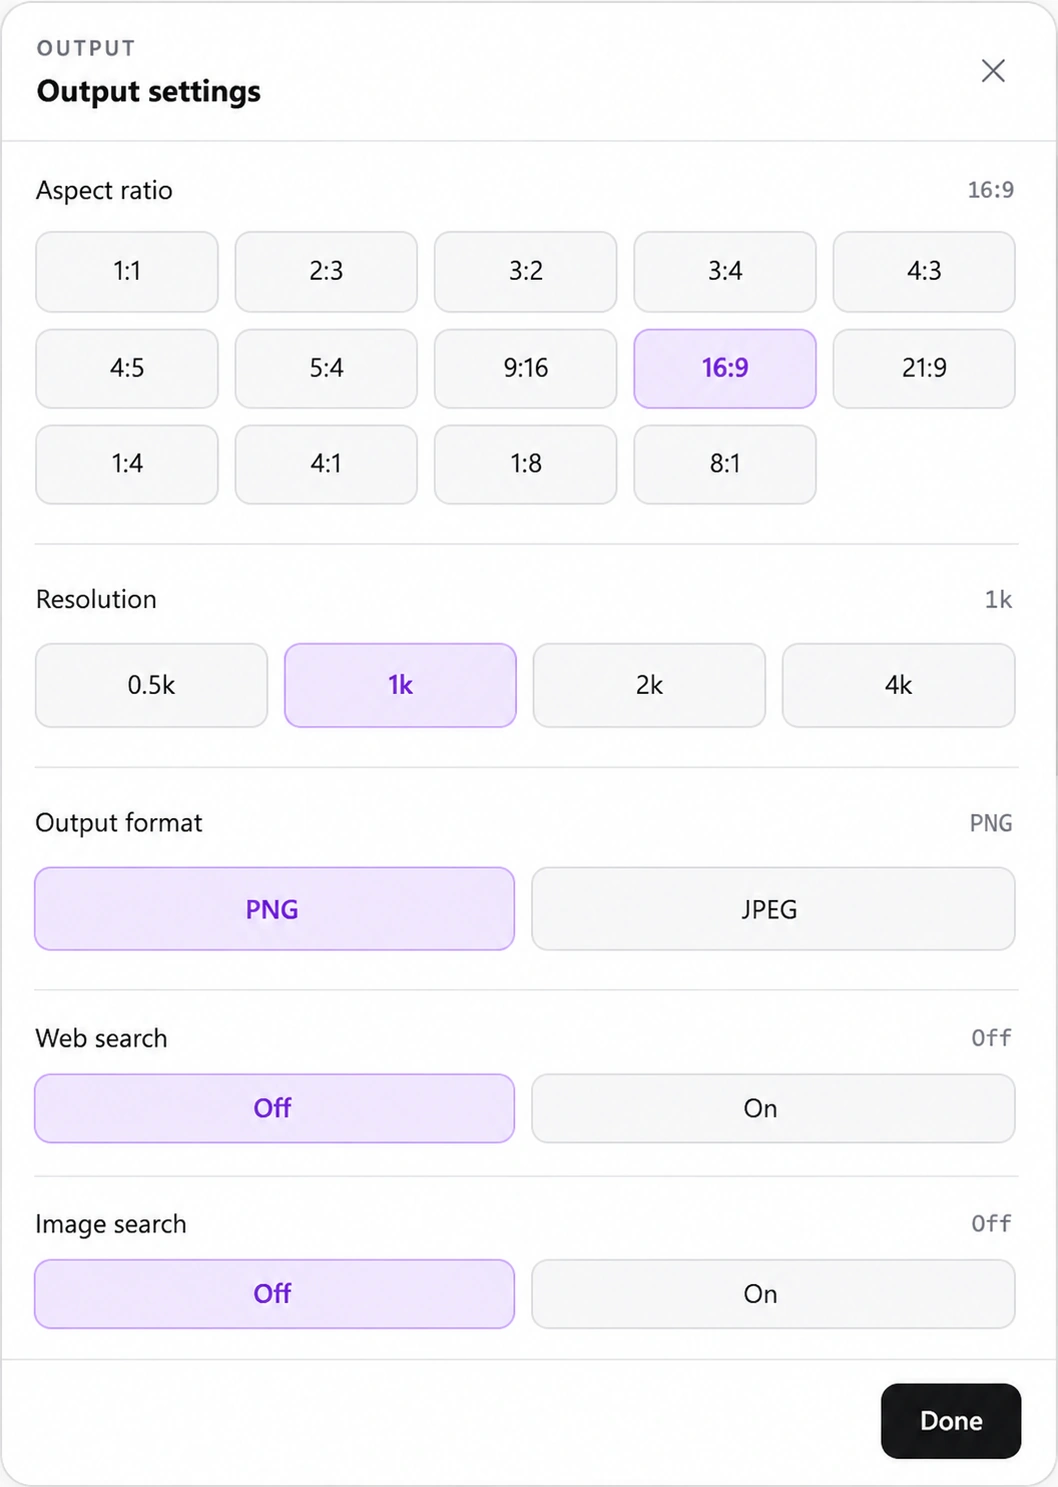
Open Output settings from the dropdown next to the model selector (it shows a summary like “1:1 · 1k · PNG”). Nano Banana 2 on ZMS AI includes:
Control | Options |
|---|---|
Aspect ratio | 1:1, 2:3, 3:2, 3:4, 4:3, 4:5, 5:4, 9:16, 16:9, 21:9, 1:4, 4:1, 1:8, 8:1 (14 total, default 1:1) |
Resolution | 0.5k, 1k, 2k, 4k (default 1k) |
Output format | PNG or JPEG (default PNG) |
Web search | Off or On (default Off) |
Image search | Off or On (default Off) |
Choose the aspect ratio based on where the image will appear, before refining composition — a 16:9 hero and a 9:16 story format need different framing decisions. The list runs from square and standard photo ratios all the way to extreme panoramic and vertical ratios like 1:4 and 8:1, which suit banner and strip-format placements other tools don’t cover.
A simple approach for resolution:
Use 0.5k–1k while testing prompts, compositions, and reference combinations.
Use 2k–4k once the composition is confirmed and you want a production-ready final image.
Web search and Image search are separate toggles, both off by default. Turn one or both on only when the brief genuinely needs current, searchable facts reflected in the image — they’re not general quality switches, and any factual detail they introduce still needs independent verification before publishing.
Click Done to close the panel — your choices collapse back into the dropdown label (e.g. “16:9 · 2k · PNG”) so you can check them before generating. The Generate button itself shows the credit cost for your current settings (for example, “Generate · 12 credits”), so you can see the cost of a higher resolution or larger reference set before committing to it.
Tip: Higher resolution cannot fix an unclear prompt or a conflicted set of references. Get the composition and reference roles right first — it also costs fewer credits to confirm that at a lower resolution.
Step 6: Generate Your Image

Once everything is ready, check your settings:
Mode: Image
Model: Nano Banana 2
Prompt: Ready
References (if used): Roles assigned
Resolution, aspect ratio, format: Selected
Credit cost: Checked
Then click Generate.
After the image appears, review it carefully. Check whether:
The subject and composition match your idea
Faces, hands, and repeated objects hold up
Product geometry and logo placement are correct, if applicable
Text — every character, at full size — is accurate
Background regions you didn’t intend to change stayed untouched
A visually convincing thumbnail can still contain a wrong letter or a drifted detail that only shows up at full resolution.
Step 7: Refine Your Result
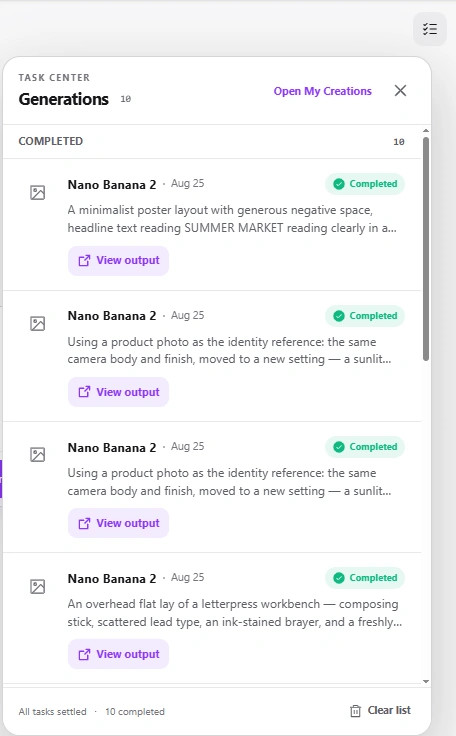
Your first generation doesn’t need to be the final one.
If the result is close, identify the specific problem before rewriting the whole prompt.
For example:
Original prompt Camera on a rock, nice lighting.
Refined prompt A matte-black field camera on a wet stone ledge, three-quarter view, foggy mountain valley behind it, soft overcast morning light, realistic metal and rubber materials, wide composition with clean negative space on the left.
The refined version adds a specific angle, environment, material treatment, and composition — the details that were missing before.
Tip: State plainly what to keep as well as what to change: “Keep the camera, composition, and morning light unchanged. Replace only the distant valley with a calm alpine lake.” A vague “make it better” gives the model no boundary between what already passed review and what still needs work.
Best Nano Banana 2 Prompt Formula
For most projects, this formula works as a starting point:
[Subject] + [Action or state] + [Environment] + [Composition] + [Lighting] + [Material] + [Style] + [Constraints]
For example:
A narrow late-night noodle counter seen from the customer side, steam rising off a bowl, the cook’s hands lifting noodles from boiling water, hand-painted menu strips on the tiled wall, warm amber bulbs against cool night blue outside the doorway, reflective steel counter, cinematic still.
Here the prompt defines:
Subject: Noodle counter and cook
Action or state: Lifting noodles, steam rising
Environment: Late-night counter, tiled wall
Lighting: Warm amber bulbs against cool night blue
Material: Reflective steel
Style: Cinematic still
You can add or remove elements depending on how much control the image needs.
Nano Banana 2 Prompt Examples
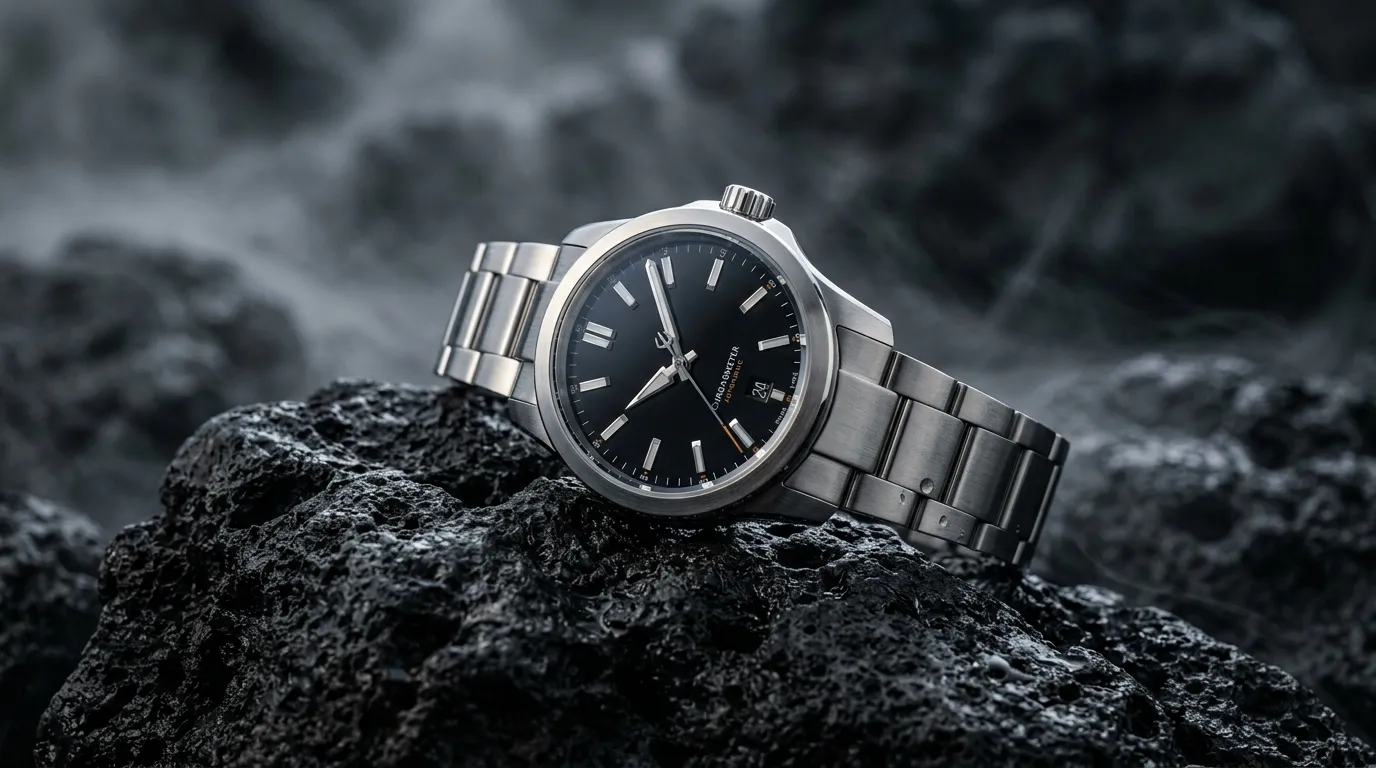
Product Photography
A premium silver wristwatch resting on dark volcanic stone, dramatic side lighting, subtle mist, macro product photography, realistic metal reflections, shallow depth of field, luxury advertising aesthetic.
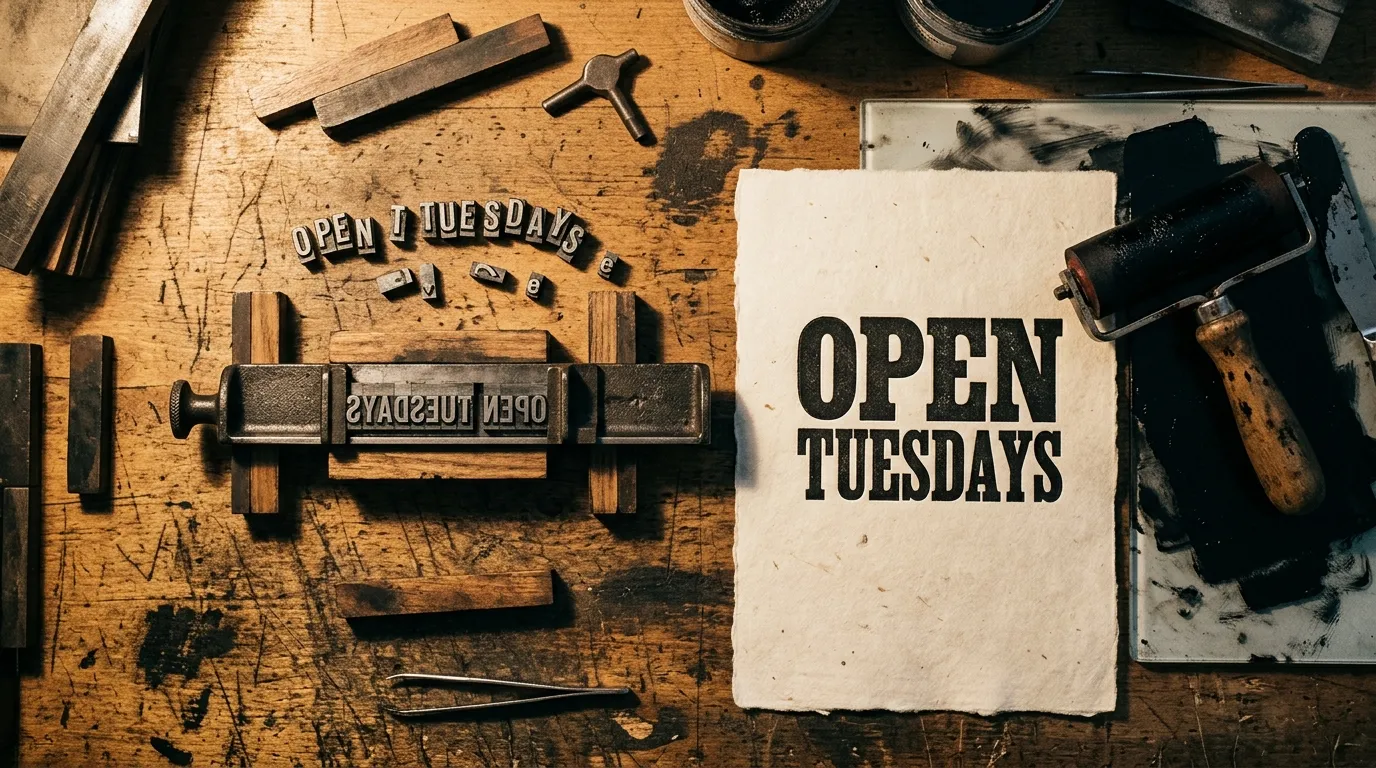
Editorial Illustration
An overhead flat lay of a letterpress workbench — composing stick, scattered lead type, an ink-stained brayer, and a freshly pulled proof reading OPEN TUESDAYS in bold slab serif — warm tungsten light raking across the wood grain, deep shadows, tactile texture, editorial product photography.
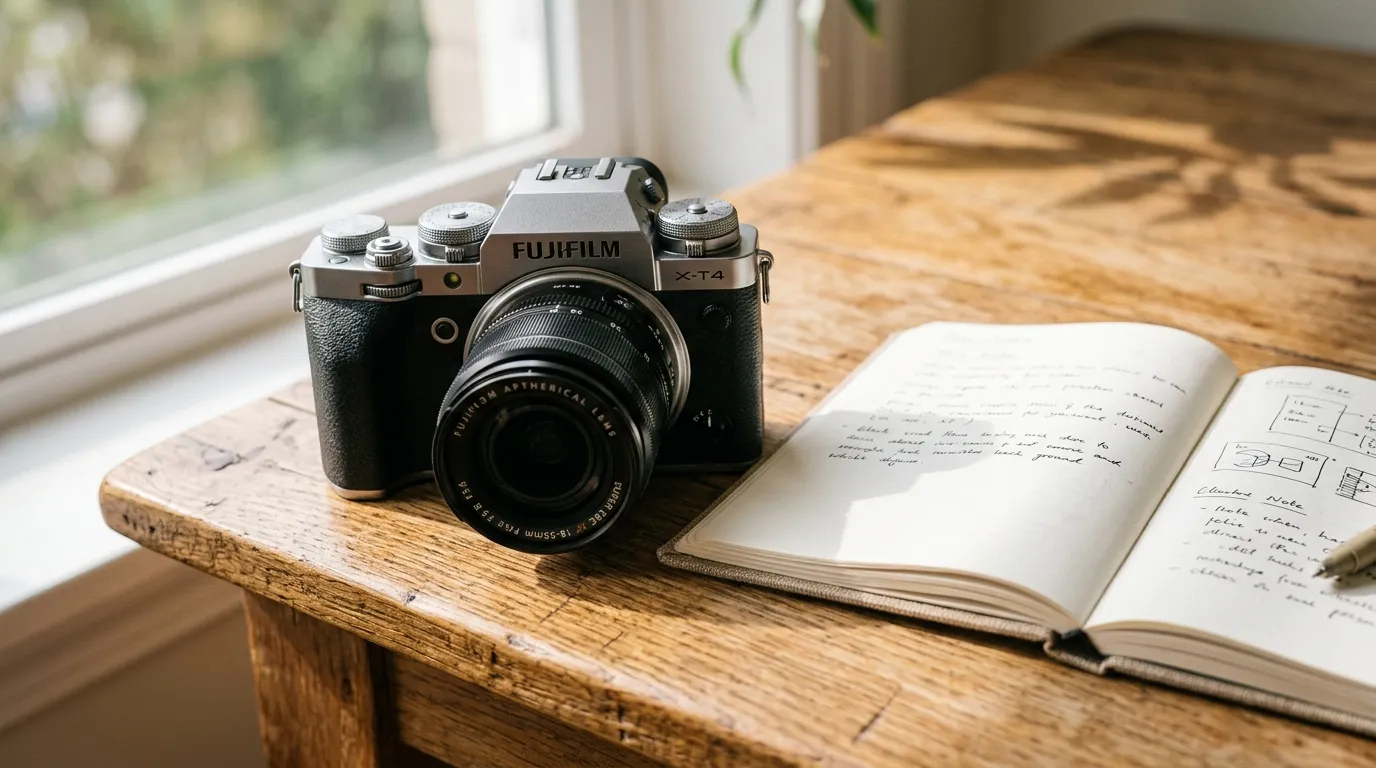
Reference-Led Variation
Using a product photo as the identity reference: the same camera body and finish, moved to a new setting — a sunlit wooden desk beside an open notebook, soft morning light, shallow depth of field, no other objects added.
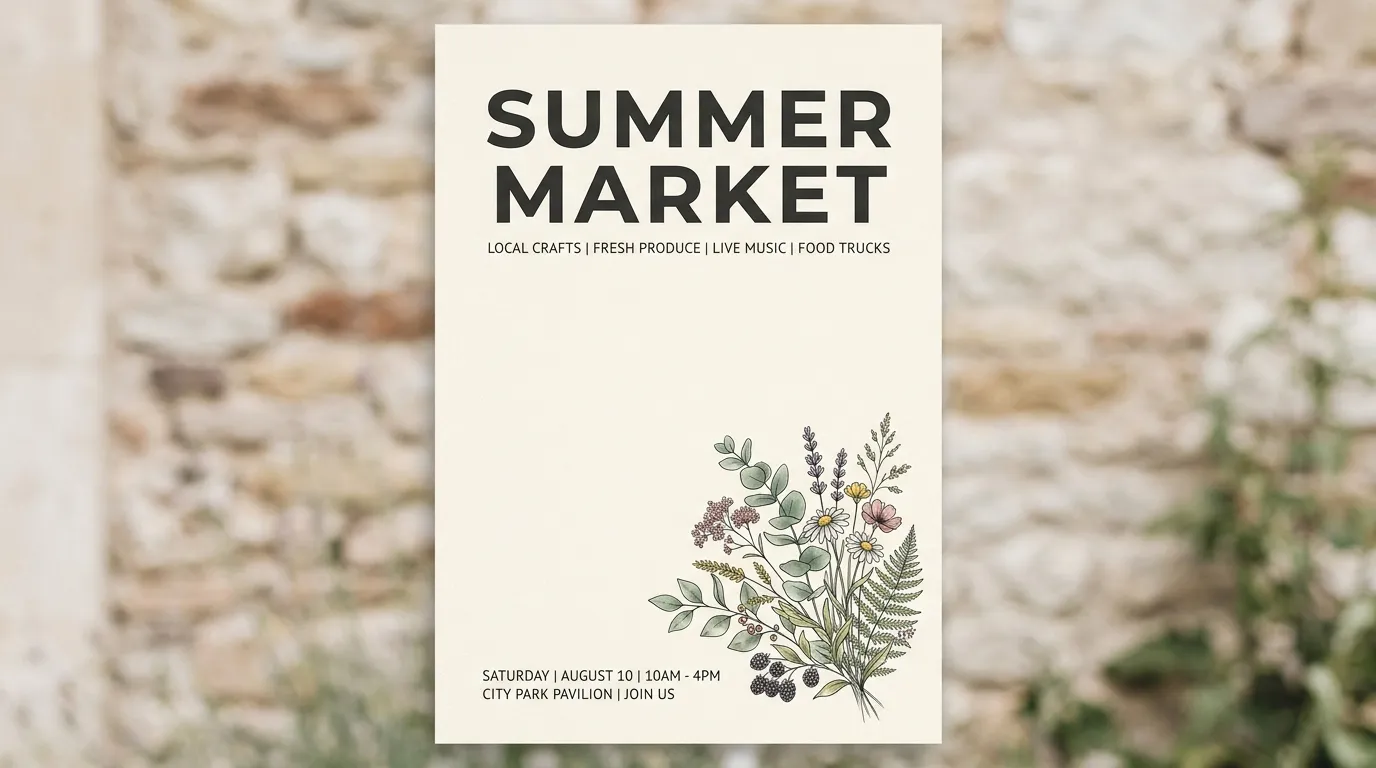
Text-in-Image Draft
A minimalist poster layout with generous negative space, headline text reading SUMMER MARKET reading clearly in a bold sans-serif at the top third, small supporting line below, warm cream background, one botanical illustration in the lower right corner.
What Can You Create with Nano Banana 2?
Nano Banana 2 on ZMS AI can support a range of image workflows.
Product and E-Commerce Visuals
Create product concepts across different environments, backgrounds, and lighting setups, or use reference-led direction to keep a specific product’s shape and finish consistent across variations.
Marketing and Brand Creatives
Generate ideas for landing pages, campaign graphics, banners, and promotional visuals — the wide aspect-ratio range, including panoramic and extreme ratios, suits banner and hero placements other tools don’t cover.
Editorial and Concept Work
Build detailed scenes with a clear subject, action, and mood — useful for concept art, illustration, and storytelling visuals that need more than a generic style prompt.
Reference-Led Edits and Variations
Use up to 14 references to hold an identity, palette, or layout stable while exploring new settings, angles, or treatments.
Text and Layout Drafts
Draft posters, social graphics, and interface mockups with legible in-image text — then verify every character at full size before treating it as final copy.
Common Nano Banana 2 Mistakes
Uploading references without assigning roles. A pile of reference images with no stated purpose gives the model conflicting signals. Name what each one contributes before generating.
Using too many references for an open-ended task. A strong reference can narrow the result so much that every variation looks the same. Use fewer references when you’re exploring rather than matching a specific look.
Treating in-image text as a formality. Small text, labels, and signage can render incorrectly even when the rest of the image looks convincing. Always review text at full size, not at thumbnail scale.
Generating at 4K before the composition is settled. Higher resolution doesn’t fix an unclear prompt or a conflicted reference set — confirm the composition first, then generate the final pass at higher resolution.
Rewriting the whole prompt after one bad result. If only the lighting or one background element is off, change that one part and re-test, rather than starting from a blank prompt.
Nano Banana 2 FAQ
How do I use Nano Banana 2 on ZMS AI? Open ZMS AI, select Image mode, choose Nano Banana 2, write your prompt and add references if needed, set resolution, aspect ratio, and format, then click Generate.
Can Nano Banana 2 edit an existing image? Yes. Add a reference image, describe the specific change, and state what should stay unchanged. Review every revised region before publishing.
How many reference images can I use? Up to 14. Assign each one a clear role — more references with vague purposes tend to produce less consistent results, not more detailed ones.
Which resolutions and aspect ratios are supported? 0.5k, 1k, 2k, and 4k resolution, with 14 aspect ratios including 1:1, standard photo ratios like 3:2 and 4:5, widescreen ratios like 16:9 and 21:9, and extreme ratios like 1:4 and 8:1.
What’s the best Nano Banana 2 prompt format? A practical starting formula is: Subject + Action or state + Environment + Composition + Lighting + Material + Style + Constraints
Do Nano Banana 2 images include a watermark? Google states that Nano Banana images include SynthID, an invisible digital watermark — not a visible corner logo. Don’t describe these outputs as watermark-free.
How can I improve my Nano Banana 2 results? Assign a clear role to every reference, be specific about lighting and material rather than stacking style adjectives, and change one variable at a time when refining a result that’s already close.
Final Thoughts
Learning how to use Nano Banana 2 is mainly about being specific — about the scene, and about what each reference is there to contribute.
On ZMS AI, the workflow is straightforward:
Image → Nano Banana 2 → Creation mode → Prompt (+ references) → Output settings → Generate → Refine
Start with a clear subject and setting, describe the lighting, material, and style, assign roles to any references you add, then choose the resolution and format that fit your final use.
You can begin with a lower resolution while testing prompts and reference combinations, and move to 2K or 4K once the composition is confirmed.
Most importantly, treat the first generation as a starting point. Review it carefully, refine the specific thing that didn’t work, and iterate until the image matches your intended direction.
Ready to create? Try Nano Banana 2 on ZMS AI and turn your next idea into an AI-generated image.